Installation of the Autodesk BIM Plugin for KanBo
Prerequisites
Please make sure you have prepared a service account within your Autodesk environment that has write access to all Projects in Autodesk BIM 360 that are allowed to be synced with KanBo (bidirectionally). It is important that you do not use your own personal Autodesk Account for that otherwise all changes in Autodesk BIM 360 resulting from KanBo changes will be registered in Autodesk BIM 360 as your actions.
Creating and adding the Autodesk Forge App
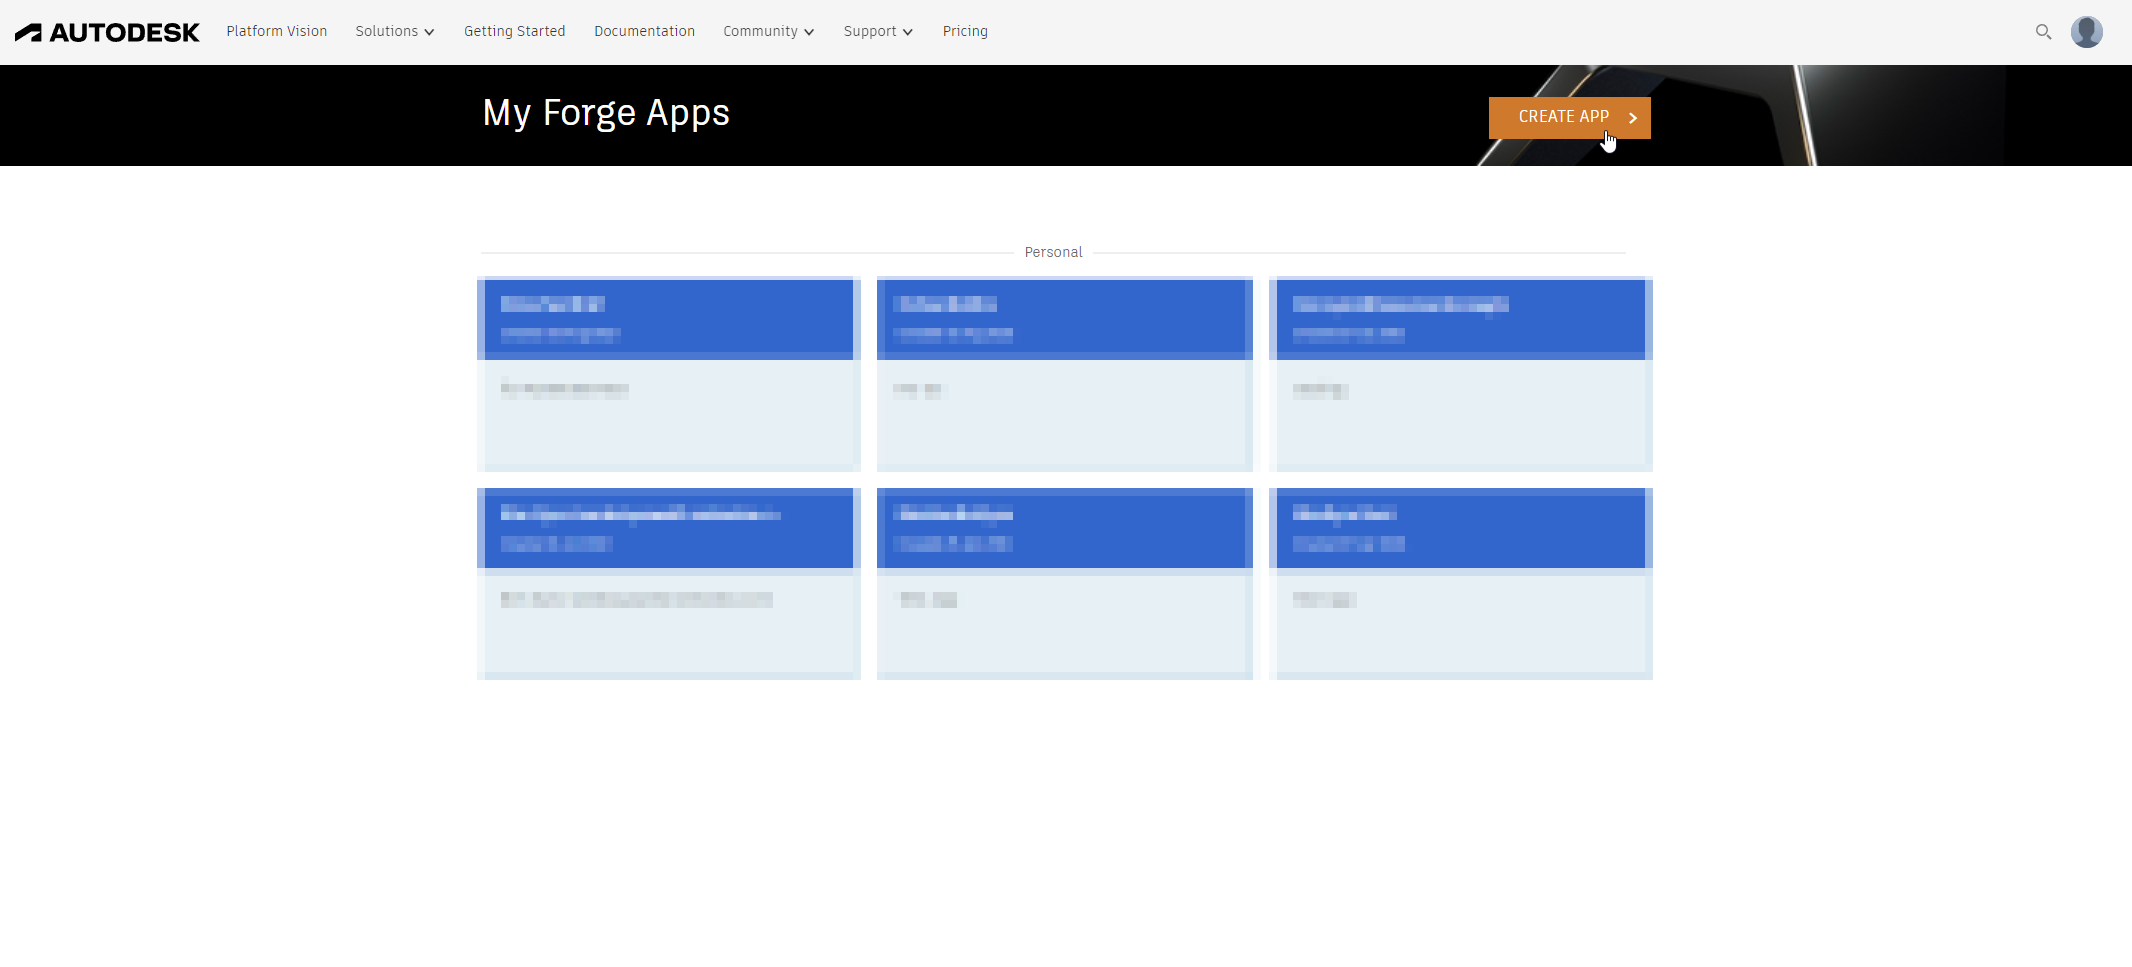
1. Go to your Autodesk Forge Apps, login with an account that has the permission to create apps at Autodesk Forge
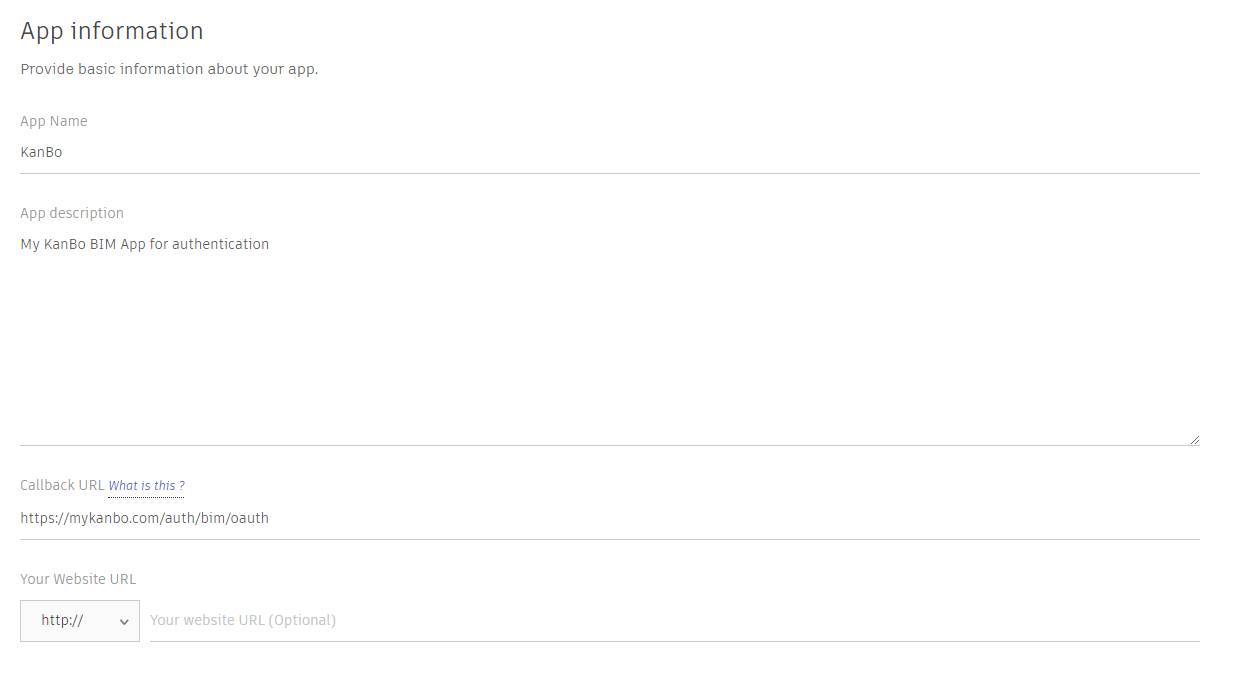
2. Put in the name and the description for Your App. For the callback URL, put in Your KanBo URL followed by "/auth/bim/oauth". Your Website URL can be left empty.
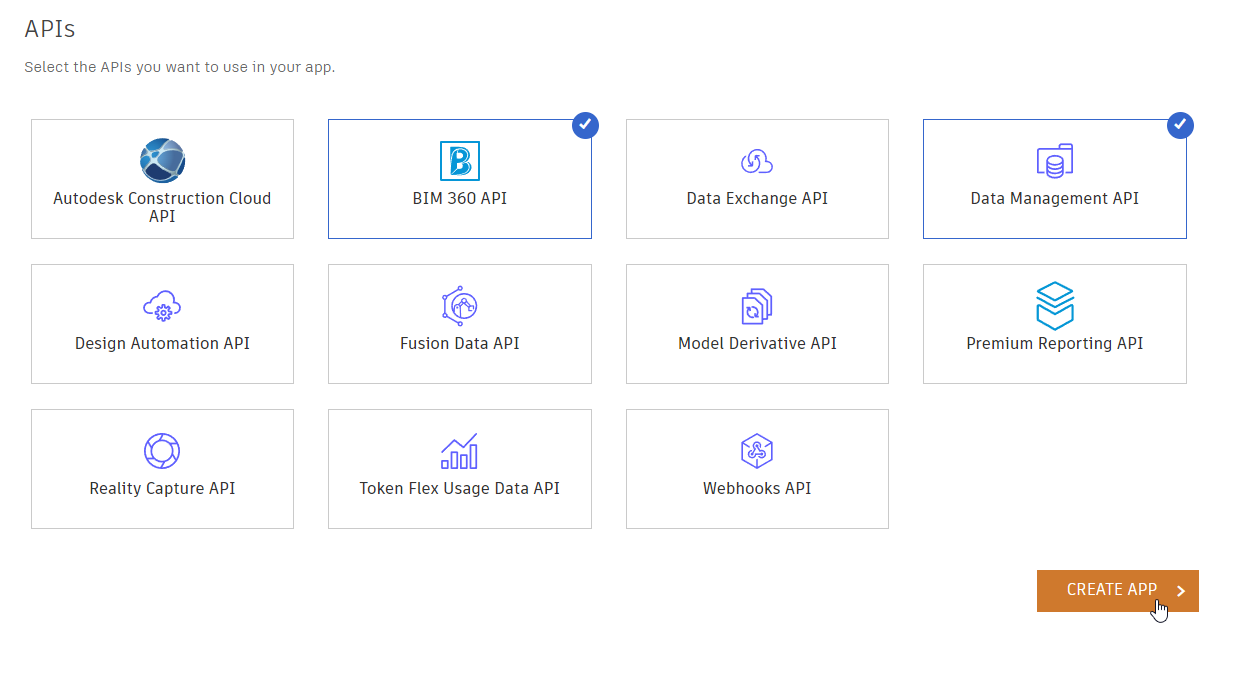
Choose the BIM 360 API and the Data Management API, then click on "Create App"
3. You will now be presented with this screen:
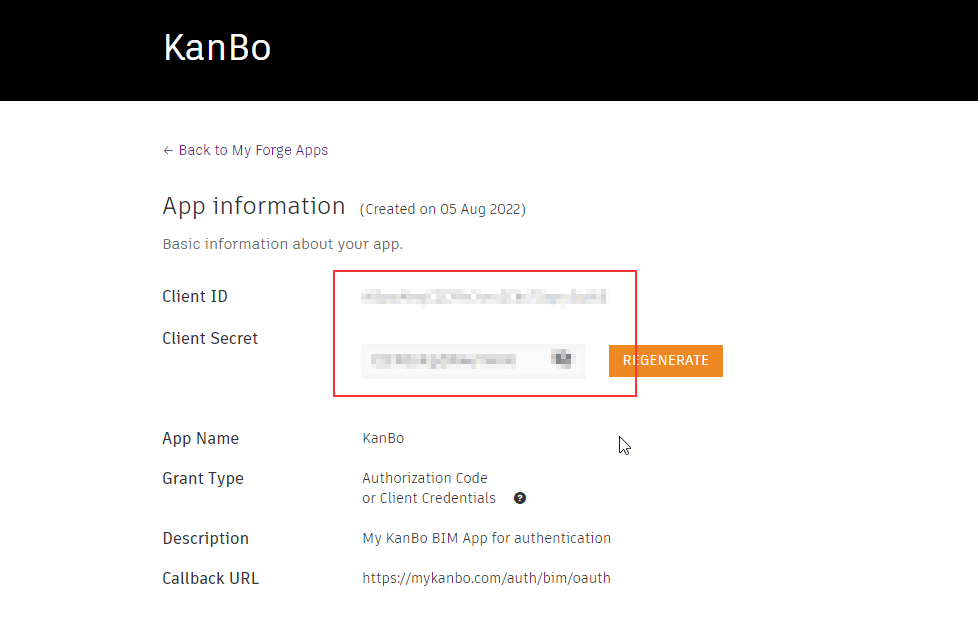
Copy the Client ID and the Client Secret and save it somewhere.
4. Go to Your BIM 360 administration center, then go to setting > applications
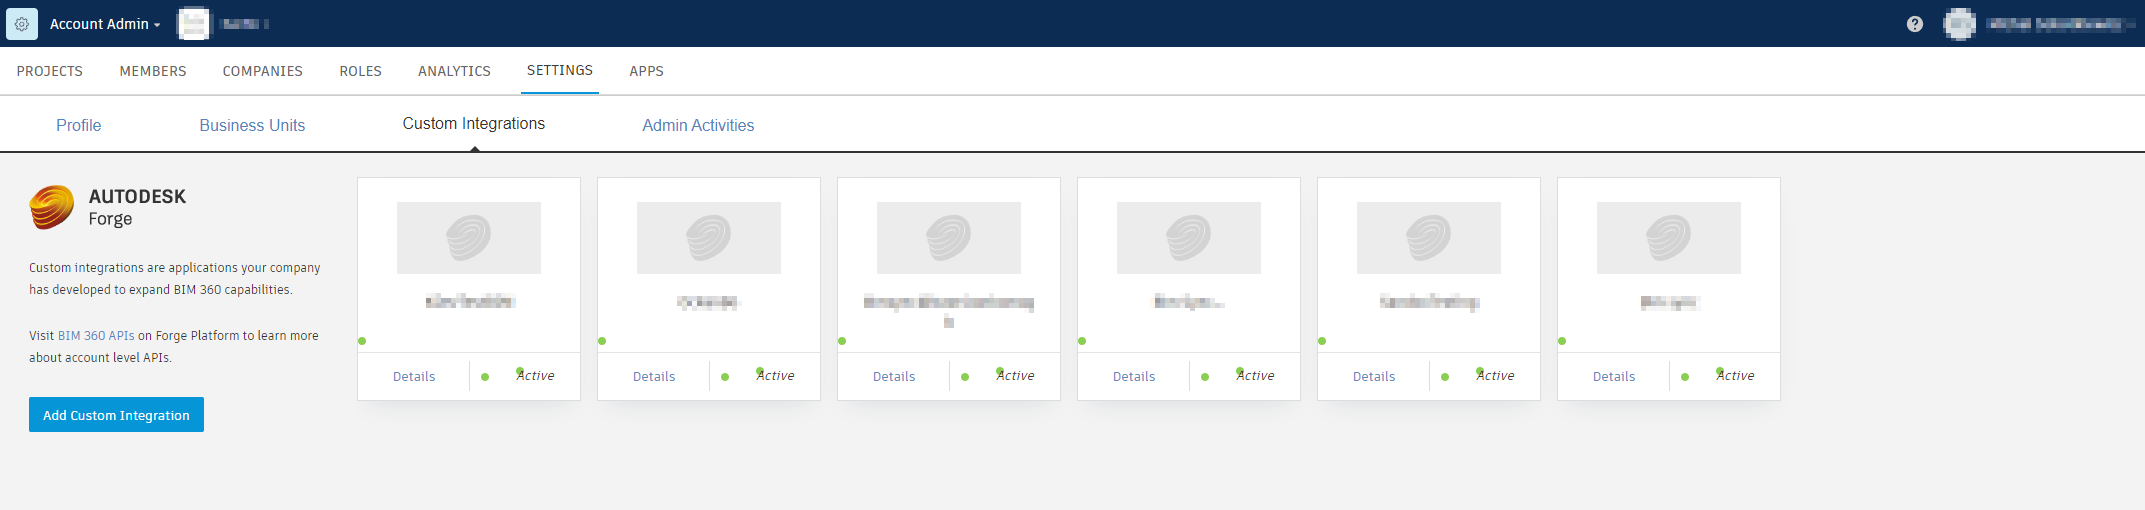
Click on "Add custom integration"
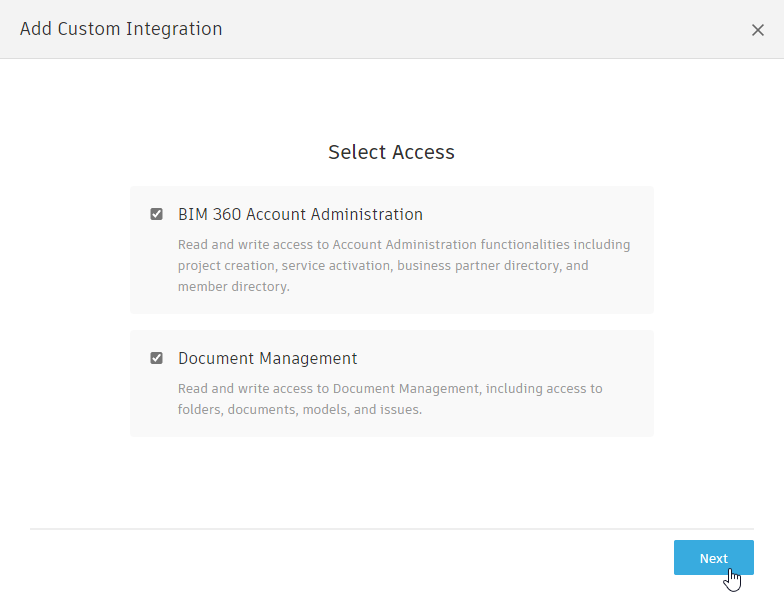
5. In the next window, leave both options selected and click on next
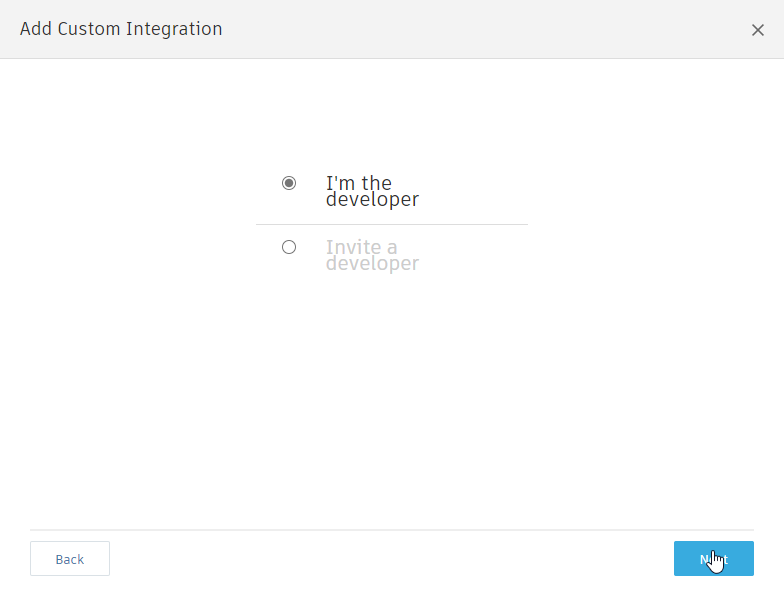
Then, choose "I'm the developer" and click next
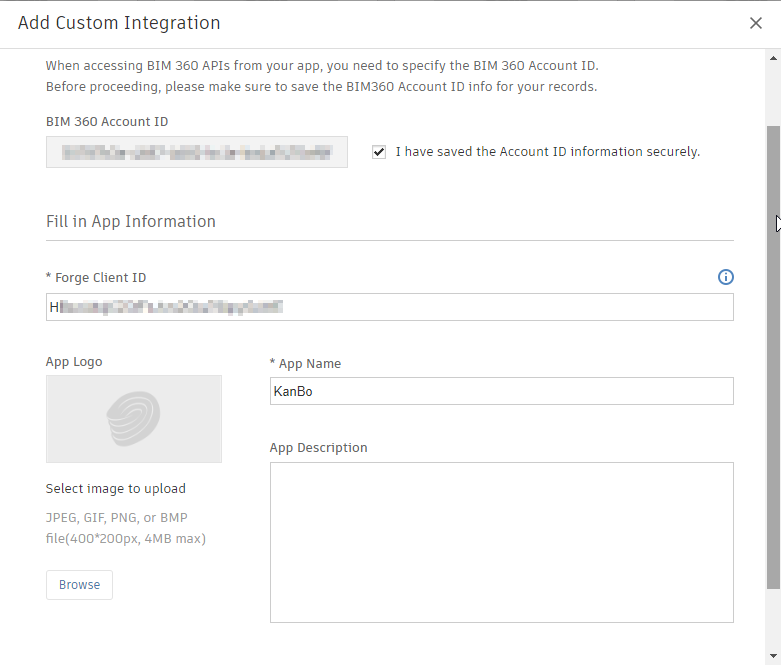
After that, check the "I have saved the Account ID information securely" box, paste in the Client ID You saved before, type in the App name, then scroll down and click "save".
- Open Your KanBo's appsettings.json. We will have to add two lines here:
- Add
{ "Path": "KanBo.BimPlugin.dll" };
into the "assemblies" array. It should look like this:
"assemblies": [
      { "Path": "KanBo.BimPlugin.dll" }
      ]
- Add
{
        "type": "job.bim-sync",
        "name": "bim-sync",
        "repeat": "1h",
        "client-id": "CLIENTID",
        "client-secret": "CLIENTSECRET"
      },
anywhere in the "plugins" section of Your appsettings.json. Replace the "CLIENTID" and "CLIENTSECRET" with the Client ID and Client Secret You have saved before. We recommend the sync to be started 1 time every hour (1h) but if you need the sync to be more frequent, you could go for 15 minutes (15m).
- Add
- After those lines are added, save the appsettings.json. Please remember that saving the config will not result in KanBo being restarted. If You want to enable the BIM plugin, You have to restart Your KanBo app manually. seconds.
- For this step it is VERY IMPORTANT, that you will use an Autodesk Service Account that has write access to those Autodesk BIM projects that could be selected by your teams to be synchronized with KanBo.
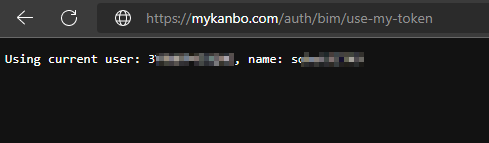
- Go to Your KanBo, and add /auth/bim/use-my-token to the URL of your KanBo (for example: https://mykanbo.com/auth/bim/use-my-token). After you log
in to KanBo you should be presented with this message (you will also be forced by Autodesk BIM 360 to enter the
credentials of your service account):
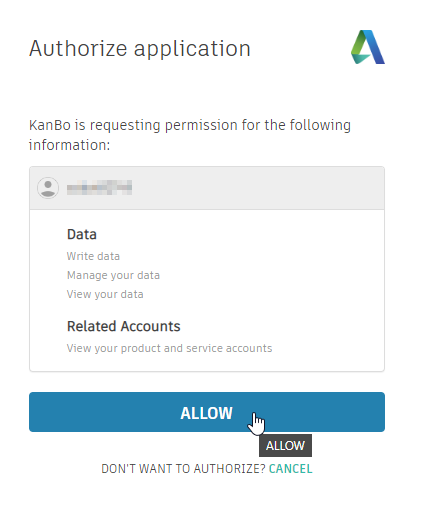
- Click on "Allow" - By allowing you allow the KanBo Sync to update Issues in Autodesk BIM 360 if there are changes in the corresponding KanBo cards.
- If your configuration is correct, You should be presented with this message and Your KanBo will now be integrated with Your Autodesk BIM 360 environment!
DO NOT USE YOUR PERSONAL AUTODESK ACCOUNT HERE!
Please start an Incognito (Chrome) or InPrivate (Edge) Window/Tab for this step to ensure that you are longing in with the right credentials to Autodesk BIM 360.