
-
Learn the Basics
-
- Creating Cards
- Changing Card Statuses
- Following Cards
- Scheduling Cards
- Renaming Cards
- Duplicating Cards
- Quick Actions
- Mass Actions
- Copy & Paste
- Creating Card Statuses
- Changing the Default Card Status
- Changing the Order of Card Statuses
- Deleting Card Statuses
- Moving Cards between Spaces
- Archiving Cards
- Unarchiving Cards
- Deleting Cards
- Creating Card Blockers
- Managing Card Blockers
- Adding Cards to My Space
- Hinzufügen von Karten zu "MySpace"
- Removing Cards from MySpace
- Entfernen von Karten aus "MySpace"
- Adding Mirror Cards
- Removing Mirror Cards
-
- Documents in KanBo
- Card Documents
- Uploading or Creating Documents in Cards
- Attaching and Detaching Documents in Cards
- Space Documents
- Document References
- Document Sources
- Downloading Documents
- Editing Documents
- Editing Documents in Browser
- Editing Documents in Office Applications
- Renaming Documents
- Deleting Documents
-
Visualize Work
-
- Space Views
- Creating Space Views
- Personal and Shared Space Views
- Card Grouping
- Filtering Cards
- Display Settings
- Work Progress Calculation
- Grouping Description
- Card Grouping Settings
- Changing the Order of Groupings
- Changing the Order of Space Views
- Deleting Space Views
- Following Card Statuses and Custom Fields
-
-
Collaborate
-
Level Up Your Work
-
Work Securely
-
Integrations
-
- Advanced KanBo Actions in Power Automate
- Creating KanBo Space Attached to Subfolder Created by Power Automate
- Creating Document Folders in Document Libraries Created by KanBo with Power Automate
- Exporting Space Views to Excel
- KanBo and Azure Logic Apps Integration
- Power Automate Integration: Triggers and Actions
- Seamless Import from Microsoft Planner to KanBo
- Synchronizing KanBo with Outlook Calendar
- Using KanBo Outlook App
-
Uploading or Creating Documents in Cards
This post is also available in: Deutsch
There are three ways of adding documents to cards. Open the KanBo and enter the space to upload or create documents in cards.
1. Upload documents using drag&drop
There are several methods to add documents to a card. You can simply drag and drop a document right to a card. It works both inside and outside a card, at the space view.
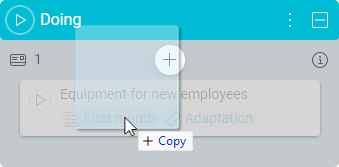
2. Add documents by pasting to the card
Try to add a new file by copying it and pressing CTRL+V on a card. It can be a screenshot as well as a file copied from your hard drive.
After entering a card, remember to click somewhere to activate this feature. It can be a grey card area or any other card section. Now you can press CTRL+V, and pasting the document will work.
There are 3 types of clipboard content that are supported by KanBo:
- Document – copy a document (one file) at File Explorer on your device and paste it onto a card
- Screenshot – take a screenshot and paste it onto a card
- Text – copy a text and paste it into the text field (as before)
Pasted files and images will be uploaded to a card in the same way as drag&drop uploading.
3. Add or create documents with the card elements menu
After entering a card more options are available.
- Click + Add element button to open the card elements menu.
- The last three positions are related to documents.
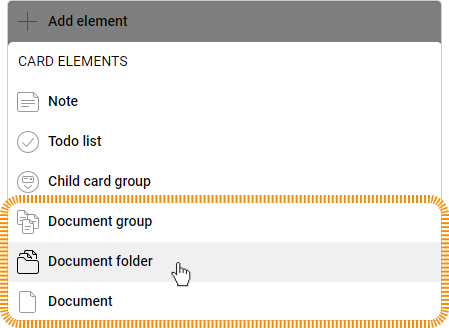
Document group contains files added to a card. It allows you to categorize your documents by any condition you may need and exist only in the card as a group. Another thing is a document folder which represents a real existing folder with documents. Any change in its content will affect the source folder.
- Choose Document to add a file.
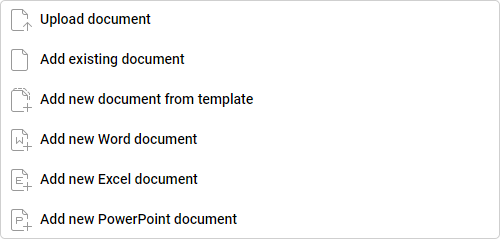
- Select whether you would like to:
- upload it from your PC
- add existing documents from space documents
- create a new one, blank documents of selected type:
- Word
- Excel
- PowerPoint
- create a new document with a document template.
4. Adding images
The same rules apply to pictures. Additionally, when you add an image to your card, its thumbnail will be shown in a card activity stream.
Was this article helpful?
Please, contact us if you have any additional questions.