
-
Learn the Basics
-
- Cards
- Card Icons
- Card Details
- Card Statuses
- Card Users
- Card Activity Stream
- Card Status Roles
- Dates in Cards
- Reminder
- Responsible Person
- Card Blockers
- Global Card Blockers
- Card Issues
- Adding Cards to My Space
- Hinzufügen von Karten zu "MySpace"
- Removing Cards from My Space
- Entfernen von Karten aus "MySpace"
-
- Creating Cards
- Changing Card Statuses
- Following Cards
- Scheduling Cards
- Renaming Cards
- Duplicating Cards
- Quick Actions
- Mass Actions
- Copy & Paste
- Creating Card Statuses
- Changing the Default Card Status
- Changing the Order of Card Statuses
- Deleting Card Statuses
- Moving Cards between Spaces
- Archiving Cards
- Unarchiving Cards
- Deleting Cards
- Creating Card Blockers
- Managing Card Blockers
-
- Documents in KanBo
- Card Documents
- Uploading or Creating Documents in Cards
- Attaching and Detaching Documents in Cards
- Space Documents
- Document References
- Document Sources
- Downloading Documents
- Editing Documents
- Editing Documents in Browser
- Editing Documents in Office Applications
- Renaming Documents
- Deleting Documents
-
Visualize Work
-
- Space Views
- Creating Space Views
- Personal and Shared Space Views
- Card Grouping
- Filtering Cards
- Display Settings
- Work Progress Calculation
- Grouping Description
- Card Grouping Settings
- Changing the Order of Groupings
- Changing the Order of Space Views
- Deleting Space Views
- Following Card Statuses and Custom Fields
-
-
Collaborate
-
Level Up Your Work
-
Work Securely
-
Integrations
-
- Advanced KanBo Actions in Power Automate
- Creating KanBo Space Attached to Subfolder Created by Power Automate
- Creating Document Folders in Document Libraries Created by KanBo with Power Automate
- Exporting Space Views to Excel
- KanBo and Azure Logic Apps Integration
- Power Automate Integration: Triggers and Actions
- Seamless Import from Microsoft Planner to KanBo
- Synchronizing KanBo with Outlook Calendar
- Using KanBo Outlook App
-
Scheduling Cards
This post is also available in: Deutsch
Adding dates to your cards allows you to place your tasks in time. Take full advantage of your cards. Set start and due dates for tasks and learn how to show them with the space views. Use personal reminders that only you can see. With these features, you can control your workload.
Adding dates to cards
- Open the space.
- Enter the card.
- Click + Add date on a Dates field in the card details section on the left side of the card.
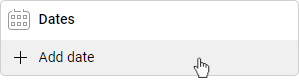
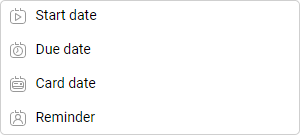
- Select which date you need to schedule.
Read about dates in cards if you are not sure which option is best for you.
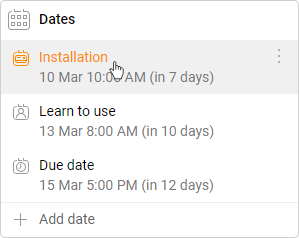
- Choose the specific date and time from the mini calendar.
Note that you can set the due date for a card using the timeline in Kanban view and drag&drop gestures.
Dates are displayed as dots on the timeline in the Kanban view. You can click on a dot to see more details.
Edit a date
- Open a space.
- Enter a card.
- Click on the date.
- Choose the new date using the calendar.
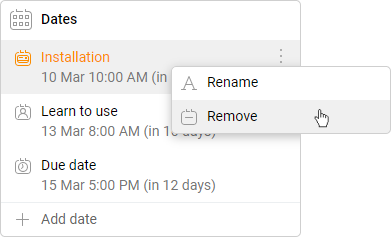
Delete a date
- Open a space.
- Enter a card.
- Hover over the card date.
- Click on the three-dots menu button.
- Select
 Remove.
Use Quick Actions to set a start or due date faster. You can change and remove them without entering the card.
FAQ
Can I visualize card with dates in a form of calendar?
Yes, use Calendar view for the classic way of presenting time or Gantt Chart view to see more time dependencies between cards. Try also our new Timeline view if you need to focus on organizing the order of tasks.
Can I turn off the notification sound?
You can turn the sound on or off by toggling the sound option in the notification settings.
Can I get email notifications from KanBo?
Yes, you can enable email messages about unread notifications in KanBo. Please note that an email message will only come if the notifications have not been read in KanBo. If you are active in KanBo and read notifications on a regular basis, you will not receive an e-mail about them.
What are available types of dates in cards?
You can add four types of dates to your card:
 Start Date – allows you to indicate a date to start your task
 Due Date – stands for the final term of completing a card
 Card Date – it might be very handy to appoint milestones in your project or any events which appear through completing work in a card
 Reminder – it is a date visible only to the user who creates it.
Was this article helpful?
Please, contact us if you have any additional questions.