
-
Learn the Basics
-
- Cards
- Card Icons
- Card Details
- Card Statuses
- Card Users
- Card Activity Stream
- Card Status Roles
- Dates in Cards
- Reminder
- Responsible Person
- Card Blockers
- Global Card Blockers
- Card Issues
- Adding Cards to My Space
- Hinzufügen von Karten zu "MySpace"
- Removing Cards from My Space
- Entfernen von Karten aus "MySpace"
-
- Creating Cards
- Changing Card Statuses
- Following Cards
- Scheduling Cards
- Renaming Cards
- Duplicating Cards
- Quick Actions
- Mass Actions
- Copy & Paste
- Creating Card Statuses
- Changing the Default Card Status
- Changing the Order of Card Statuses
- Deleting Card Statuses
- Moving Cards between Spaces
- Archiving Cards
- Unarchiving Cards
- Deleting Cards
- Creating Card Blockers
- Managing Card Blockers
-
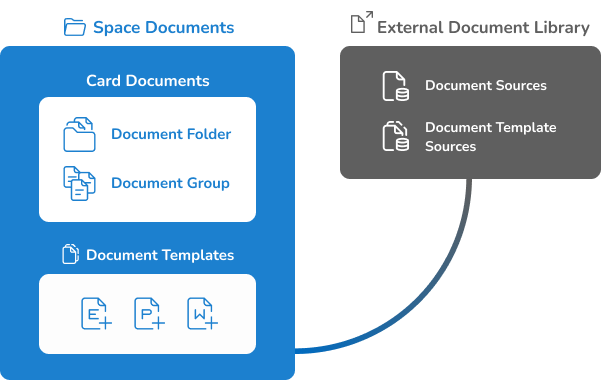
- Documents in KanBo
- Card Documents
- Uploading or Creating Documents in Cards
- Attaching and Detaching Documents in Cards
- Space Documents
- Document References
- Document Sources
- Downloading Documents
- Editing Documents
- Editing Documents in Browser
- Editing Documents in Office Applications
- Renaming Documents
- Deleting Documents
-
Visualize Work
-
- Space Views
- Creating Space Views
- Personal and Shared Space Views
- Card Grouping
- Filtering Cards
- Display Settings
- Work Progress Calculation
- Grouping Description
- Card Grouping Settings
- Changing the Order of Groupings
- Changing the Order of Space Views
- Deleting Space Views
- Following Card Statuses and Custom Fields
-
-
Collaborate
-
Level Up Your Work
-
Work Securely
-
Integrations
-
- Advanced KanBo Actions in Power Automate
- Creating KanBo Space Attached to Subfolder Created by Power Automate
- Creating Document Folders in Document Libraries Created by KanBo with Power Automate
- Exporting Space Views to Excel
- KanBo and Azure Logic Apps Integration
- Power Automate Integration: Triggers and Actions
- Seamless Import from Microsoft Planner to KanBo
- Synchronizing KanBo with Outlook Calendar
- Using KanBo Outlook App
-
Document Sources
This post is also available in: Deutsch
The document source feature allows users to easily associate and organize documents within KanBo. With this feature, users can link documents from various sources, such as SharePoint, directly to cards or spaces.
This feature enables seamless integration between KanBo and external document storage platforms, providing convenient access to all relevant files and resources in one place. Users can simply click on the document source link within a KanBo card to open and view the associated document, eliminating the need to switch between different applications or platforms.
By utilizing the document source feature, teams can centralize their project-related documents, ensuring easy collaboration, version control, and visibility for all stakeholders. It also streamlines document management and reduces the risk of data duplication or fragmentation across various systems.
How to link your document library with KanBo
By default, all attachments added to a card are stored in a dedicated SharePoint document library. This document library is created during the space creation process – when you create a new space, a new SharePoint Team Site1 is created for you. This functionality also allows you to attach multiple existing SharePoint document libraries to a space.
In addition, permissions from these libraries take precedence over the space. This means that if you are a member of a space and you visit a card that has an associated document from a library that you do not have access to, you will see that document signed in red and will not be able to edit or open it.
Learn how to link your document library with KanBo in 3 steps:
Follow the instruction below.
You need the Document Sources role to complete the next steps.
Step 1. Register the document library in KanBo
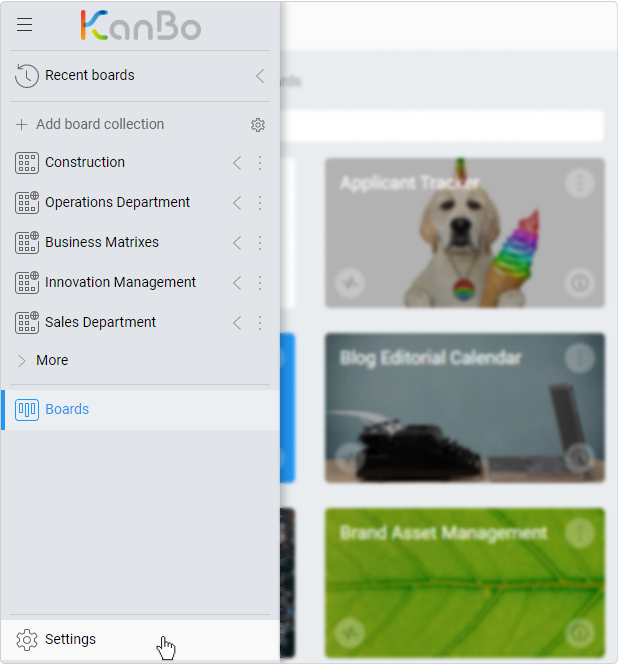
- Go to your
 KanBo Settings.
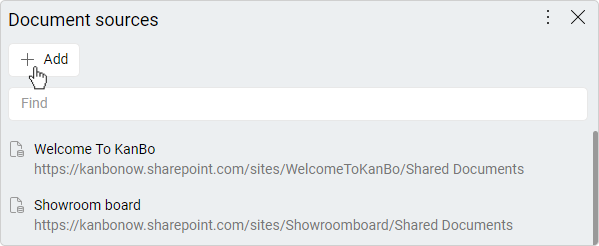
- Select Document Sources.
The new window contains all currently used SharePoint document libraries, including those created during every space creation.
- To register the already existing document library, click the +Add button.
Now you can choose from 3 options:
- Modern SharePoint drive – Choose an Office 365’s group which is connected to a modern SP Site
- Add by URL – Paste the URL to the existing folder in your tenant
- (RAW) MS Graph file – get Drive ID from MS Graph explorer and paste it here.
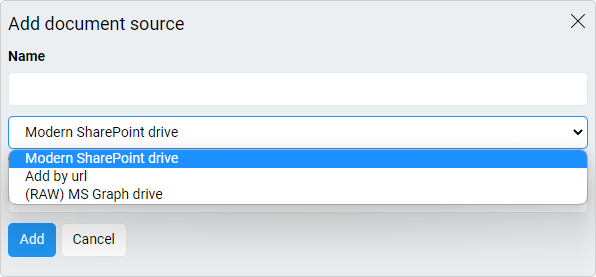
- Click Add to confirm.
Document source was added.
Click on the three dots button to see more options: Check permissions and Repair Document Sources.
By using the Check permissions button you can verify whether you still have permissions to these libraries.
A green indicator shows that this document library is accessible to you, and red means that you don’t have any permission to this library.
Step 2. Connect registered document source with a space
Now you need to navigate to a specific KanBo space where you want to connect the registered document source.
Only space owners can assign document sources to spaces.
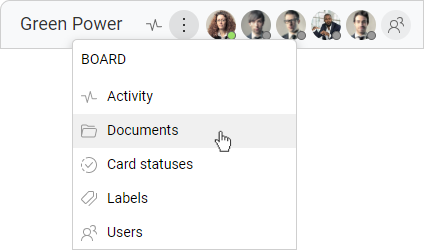
- Open a space.
- Click More (the three-dot menu) on the top bar.
- Select Documents.
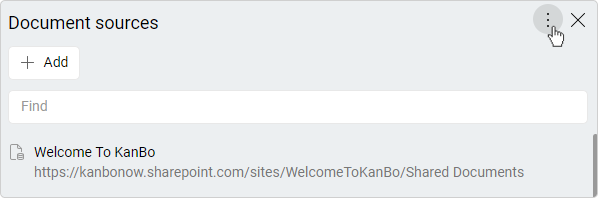
Here you can see all the space documents.
- Click on the three-dots button and then select Document Sources. Here are document sources already assigned to that space.
You can go there also with Space Settings->Document Sources
- Click on + Add to add more document sources. You can check multiple registered document libraries and add them with one click.
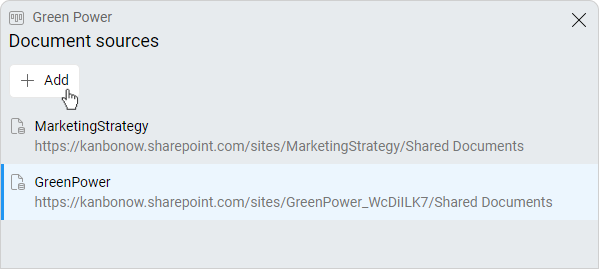
- After you chose desired libraries, click Add Selected.
Now new Document Sources are added.
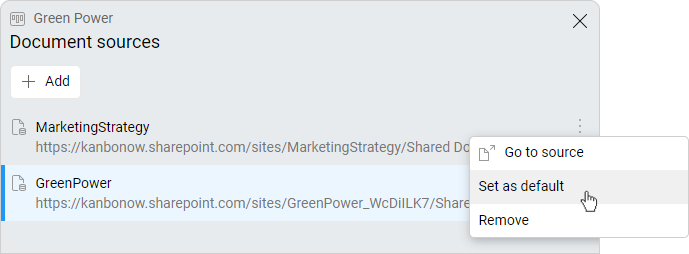
- Once you click the three-dots button near to Document Source’s name and choose Set as default, all new documents added to the cards will be stored in that Document Source.
You can also remove a Document Source here.
Step 3. See how to use it
Go to space documents and move between libraries using Breadcrumb (select the Home icon to see all available libraries on this space).
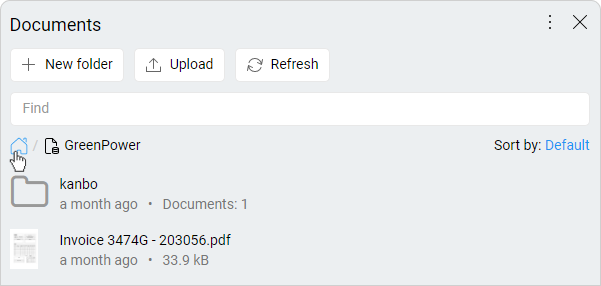
Attach documents directly from cards using card documents powers.
Tips & tricks
- Many spaces can use one common SharePoint document library
- As a document source, you can connect user’s private OneDrive for Business space. You can share documents with a specific person that will be able to see or edit documents there.
- You can connect document libraries from different Sites, Site Collections, Web Applications, and Farms. You only need to have permission to that space.
Advanced scenario
Moving card which contains documents from custom document libraries (document sources) between spaces
In this scenario, there are spaces A and B.
Space A contains a default document source and a custom one, added from another Site Collection. Space B contains a default document source and a custom one, added from another Site Collection which is chosen as default in this space.
There is a card in the space A, which contains 2 documents: one (1) from the default document source and one (2) from the custom document source. When you move this card into space B, only document 1 will be added to space B and document 2 will remain the same (it won’t be added again or overwritten).
Was this article helpful?
Please, contact us if you have any additional questions.