
Creating and Updating the Elastic Cloud Deployment
- Go to portal.azure.com.
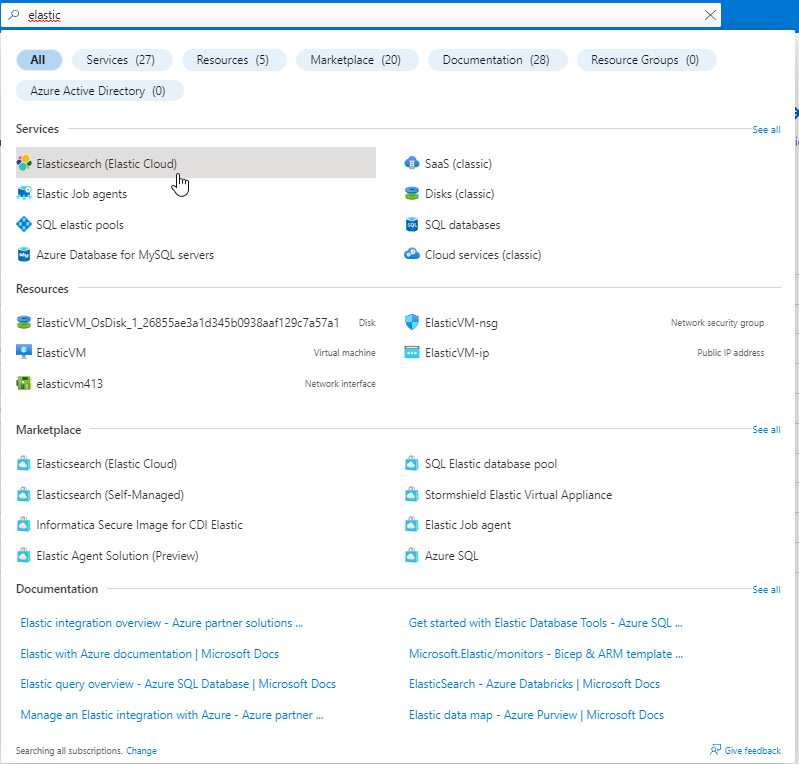
- In the search bar on the top, search for “Elastic” and click on “Elasticsearch (Elastic Cloud)”.
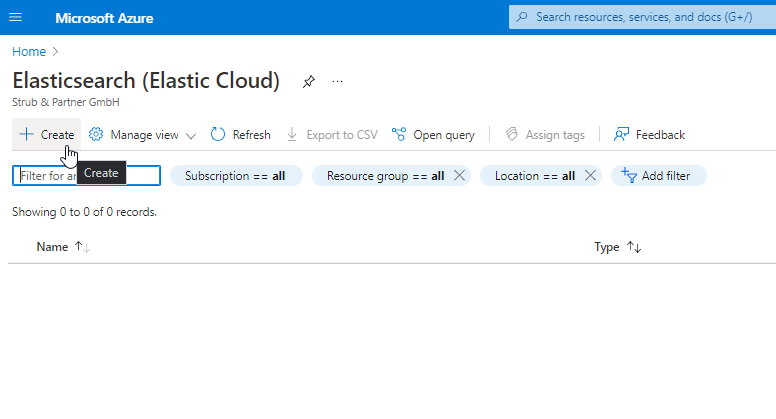
- Click on “Create”.
- Choose Your Resource group, Resource name and region (pick the one closest to You).
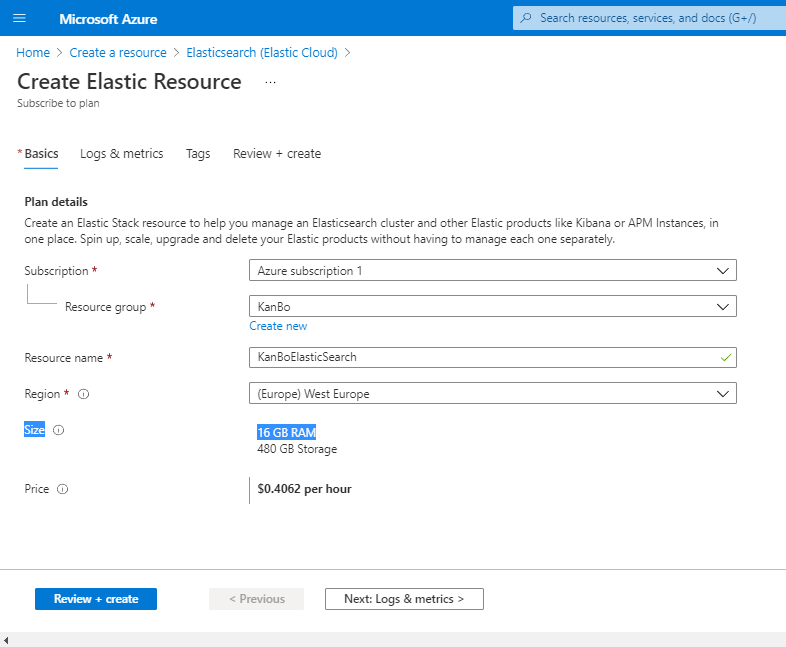
Important thing to note is that the price here will be cut down by 80%. This topic will be explained further into the article.
- After that, click “Review + create” and then “Create”.
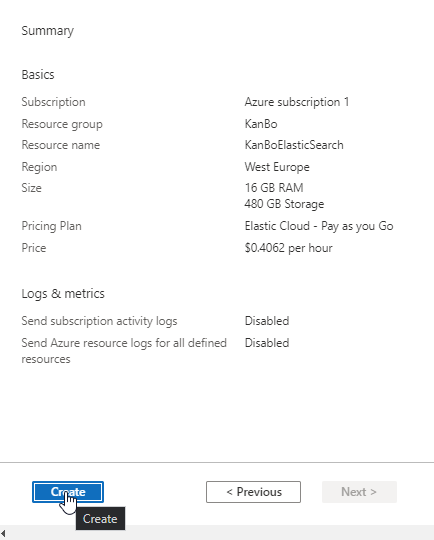
- After that, Your Elasticsearch will begin installing. It will take around 20 to 30 minutes.
- After the installation is done, You will see a message that the deployment is complete.
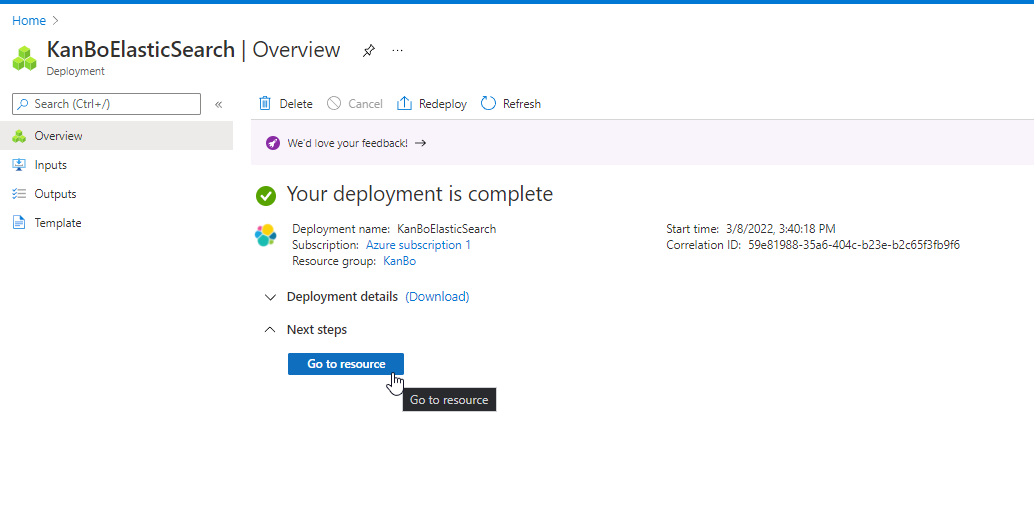
- Click on “Go to resource”.
You should see this view:
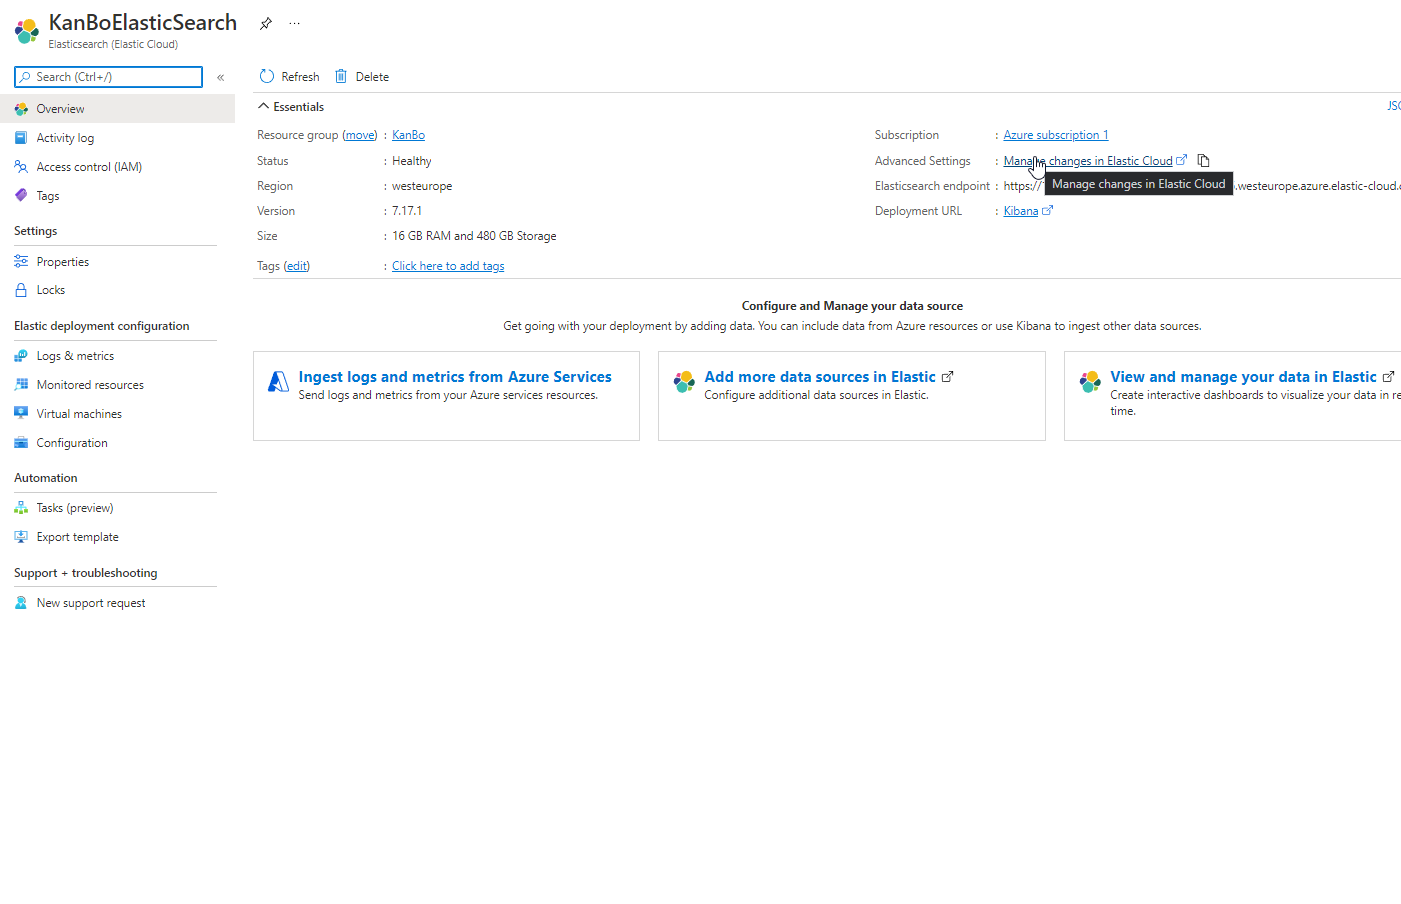
- Click on “Manage changes in Elastic Cloud”.
- If You are prompted about permissions, tick off the box to consent on behalf of the organization and click “Accept”.
- Now we have access to Elastic Cloud Administration Panel.
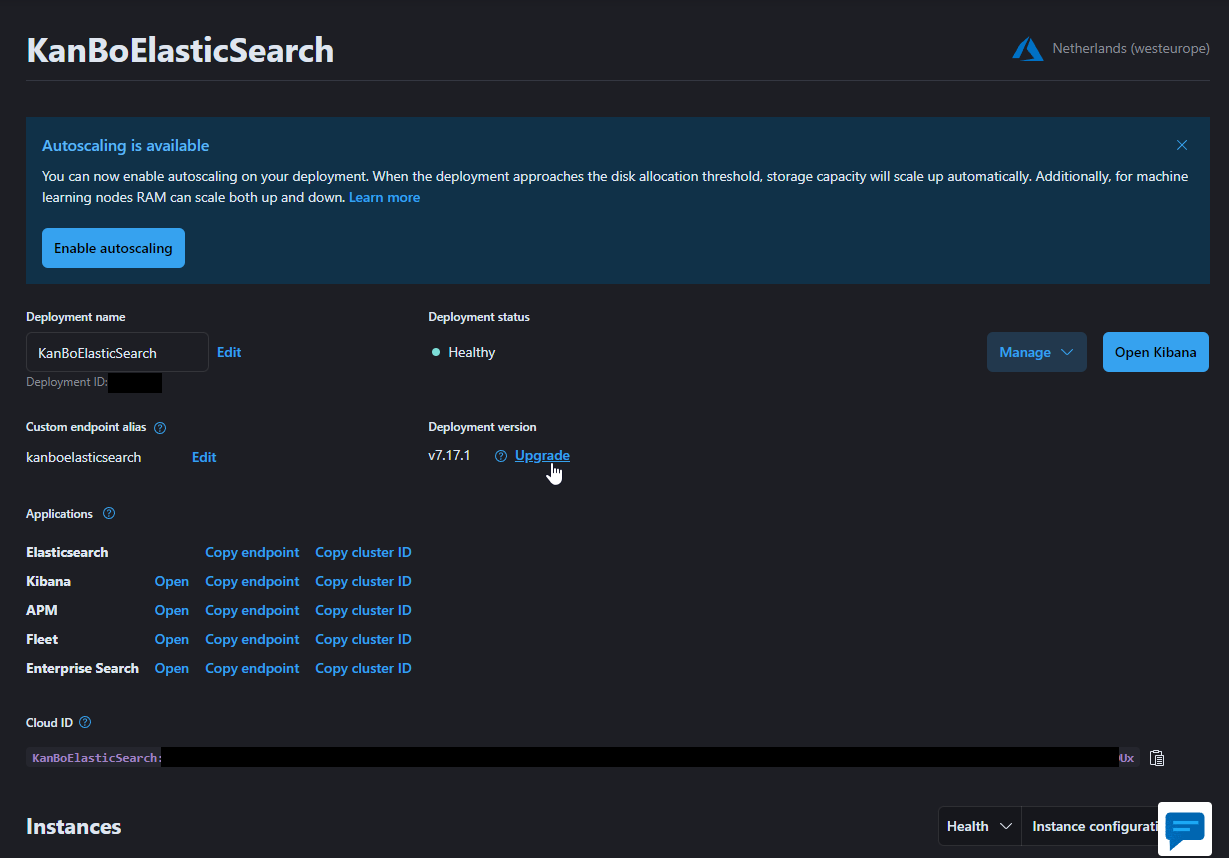
We should update Elastic Cloud deployment to the newest version first.
- Click on “Upgrade” (as shown in screenshot).
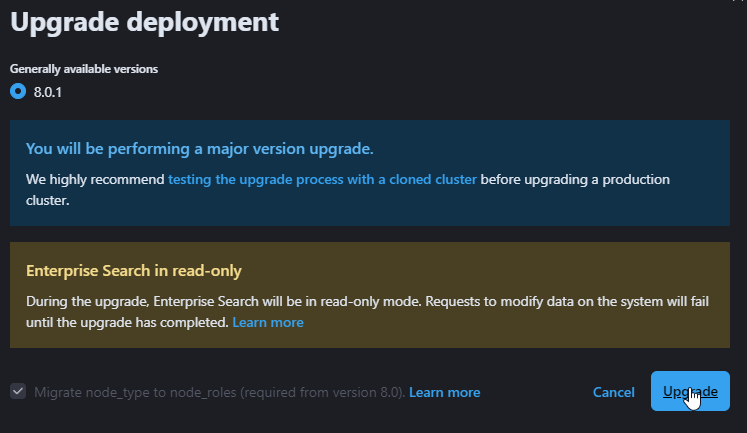
- Select the newest Generally available version and click on “Upgrade”.

- Confirm Upgrade.
Now Your Elastic Cloud deployment is updating all of its components. This may also take somewhere between 20 to 30 minutes. After the update is done, the window will look like this:
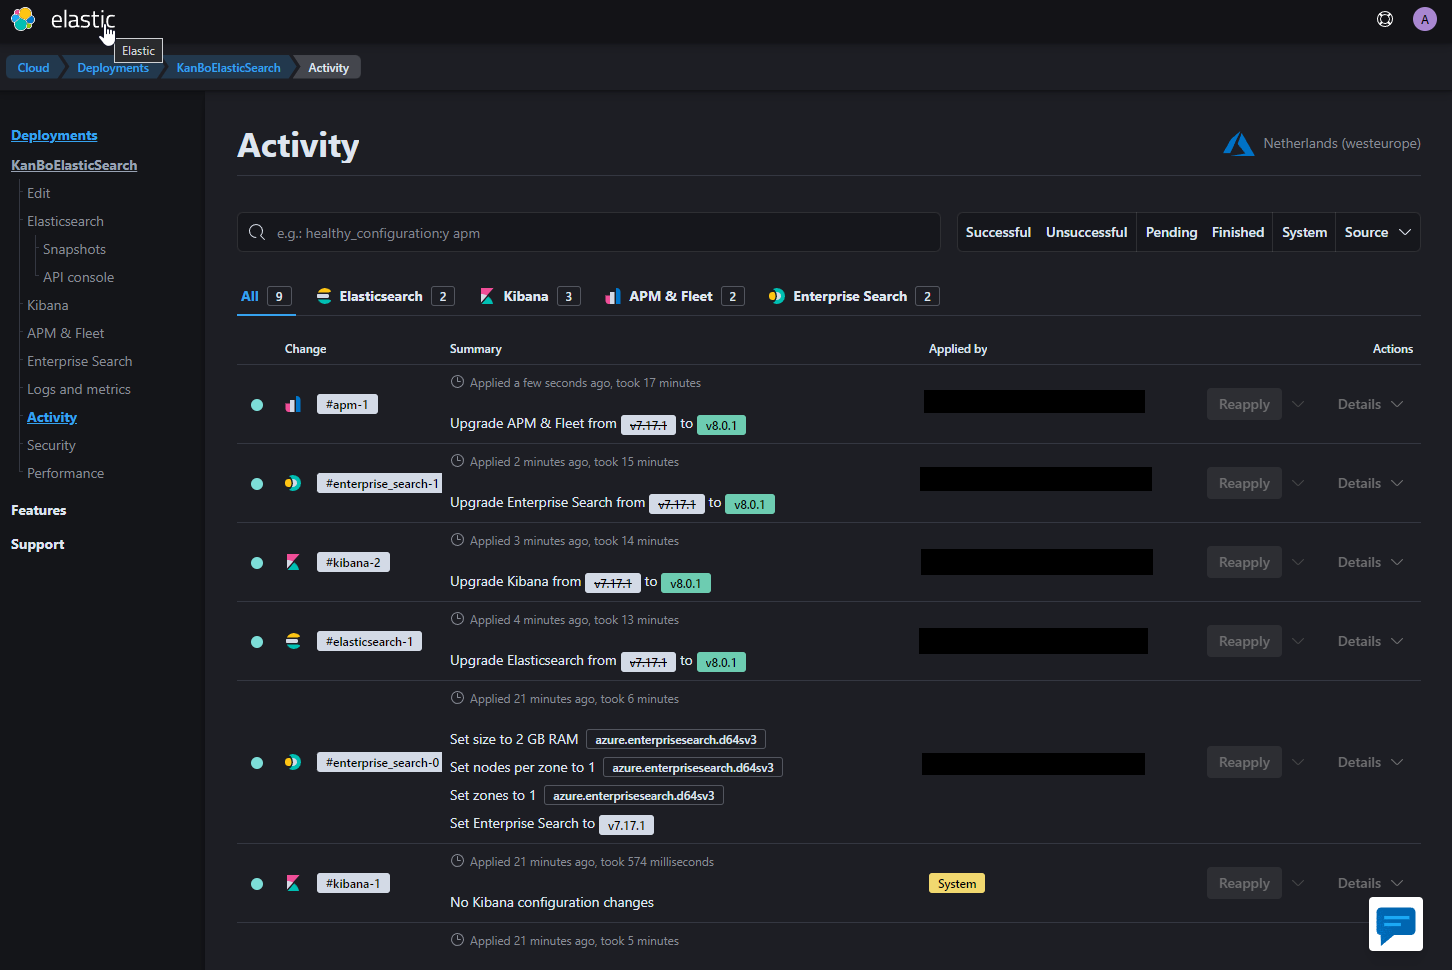
- Click on the Elastic logo in the top left corner. We will now start with creating a user that will act as a connector between KanBo and Elastic Search.
Create a user for KanBo
Now we will create a user that will be used as a connector between KanBo and Elastic Search.
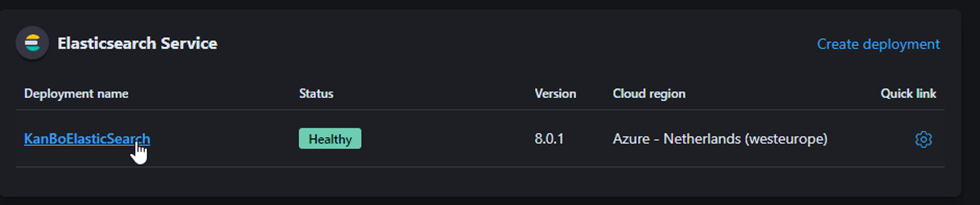
- Click on the name that You gave to the Elastic deployment (in our case, KanBoElasticSearch).
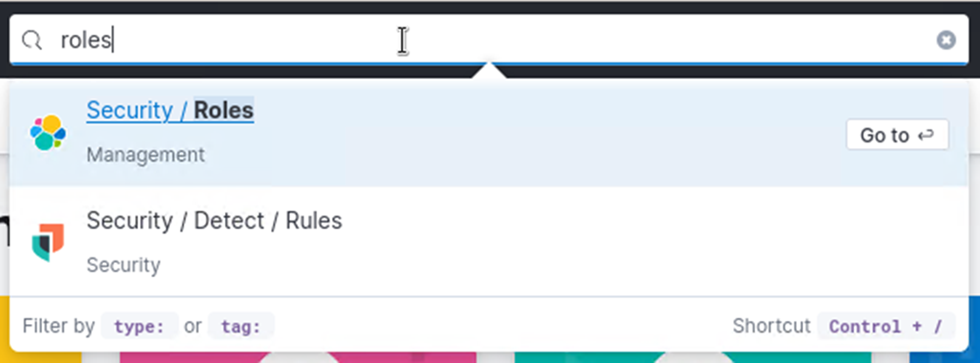
- Now You have accessed Kibana. In the search bar at the top of the site, search for “Roles” and select it by “Go to”.
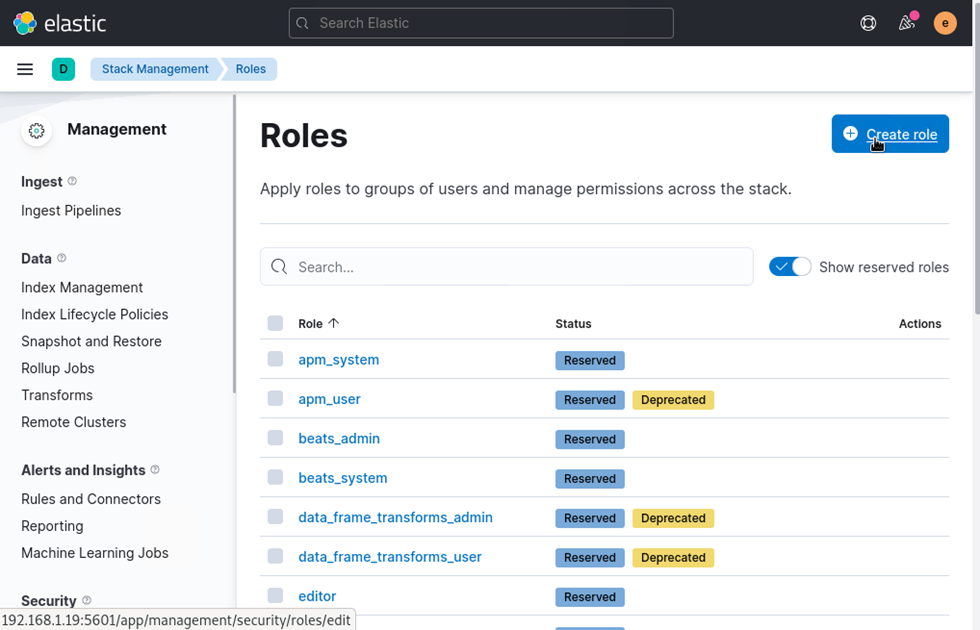
- After that, click on “Create role”.
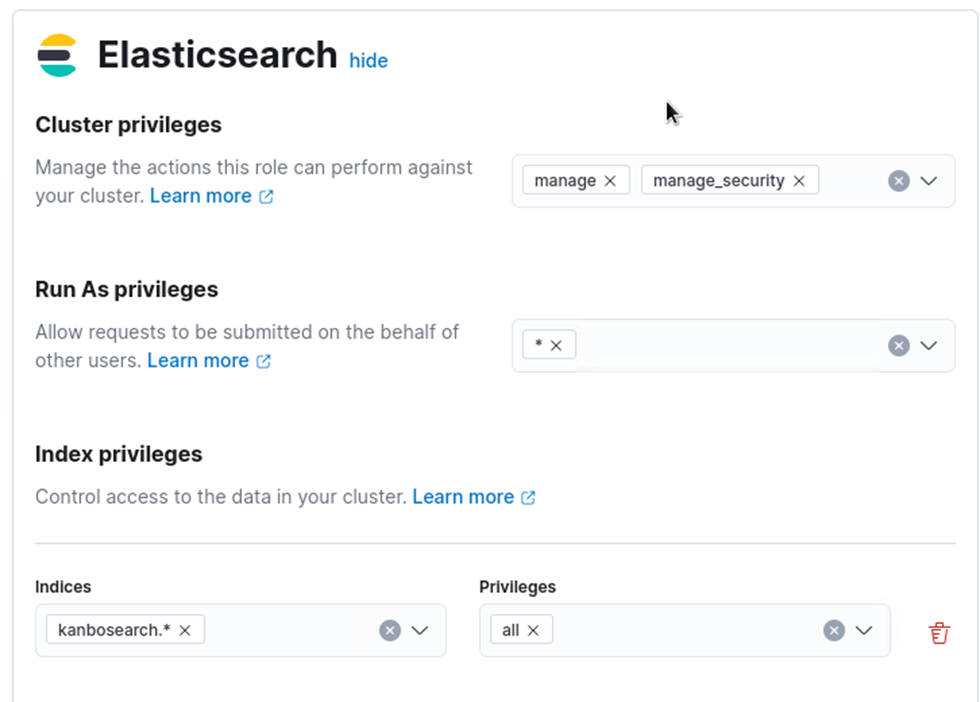
- Then configure these options the same way they are configured in the
screenshot.
-
Role name: admin-KanBoSearch
-
Cluster privileges: manage, manage_security
-
Run As privileges: *
-
Indices: kanbosearch.*
-
Privileges: all
-
Role name: admin-KanBoSearch

- After creating a role, search for “Users” in the top bar and select “Go to".

- And create a user in this fashion:
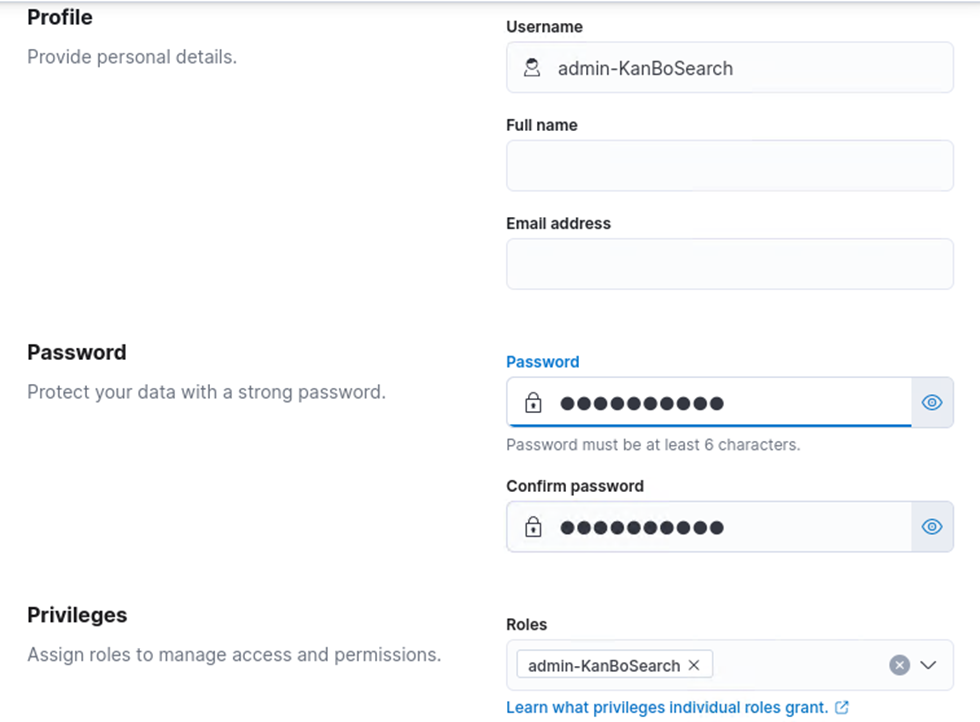
It is good practice to have the same username as the role name. The password is not generated and is set by you. For the “roles” section, select the role created in the step before: “admin-KanBoSearch”.
- Save the username and password somewhere for later.
Scale down the Elastic Cloud deployment
The default sizing of Elastic search is a lot more than what is generally needed for searching through KanBo, which is why the deployment should be downscaled to avoid any unnecessary costs.
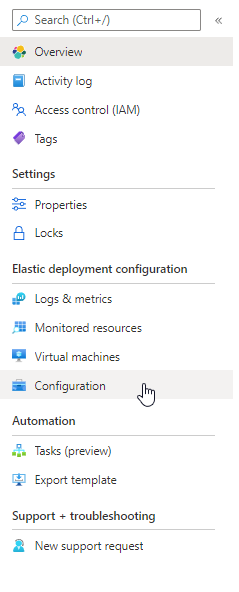
- Go back to Your Elastic Cloud instance inside of Azure and go to “Configuration”.
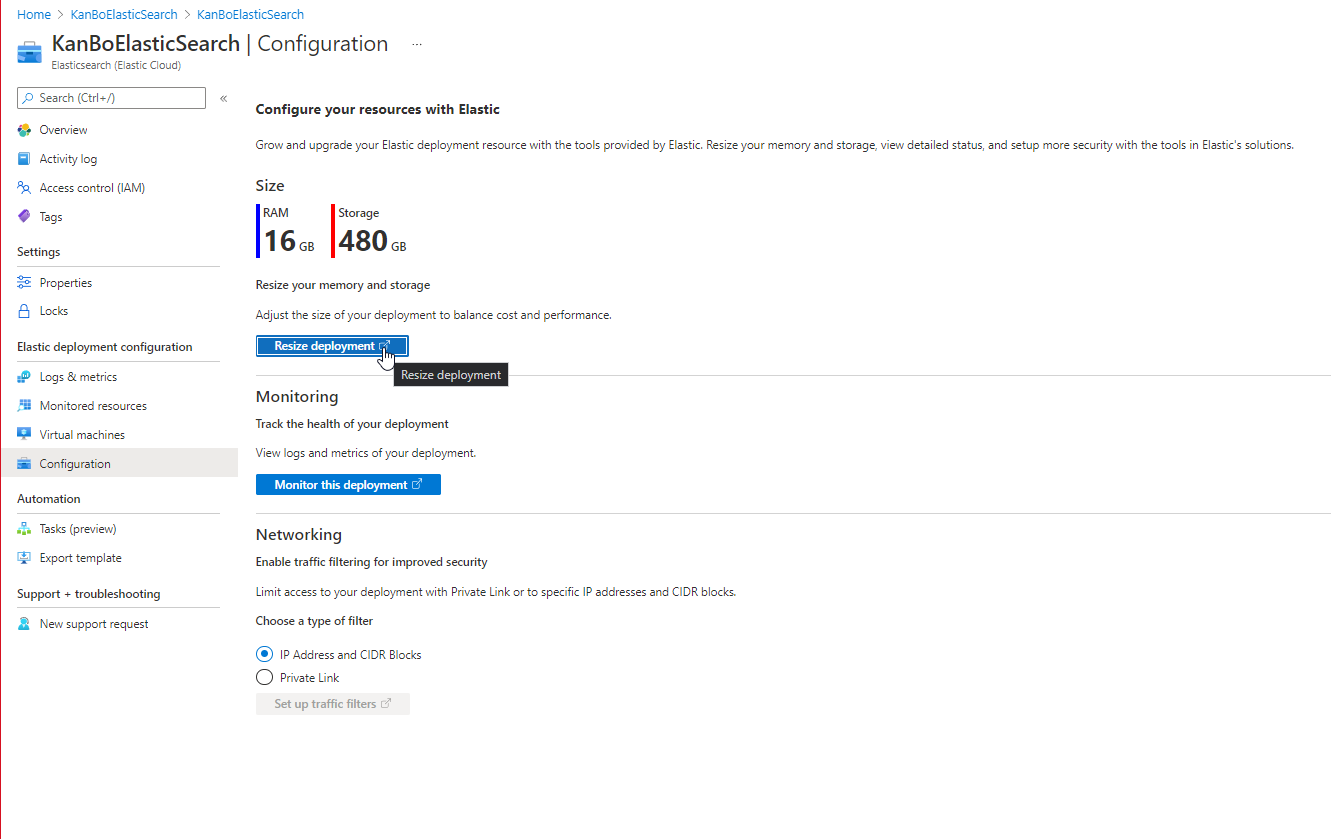
- Click on “resize deployment”.
Here we only need to modify the Elastic Search sizing, as other components do not impact the hourly costs.
The minimum required sizing of Elastic Search for KanBo is “70GB storage | 2 GB RAM | Up to 2.1 vCPU”, but, in case search is underperforming inside of KanBo, You should change the size to a higher one
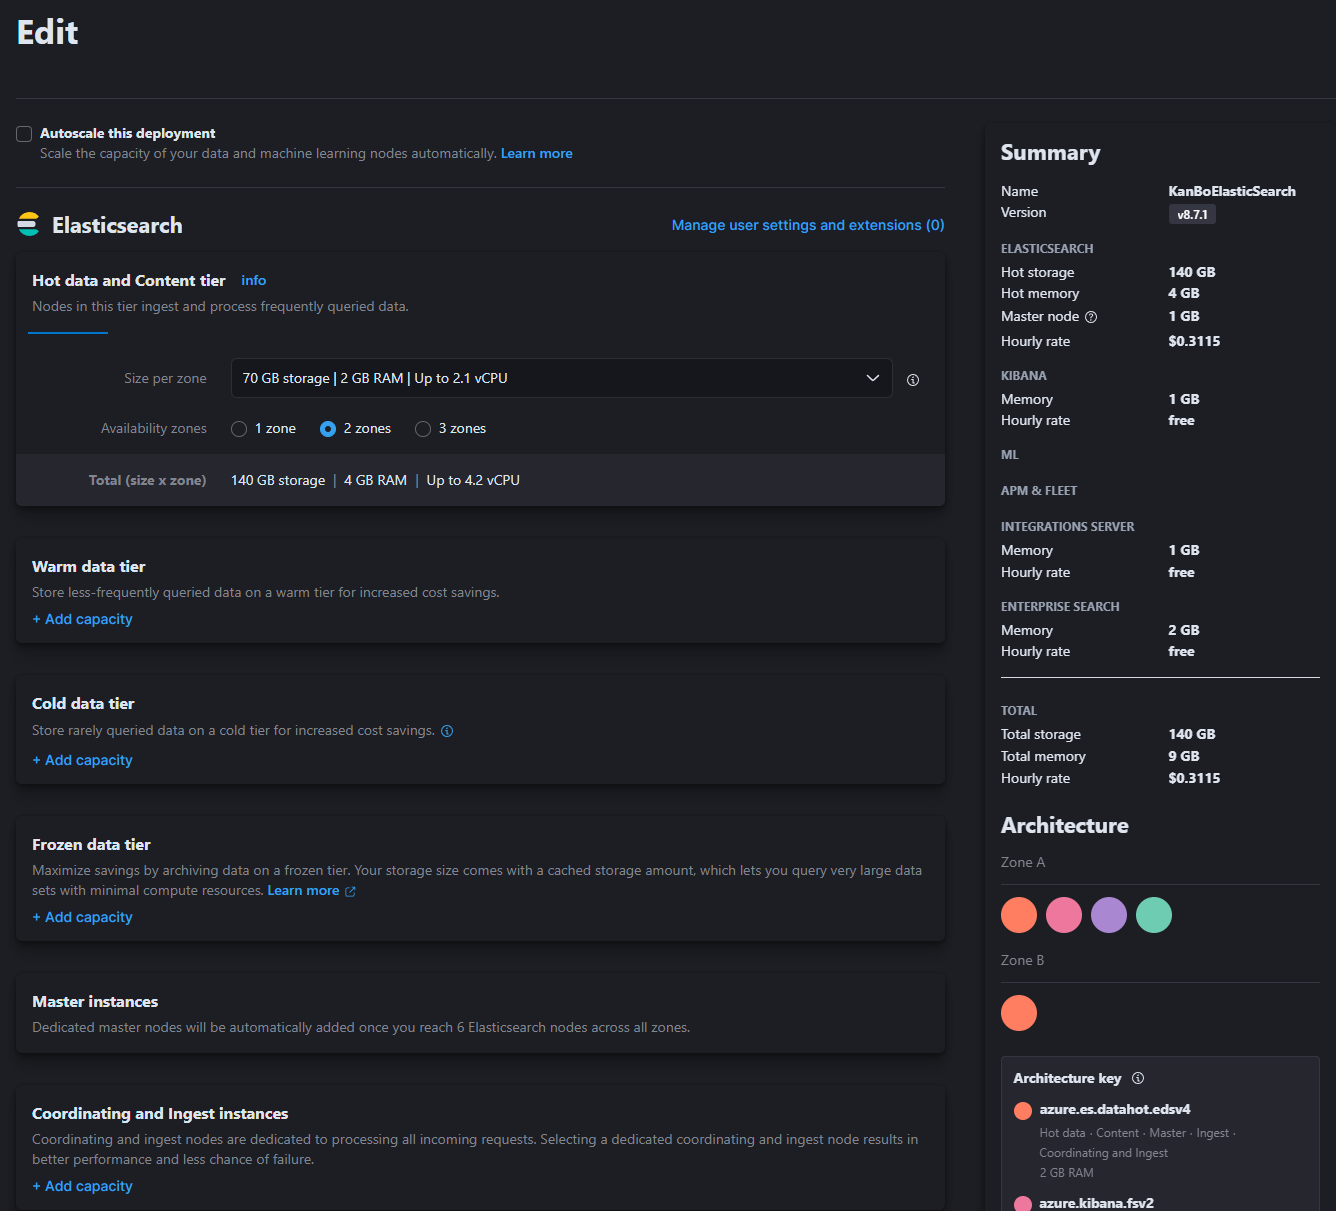
- After You select Your size, scroll all the way down, select "Extended maintenance" and click on “Save”.
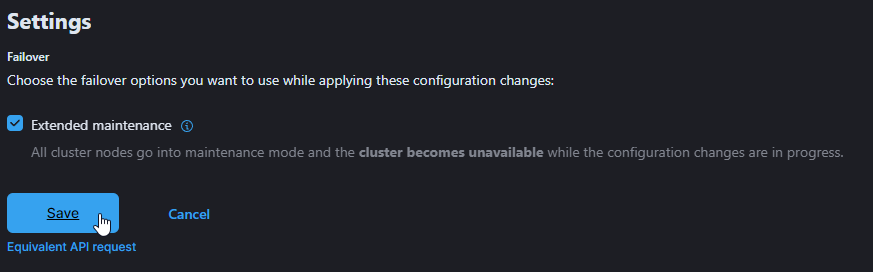
Your Elastic Search will now begin downscaling. This will take around 10 minutes.
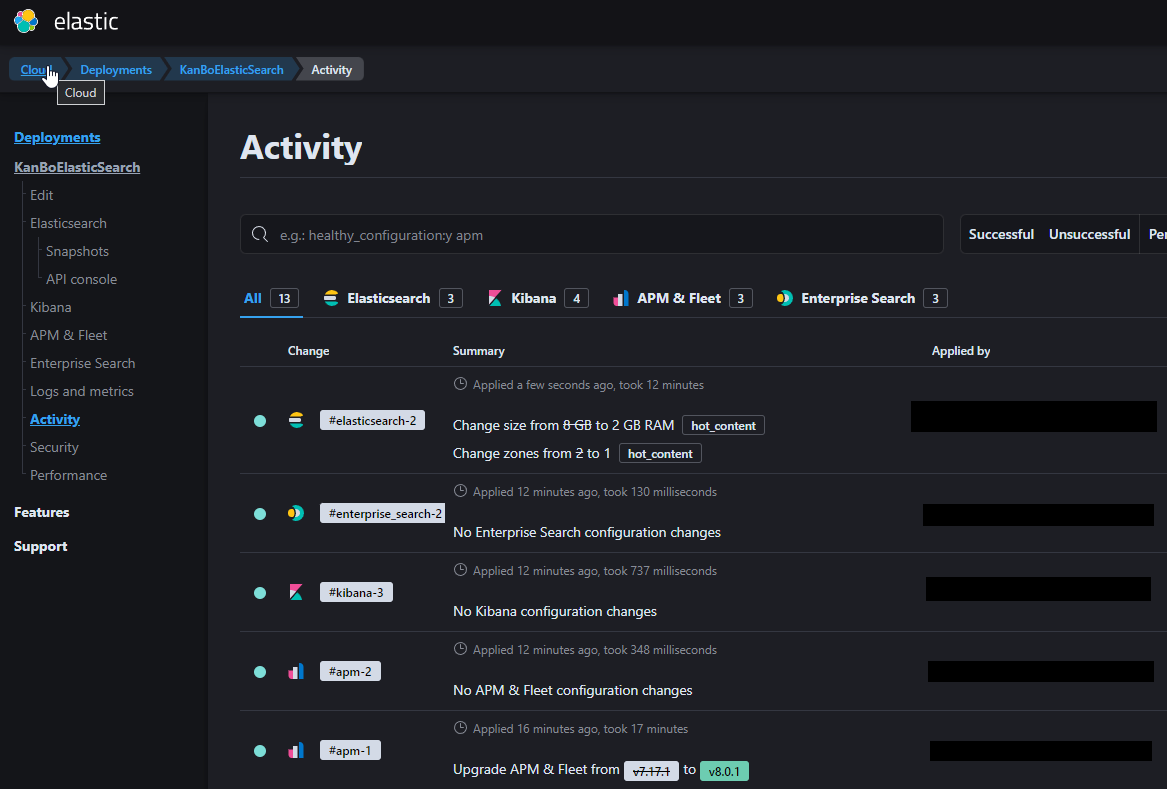
- After downscaling is finished, click on the "Edit" button in the left panel, as we will need to downscale the environment again.
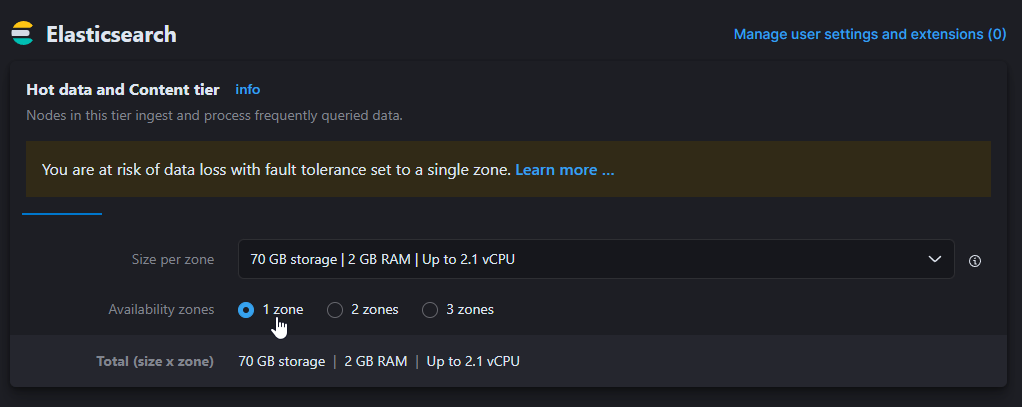 Select "1 zone" in the Elasticsearch options. Doing this will cut the running cost in half. This downscaling has to be done separately to prevent the whole Elastic Stack from breaking.
After selecting 1 zone, select "Extended maintenance" and click on "Save" again.
Select "1 zone" in the Elasticsearch options. Doing this will cut the running cost in half. This downscaling has to be done separately to prevent the whole Elastic Stack from breaking.
After selecting 1 zone, select "Extended maintenance" and click on "Save" again.
- Now go back to the main page, from which we will begin configuring the user account for Elasticsearch
Connect KanBo with Elastic Search
This part of the article is only meant to be done after a KanBo Installation has been finished.
- Make sure You have these lines in Your KanBo appsettings.json:
{
    "type": "elastic",
    "key": "FILL-ME"
   },
The "key" variable here is the encryption key and is a random String of min. 30 characters. This key will not be used anywhere in the configuration and is used to encrypt the communication between KanBo and elastic as an additional layer of security.
- Copy the cloud id (as shown below).
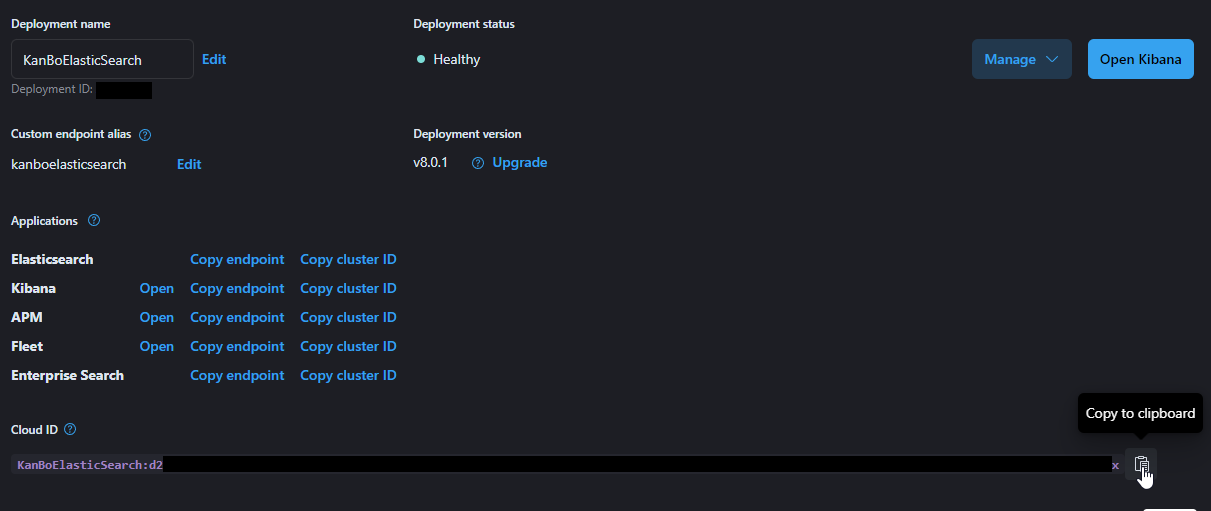
- Save it somewhere.
- Go to KanBo Setup, show advanced setup and click on Elastic. If the ”Elastic” option does not appear, restart the KanBo and try again.
- Click on “Cloud” and input these values into the boxes in the
“Connection” section:
- Cloud ID: The Cloud ID of Your Elastic Deployment
- User: The username from “Creating a user for KanBo”, step 4.
-
Password: The password from “Creating a user for KanBo”, step 4.
-
Tenant name: kanbosearch
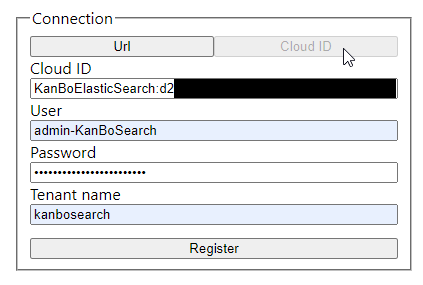
- Click on register, and Your KanBo will be connected to the Elastic Search service.
- Index all Your data by choosing “All”, in the “Data import” section, ticking the “clean” box and clicking on “Execute”.
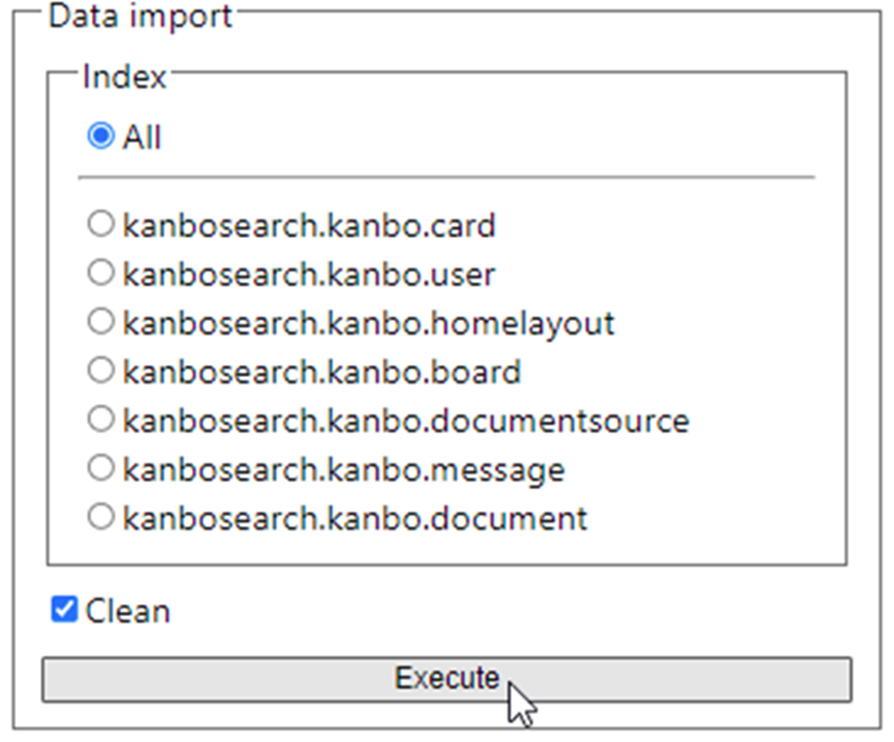
Wait until Elastic indexed everything.
- Restart Your KanBo.
- Your KanBo now uses Elastic Search.
Troubleshooting
Failed registering elastic connection: Elastic ping failed
If that happened, then one of the inputs inside the boxes in the “Connection section” must have been wrong. Please make sure that:
- You copied the whole Elastic Cloud ID.
- The Username and Password are correct.
- The tenant name doesn’t include the “.*” part that was present inside the Indices of a role we have created in Kibana.