
KanBo Installation on Office 365 and Azure (KanBo Installer)
Introduction
Purpose
KanBo Installer is a PowerShell script that simplifies the installation process of KanBo by performing most of it through commands.
Technical information
The PowerShell script will require some amount of user interaction explained in detail further in the article and during the installation process. These interactions include:
- Logging into Azure CLI
- Authenticating the PowerShell Microsoft Graph module
- Choosing an O365 subscription, Azure resource group, location of Azure components, the email account for Email Notifications, and names of Azure resources
- Inputting the API Key from Azure Cloud and Kibana
These interactions are required for the installation process. You will be notified during the installation when a need for interactions occurs.
All Azure resources are created in one resource group. Those resources include a:
- Virtual Network
- Elastic Cloud instance
- SQL Server
- SQL Database
- App Registration in Azure Active Directory
- App Service Plan
- App Service
All of the resources are connected to the virtual network and communicate with each other through it, only the KanBo application is open for public access.
Prerequisites
- KanBo Installer package
- Windows-based system to run the PowerShell script on
- Azure CLI
- Extension for Elastic in Azure CLI installed
- Microsoft Graph Powershell module
- Microsoft 365 Business Basic environment (or a higher version) with administrator access to it
- Administrator access to the Azure portal
Installation
Starting the script
Two important conditions must be fulfilled for the script to run properly:
- You must run the script as Administrator
- The script must be run in the main folder
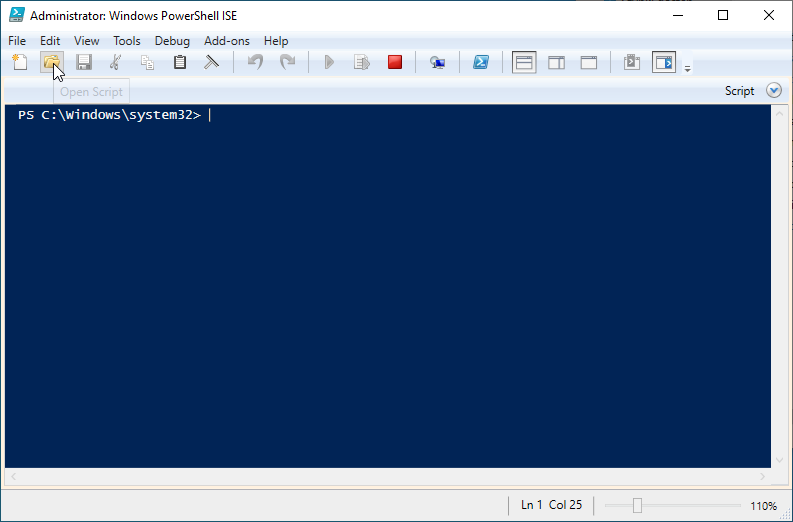
One of the ways to ensure those conditions is by using PowerShell ISE. Start by running PowerShell ISE as Administrator:

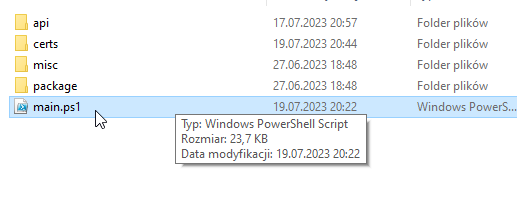
Then, open the file “main.ps1”
After that, You will be presented with this screen
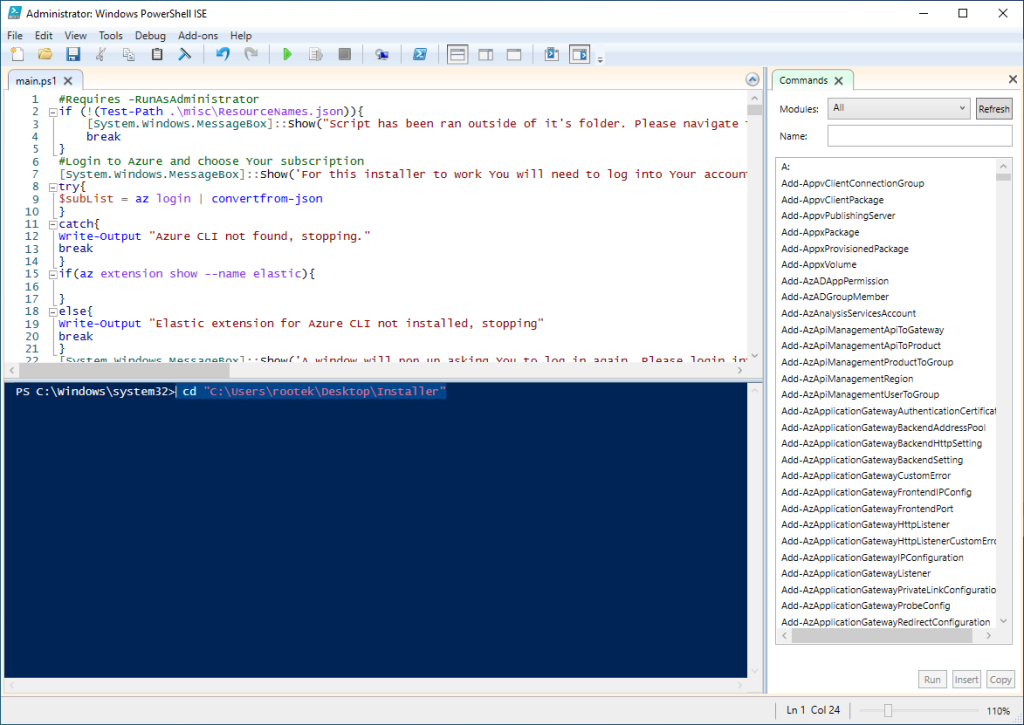
Use the blue command line to head into the folder in which Your installer is stored by using the “cd” command. Best to make sure You are putting the path of the folder in quotation marks.
Click on the green play button to start the script.
Setting up
The first thing You will have to do is to log in to Azure two times. Please make sure that:
- You are logging in with Your Administrator account with all the rights to the subscription
- You have logged in with the same account twice
After that, You will have to choose the O365 Subscription You want Your KanBo installed on and what region should it be installed in. You will also have a choice between choosing an existing resource group in said subscription or creating a new resource group for KanBo. You will also have an option of naming every resource the script will create or of letting the script name the resources by itself.
At this point, the installation is started.
Installation – Elastic Cloud
During the installation, You might encounter warnings like this from az:

Although they look dangerous, they are actually just information that a couple of Azure CLI commands are in the experimental stage. You do not have to worry about those during the installation.
The first thing that the installer starts with is creating an Elastic Cloud instance. Soon after installation, You will be prompted to input an API key for Elastic Cloud. This API Key will be used to change the sizing of the Elastic Stack and to secure the private connection to Elastic. A browser window will open, and You will be presented with this screen:
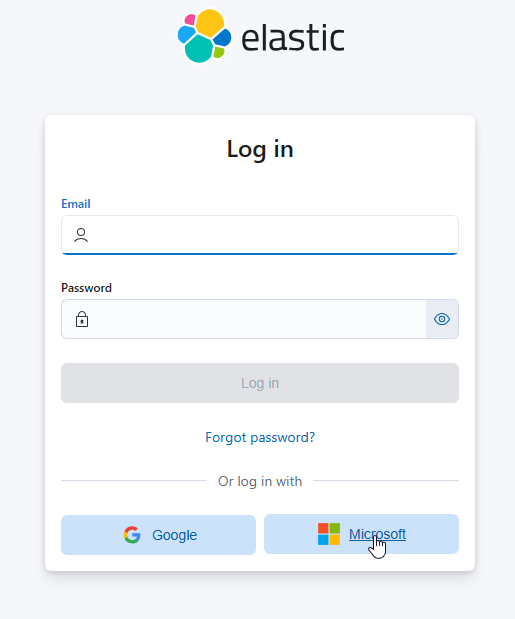
Please make sure to login with Microsoft, using the same administrator account You used previously.
After seeing Your Elastic instance, click on “Manage”

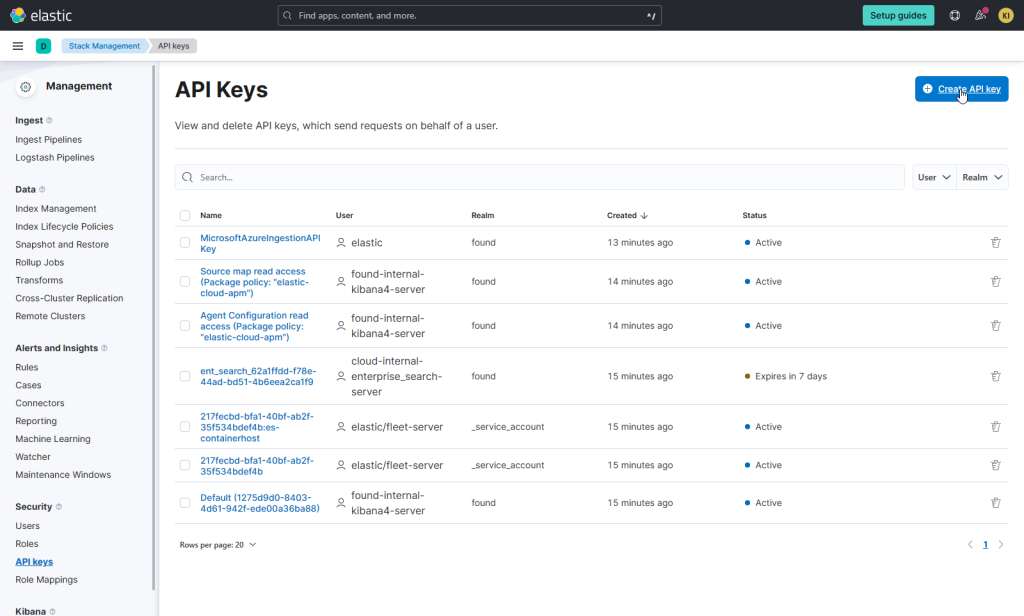
Then, on the left panel click on “Features”, then “API Keys”
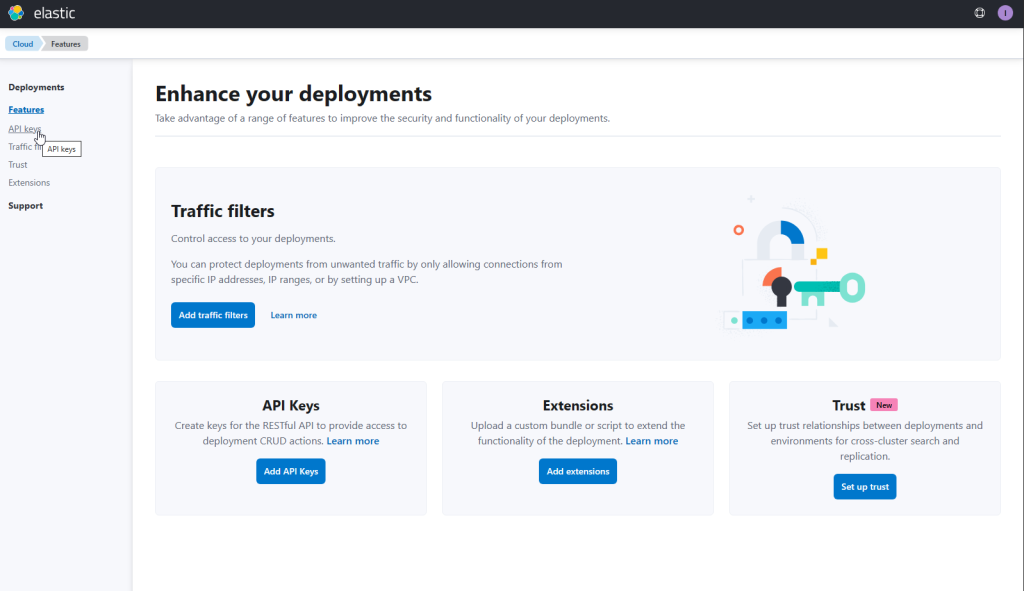
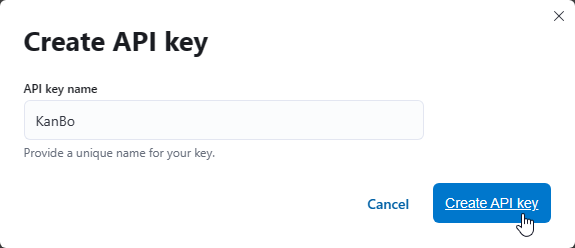
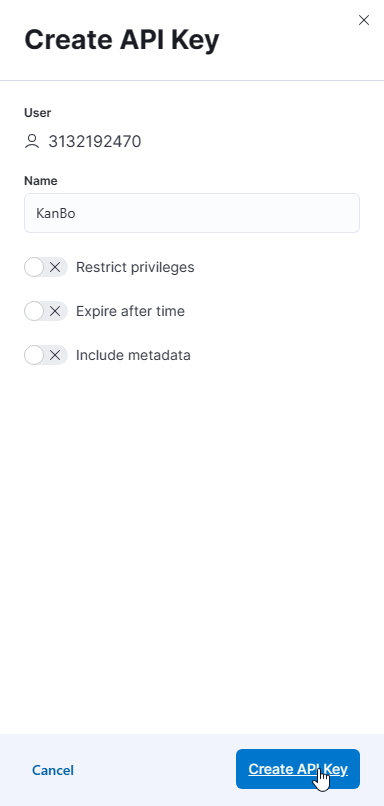
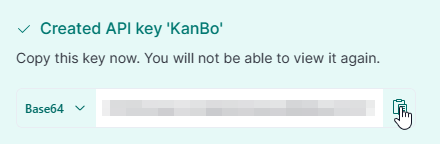
Then, create a new API Key and copy it
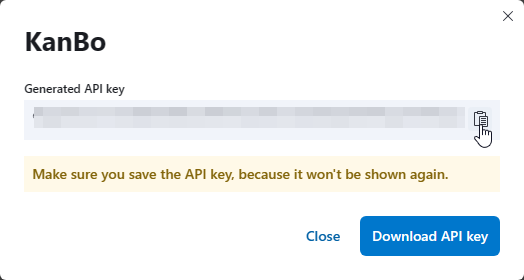
Use ctrl+v to paste it into the command line and click enter to submit.

Right after that, Elastic Cloud will begin the two steps downscaling process. You are going to see this error multiple times:
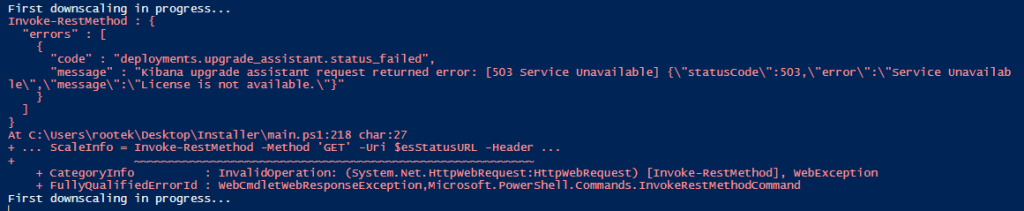
It is caused by the script requesting information every 10 seconds on whether the upgrade assistant is ready or not. If the Elastic Cloud stack is in the middle of having itself changed, the upgrade assistant is offline and returns the 503 error seen above. It is done so to make sure nothing else is running during the downscaling process. When the upgrade assistant is back up and running (which means that the downscaling is done), the rest of the installation continues.
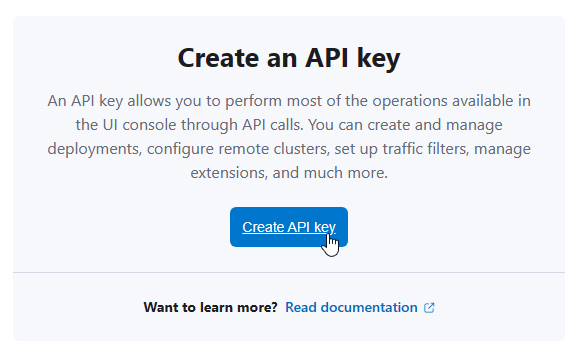
After the downscaling processes are done, You will be asked to input another API Key. This API Key will be used to create a user in Elastic that will be used for Search in KanBo. Once again, a browser window will open and You will be presented with this:
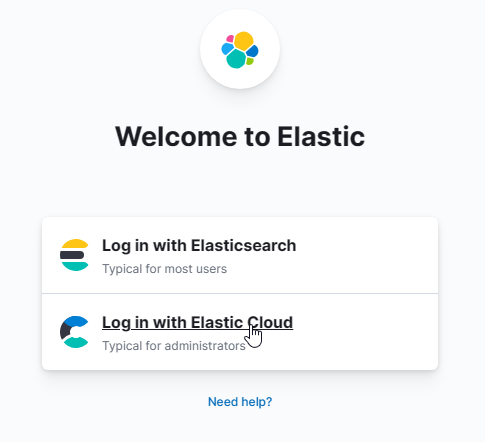
Make sure to log in with Elastic Cloud and Microsoft (if another login window appears).
After that, You should see this window:
Once again, create an API Key, copy it, and paste it into the command line

Installation – KanBo
At this point, installation is fully automatic. All the resources in Azure required for KanBo will be created and the KanBo package will be uploaded. You might be notified via the command line that names for Your SQL Server or the App Service have been already taken, in which case You will be asked to rename them. After installation is finished, a new file called “Information.txt” will be created in the main folder. This file contains information on the Elastic user, the Login and the password for the SQL Server, the URL of Your KanBo, and the URL of Your Elastic Endpoint, which will be needed in the next steps.
Installation – Activation
This part of the installation is manual. Go to the URL of Your KanBo and add /setup to it (example: https://kanbo.azurewebsites.net/setup). You will be presented with this information:
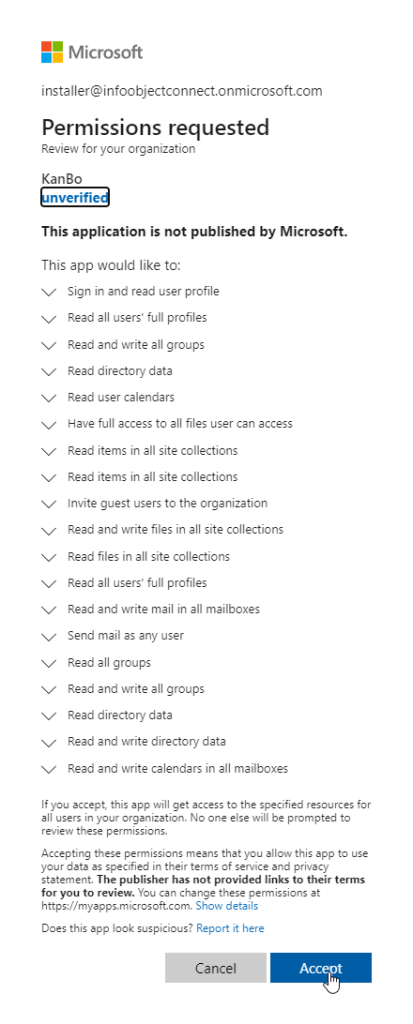
Click on “Accept”
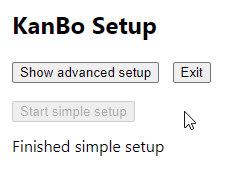
Then, You can start the KanBo installation by clicking on “Start simple setup”.

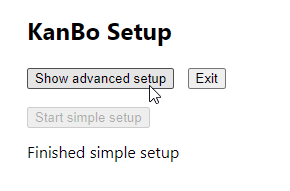
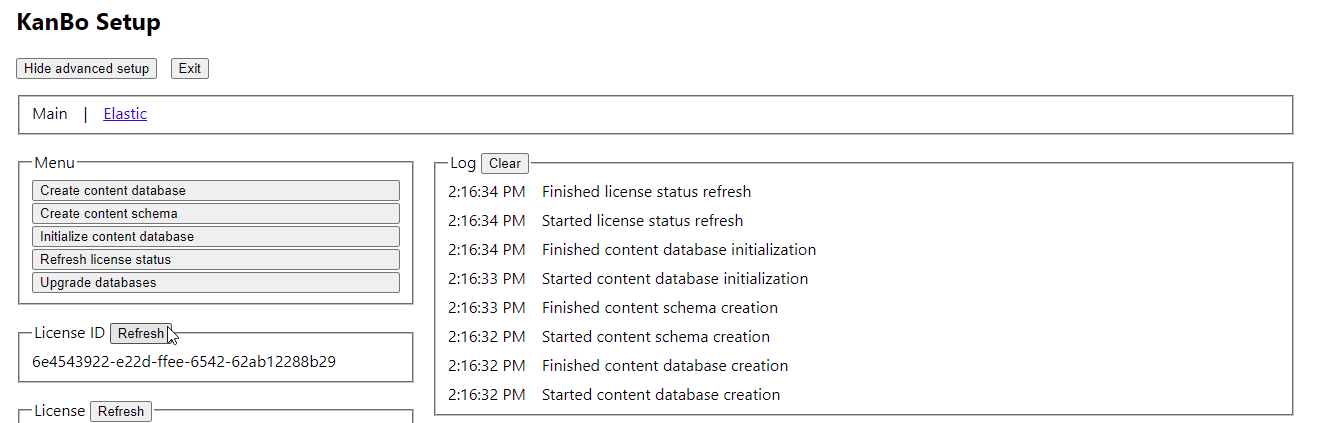
Then, click on “Show advanced setup”, the “Refresh” button near the License ID fieldset (see screenshot),copy the License ID, and send it to our email support@kanboapp.com
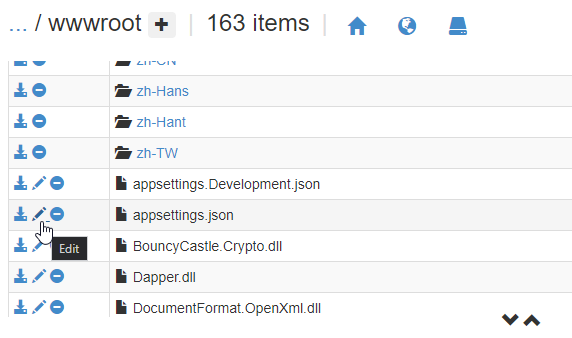
The last step is to put the KanBo License Key into the configuration of You KanBo. You can see Your KanBo files by adding “scm” before the azurewebsites.net part of Your KanBo URL (example: https://kanbo.scm.azurewebsites.net). After that, head to the site folder, then the wwwroot folder, then click on the edit button near the “appsettings.json” file
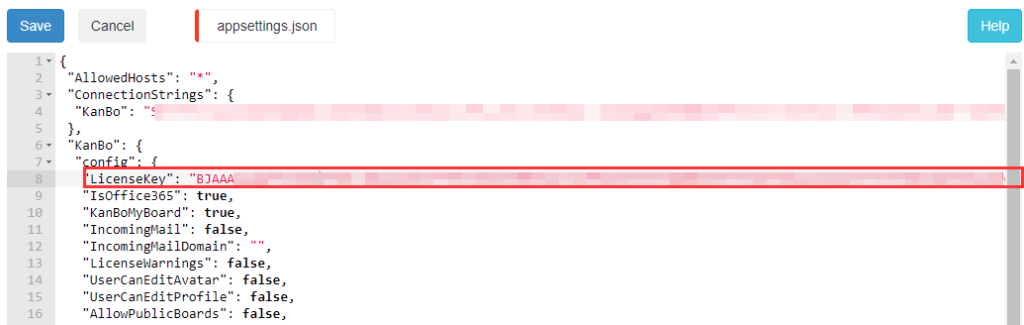
Then, find the “LicenseKey” variable and paste Your License Key between the quotation marks
After that, go to Your KanBo App Service in Azure and restart the app
Installation – Search
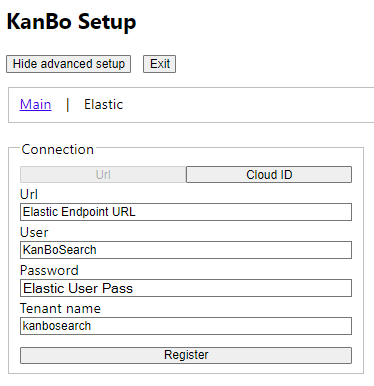
To enable search in KanBo, go to the Setup page again and click on “Advanced settings”, then on “Elastic” and fill in the boxes with the following information from the .txt file:
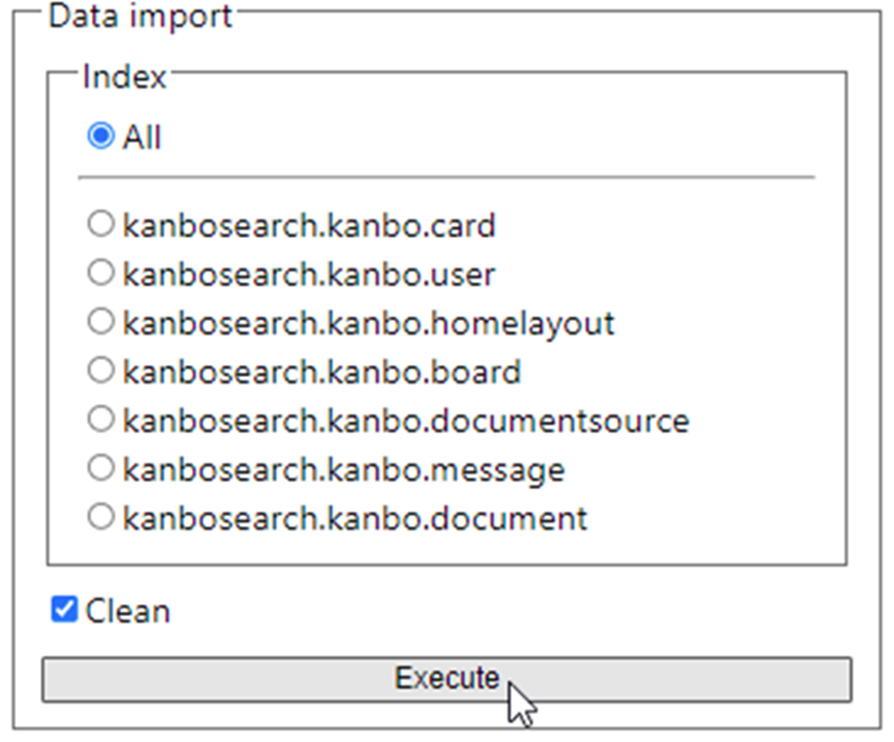
Then, click on “Register”. After that index all Your data by choosing “All”, in the “Data import” section, ticking the “clean” box, and clicking on “Execute”.
And with that, the installation is finished!
Additional Step – KanBo Teams App
After KanBo has been installed You can follow this article to configure the Teams App for Your KanBo