-
KanBo Installation
- KanBo Installation on Office 365 and Azure (Manual)
- KanBo Installation on Office 365 and Azure (KanBo Installer)
- KanBo On-Premises Installation Requirements and Prerequisites
- KanBo Installation On-Premise SharePoint 2013/2016/2019
- Creating and Updating the Elastic Cloud Deployment
- Creating a Linux Based Virtual Machine on Azure for Elastic Search
- Installing and Configuring Elastic Search on Debian
- Creating a Windows Virtual Machine on Azure for Elastic Search
- Installing and Configuring Elastic Search on Windows
- How to Create a X.509 High-Trust Certificate
- KanBo Setup
- KanBo Modern Webpart Installation
- Uninstall KanBo from Office 365
- Supported Browsers
-
KanBo Updates
-
Additional Components
- Setting Up KanBo Email Notifications on Azure
- Setting Up KanBo Email Notifications (On-Premise)
- KanBo Outlook Add-in Installation (O365)
- Send Email to KanBo - Installation (Cloud)
- Send Email to KanBo - Installation (On-Premise)
- Enabling Email a Card Message
- KanBo and Microsoft Power Automate integration: Installation
- KanBo and Microsoft Power Automate Integration: Activation
- Installation of KanBo MyBoard Synchronization with Outlook Calendar and Outlook Tasks
- Installation of the Autodesk BIM Plugin for KanBo
- KanBo and UiPath Integration: Configuration
- Nintex Integration Installation
- KanBo API for Developers
- KanBo External User Groups (Active Directory Integration)
- KanBo Mini Application Installation
- Plugin for Adding Users to KanBo / Sharepoint When They First Enter it
- SharePoint Profiles Synchronization
- SharePoint Site Collection Balancing and Admin Warnings
- Sync Targets
- Installation of the KanBo Teams App
- Setting up BIM Sync as a Webjob
- Configuring KanBo for OData integration in PowerBI Desktop
- Show all articles ( 2 ) Collapse Articles
-
Tips & Tricks
- Configure How Documents Should Be Opened from KanBo
- Customize KanBo Background Images and KanBo Colors
- Disable Sleeping Tabs in Browsers
- Disable/Enable Public Boards Creation
- Find Out the Certificate Expiration Dates On-Premise
- Get KanBo ID
- How to Change the Help URL in Your KanBo
- Import Users to KanBo
- Renew Certificate for KanBo Graph Installation
- Show KanBo Version
- Removing syncing of profile pictures in the Profile Sync job
- Creating and customizing the Profile Sync Webjob
- KanBo configuration for Microsoft Azure Cloud GCC High environment
-
Troubleshooting
- KanBo Error: 401 (On-Premise Installation)
- KanBo Error: 403 (On-Premise Installation)
- KanBo Error: Cannot Open Database
- KanBo Error: User Authentication Postback Failed (On-Premise Installation)
- Migrate Boards between Office 365 Groups
- Replace Expiring Client Secret
- Grant access to logs of an Azure Web App hosted KanBo
Installing and Configuring Elastic Search on Debian
This post is also available in: Deutsch
Prerequisites
For this installation You will need a machine with Debian installed. You
can read on how to prepare a virtual machine on Azure here.
Basic knowledge of using a Linux Terminal might also be needed, as the
whole installation is done without a graphical interface.
Installation
1. Installing Elastic Search and Kibana
- Access Your Linux terminal.
- Add the Elastic public signing key by running:
sudo wget -qO - https://artifacts.elastic.co/GPG-KEY-elasticsearch | sudo gpg --dearmor -o /usr/share/keyrings/elasticsearch-keyring.gpg
sudo apt-get install gnupg
- Run:
- Save the elastic repository with:
- Update Your package information with:
- Install Elastic Search by running:
sudo apt-get install apt-transport-https
.
echo "deb [signed-by=/usr/share/keyrings/elasticsearch-keyring.gpg] <a href="https://artifacts.elastic.co/packages/8.x/apt"> https://artifacts.elastic.co/packages/8.x/apt</a> stable main" | sudo tee /etc/apt/sources.list.d/elastic-8.x.list
.
sudo apt-get update
.
sudo apt-get install elasticsearch
.
During the installation of elasticsearch, something like this should pop up:
- Save the password for the elastic built-in superuser. It will be needed later.
- Install kibana by running:
sudo apt-get install kibana
.
- Run:
- Enable Elastic Search and Kibana by running:
systemctl enable elasticsearch.service
and:systemctl enable kibana.service
.
systemctl daemon-reload
.
2. Checking if Elastic Search is running
- Start Elastic Search by running:
- Check if you can access elastic by going to: https://YOURMACHINEIP:9200, with YOURMACHINEIP being the ip address of Your machine. If You can not access the site, make sure You have the 9200 port open to the public on Azure (in some Linux distributions like Red Hat opening the port inside of the VM might also be needed).
sudo systemctl start elasticsearch.service
.
3. Connecting Elastic Search with Kibana
Kibana is the visual front-end for the Elastic Stack applications. For now, we will need Kibana to set up and configure a user that will be used as a connector between the KanBo and Elastic Search, but in the future, it might get used for visualizations of data inside KanBo. There are two ways to connect the Elastic Search service with the Kibana Service:
- To generate an enrollment token for kibana run:
sudo./usr/share/elasticsearch/bin/elasticsearch-create-enrollment-token -s
kibana
.
- Go to YOURMACHINEIP:5601 (without https).
- Paste the enrollment token inside the window.
- Click “Configure Elastic”.
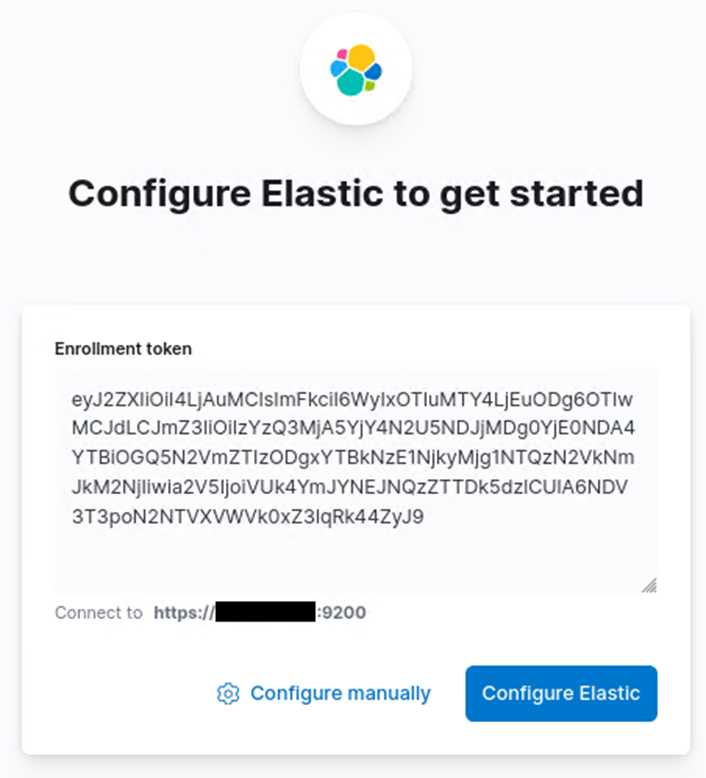
- After that this window will appear:
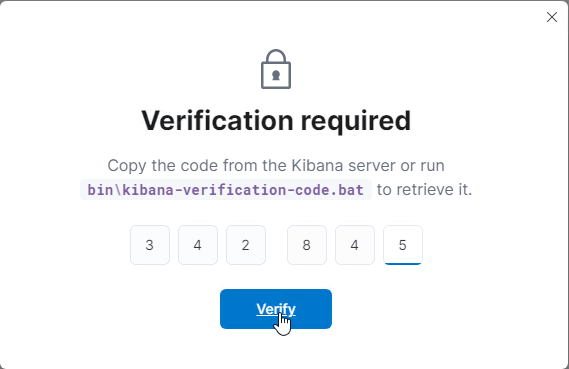
- Run:
sudo ./usr/share/kibana/bin/kibana-verification-code.
A code will be generated:
- Type this code and click “Verify”.
4. Creating a user for KanBo
- Make sure You have this line in Your KanBo web.config:
- Save Your web.config.
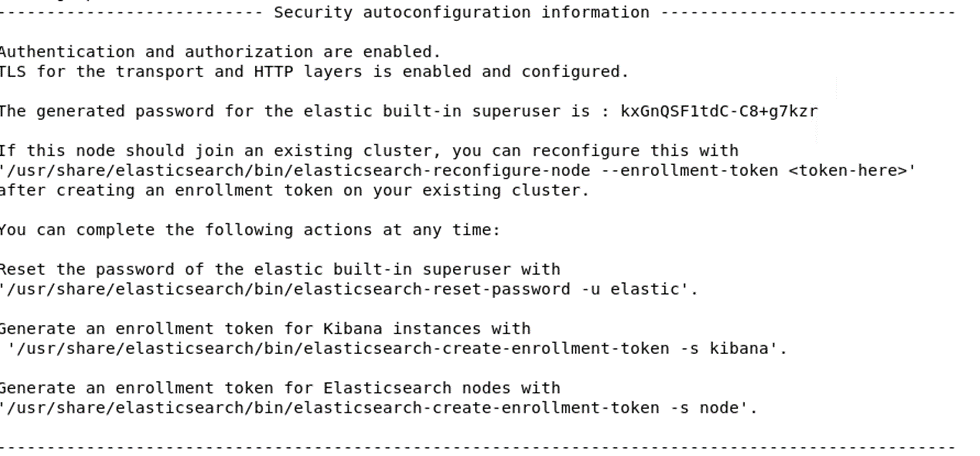
- Open Kibana and login with the username “elastic” and use the password of the Elastic build-in superuser from “Installing Elastic Search and Kibana”.
<elastic key=”55a42c0f7fc8e9444ba6e22370d8339c”/>
.
The key here is the encryption key and is a random String of min. 30
characters. This key will not be used anywhere in the configuration and is
used to encrypt the communication between KanBo and elastic as additional
layer of security.
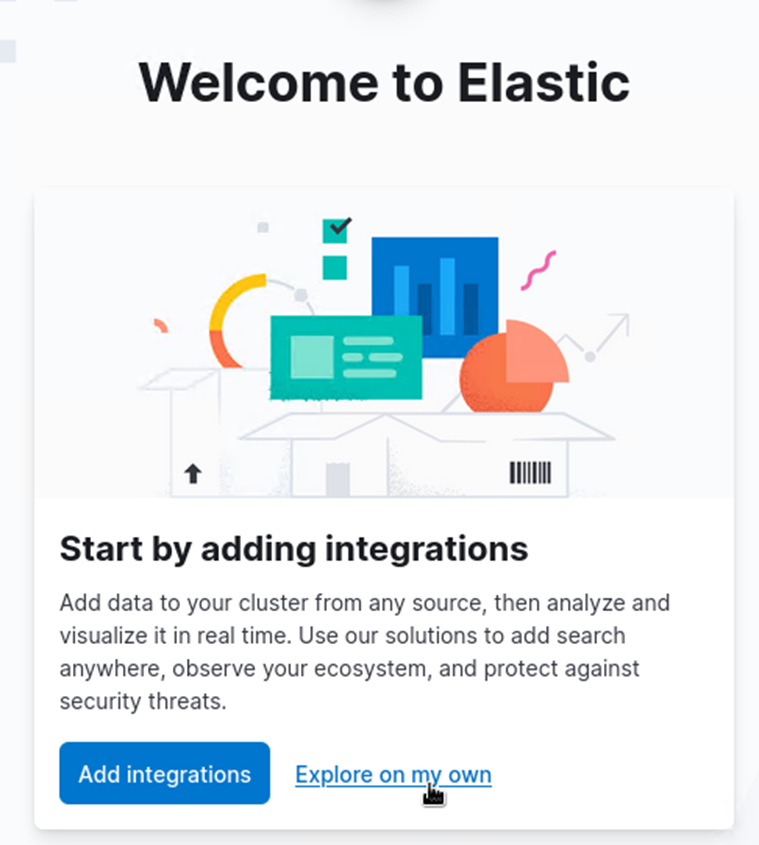
- When this window appears, click “Explore on my own”.
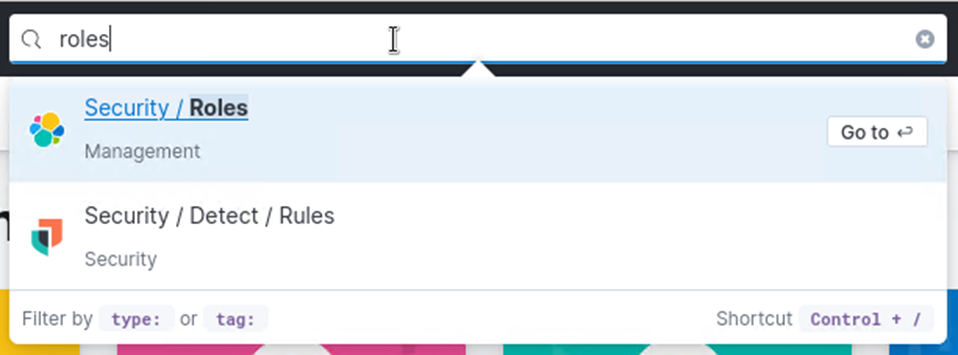
- In the search bar at the top of the site, search for “Roles” and select it by “Go to”.
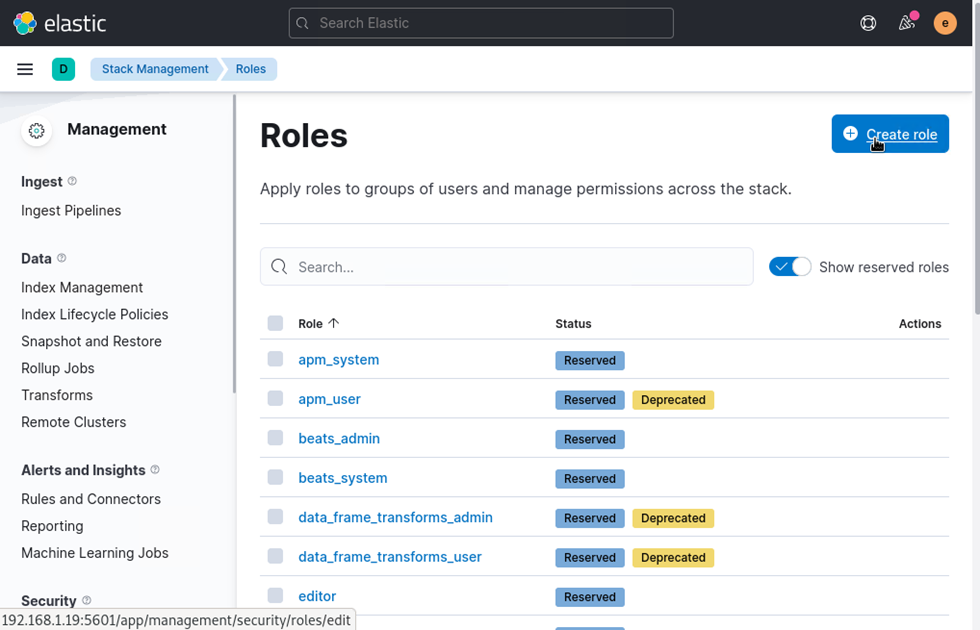
- After that, click on “Create role”.
- In the search bar at the top of the site, search for “Roles” and select it by “Go to".
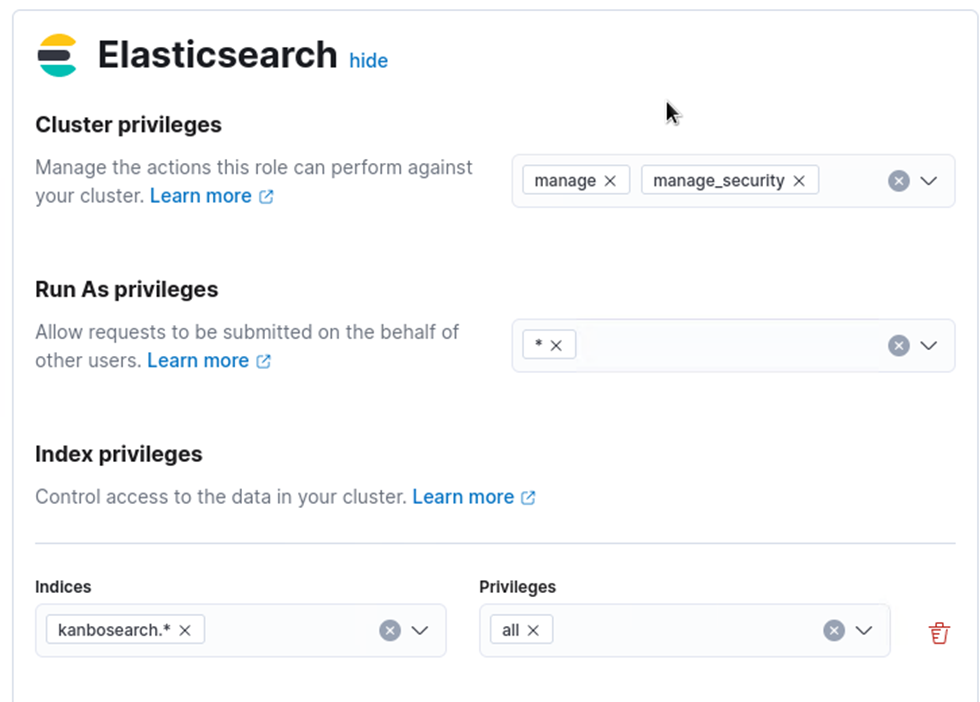
- Then configure these options the same way they are configured in the
screenshot.
- Cluster privileges: manage , manage_security
- Run As privileges: *
- Indices: kanbosearch.*
- Privileges: all
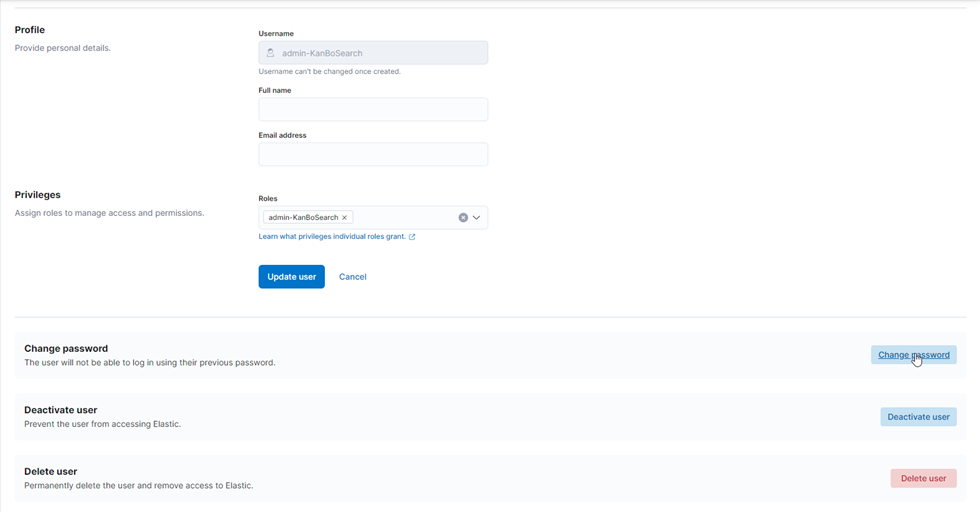
- After creating a role, search for “Users” in the top bar and select “Go to".
- And create a user in this fashion:
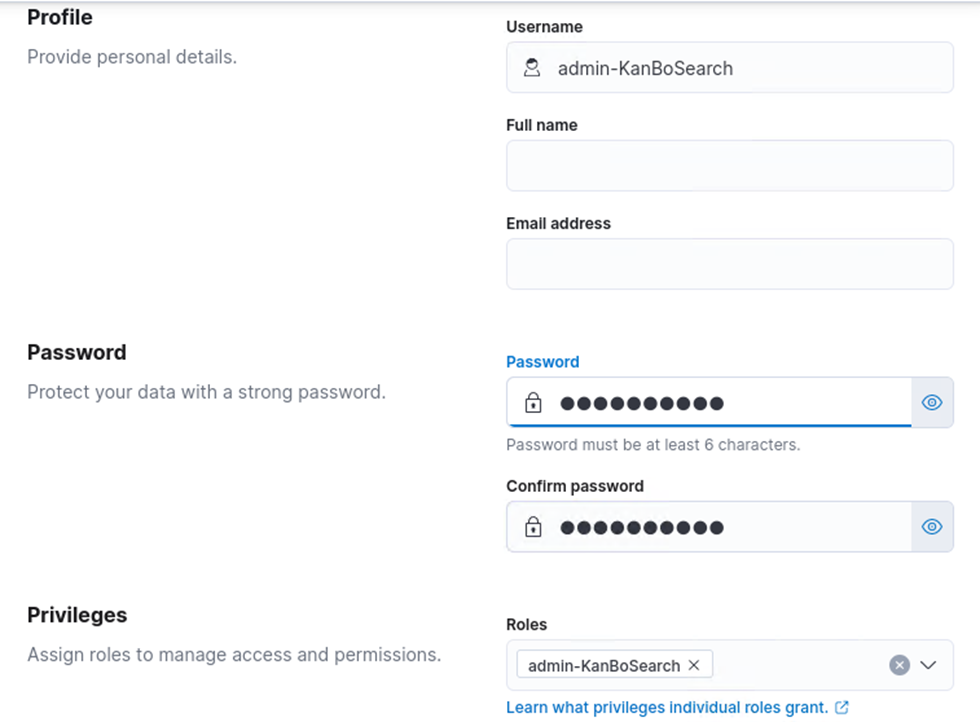
It is good practice to have the same username as the role name. The password is not generated and is set by you.
- For the “roles” section, select the role created in the step before: “admin-KanBoSearch”.
- Save the username and password somewhere for later.
- Stop Kibana by running:
sudo systemctl stop kibana.service
, as
it is not needed for now.5. Connecting KanBo with Elastic Search
- Go to KanBo Setup (https://yourkanbo.com/setup), show advanced setup and click on Elastic.
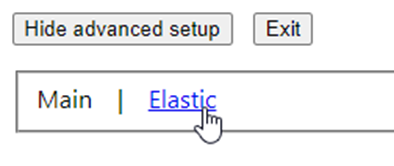
- If the ”Elastic” option does not appear, restart the KanBo and try again.
-
The input for the boxes in the “connection” section should be:
Url: https://YOURMACHINEIP:9200.
Replace YOURMACHINEIP with the ip address of Your Elastic Search VM. The 9200 port is the port that Elastic search runs on. - User: The Username from “Creating a user for KanBo”, step 8
- Password: The password from “Creating a user for KanBo”, step 8
- Tenant name: kanbosearch
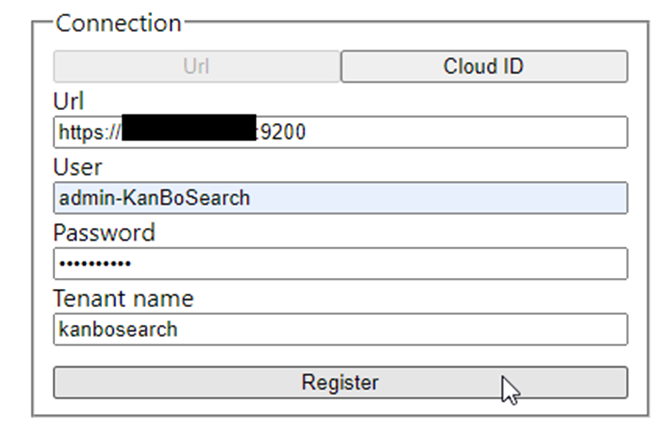
- Click on register and Your KanBo will be connected to the Elastic Search service.
- Index all your data by choosing “All”, in the “Data import” section, ticking the “clean” box and clicking on “Execute”.
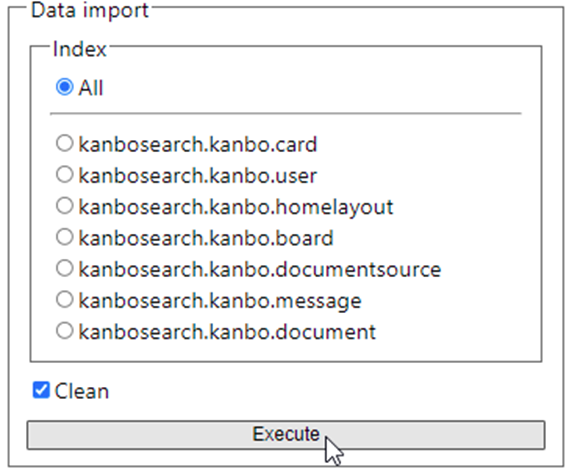
Wait until Elastic indexed everything.
- Restart Your KanBo using IIS (stop / Start KanBo Pool).
- Your KanBo now uses Elastic Search!
Troubleshooting
Failed registering elastic connection: Elastic ping failed.
This error appears whenever any of the input in the “connection” section are incorrect, (not just the URL), or if KanBo cannot connect to the specified IP. Please, make sure that:
- The url starts with https://, the machine ip is correct and is followed by “:9200” at the end.
- The Username and Password are correct.
- The tenant name doesn’t include the “.*” part that was present inside the Indices of a role we have created in Kibana
- In case the Elastic Search service is not hosted on the same machine as KanBo, make sure that this URL is accessible from the KanBo machine.
Check if the user is configured properly in Kibana
- Start Kibana, go to the Kibana URL and log in.
- Go to roles and click on the role you created.
- Make sure that the Cluster privileges, Run As privileges, Indices and Privileges are configured accordingly to the previous steps. Also make sure that indices end with “.*”.
- Go to Users and click on the user you created.
- Make sure that the correct role is assigned to this user.
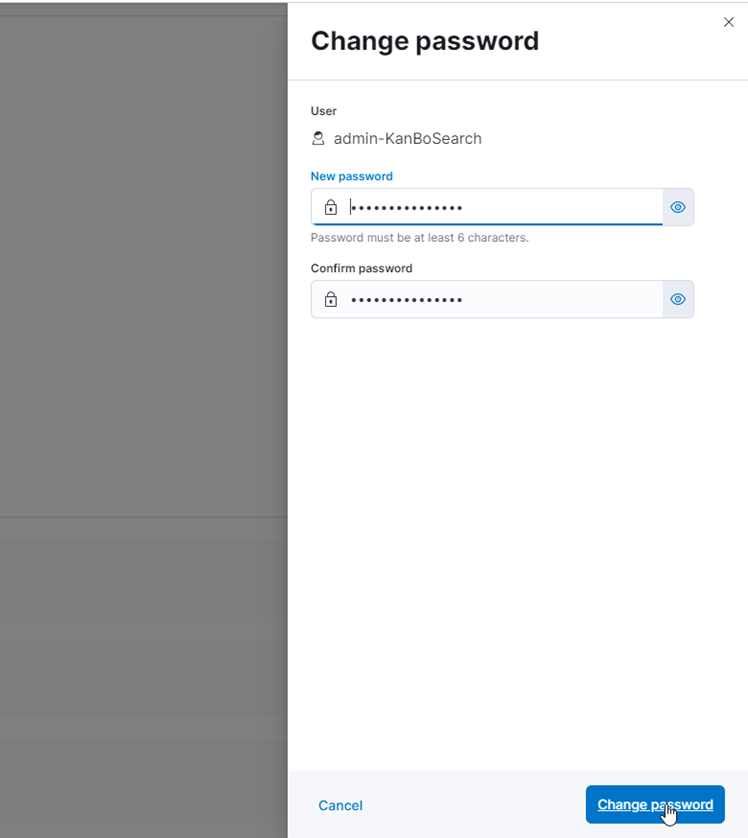
- If You are unsure about the password, you can reset it by clicking “change password”.
Open ports inside of the Machine
It is possible that the 9200 port is blocked by the firewall inside of the
VM (and if You have a VM hosted on Azure, the port might also have not been
enabled inside of the VM’s Networking setting, please refer to the article
about preparing the VM on Azure) . To open the port on a Debian VM, run
sudo iptables -I INPUT 1 -p tcp --dport 9200 -j ACCEPT
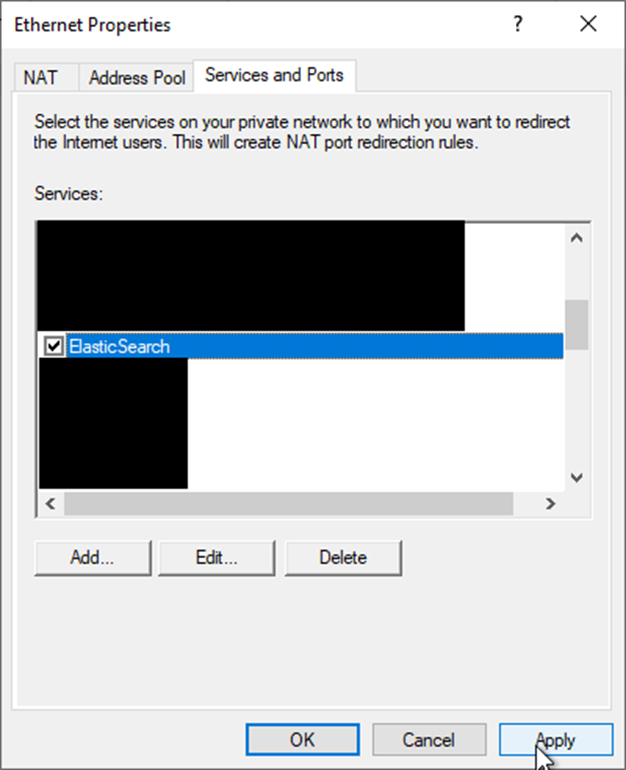
Connecting to Elastic Search hosted on a Hyper-V Virtual Machine
If You decided to host Your Elastic Search virtual machine on Hyper-V, Your host machine needs to reroute traffic to the machine’s port to a VM’s port. To do that:
- Open Routing and Remote Access.
- Double click on “Ethernet”.
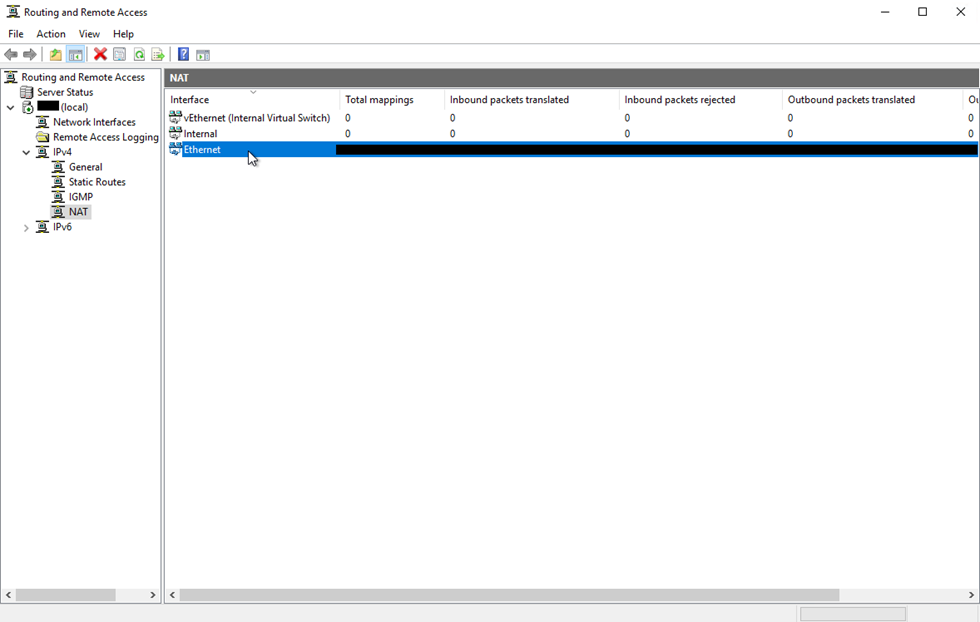
- Head to “Services and Ports” and click “Add”.
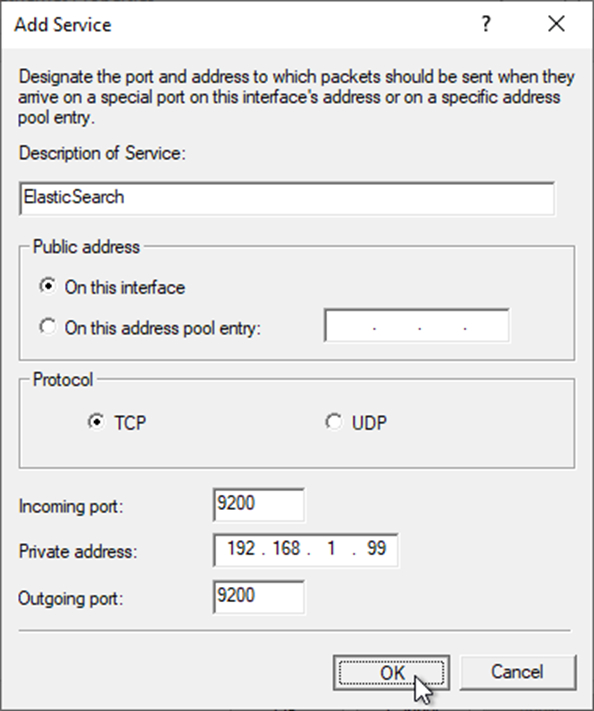
- Add a description (for example “ElasticSearch”), keep “On this interface” and “TCP” protocol selected. In incoming port, type “9200”. In private address type in the IP address of Your VM, and in outgoing port type in 9200 (the port that Elastic Search is using) and click OK.
- After that is done, click “Apply” and now You should be able to connect to Elastic Search hosted on Your Hyper-V virtual machine.
Was this article helpful?
Please, contact us if you have any additional questions.