KanBo External User Groups (Active Directory Integration)
<security-group-sync-source.active-directory />

2. Go to the wwwroot folder and check if you have the AD sync plugin.

Configuration while launching Job Host as a standalone app
You can configure and launch Job Host as a standalone app on your Virtual Machine. Job Host will let you import AD users automatically by configuring the recurrent launch in the Task Scheduler.
In such scenario, you will have the whole control about timing of launching of the application and you can use the right account to launch it (i.e. the one connected to the right AD).
While launching a Job Host as a standalone app, you will be also sure that nothing would stop or disrupt your application from performing it's tasks.
1.Open the extracted KanBo package.
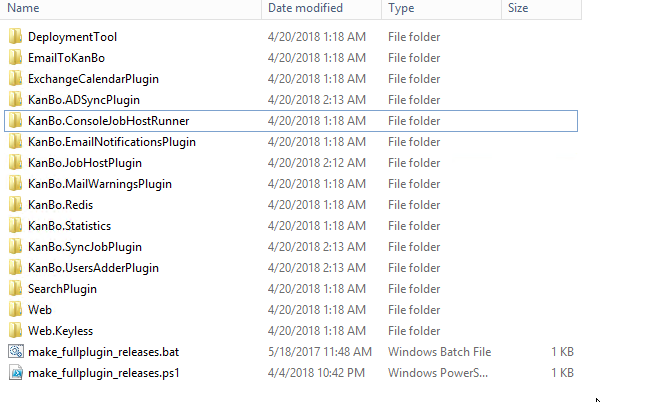
2. Move dll files from folder KanBo.ADSyncPlugin and KanBo.JobHostPlugin and KanBo.UsersAdderPlugin into Kanbo.ConsoleJobHostRunner.
3. Add KanBo.ConsoleJobHostRunner folder on your C disc or to any specific
directory.

4. Open the KanBo.ConsoleJobHostRunner.exe.config

5. Start editing it. Firsly, enter your KanBo database connection string (you might copy it from the KanBo web.config).

6. Generate a pair of certificates for the communication purposes. Here's how to do that:
Go to the IIS Server Manager, click on your server and choose Server Certificates. From the menu on the right side choose “Create self-singed certificate”, pick a name for your certificate and follow the next steps to create it. After the certificate has been created save it to a file by following these steps:
- Select -> Click on “Export” -> Follow the steps to save it as a .pfx file in a choosen location (we will use the location later when configuring the app)
- Select -> Click on “View” -> Details -> Copy to file -> Save it as a .cer file in the same location as the .pfx file
- Install certificate to LocalMachine store (DoubleClick it) . Ensure certificate exist under Personal tree using Manage computer certificates (certlm).
If you do not wish to create a Self-signed certificate, you can use this manual to generate certificates using your corporate CA - Creating a pair of authenticating certificates in KanBo.
7. Go to your KanBo directory and add information about certificate in the authentication section.
<auth.app issuer="remote">
<signature algo="rs256">
<cert type="X509SignerFromStore" storename="My"
storelocation="CurrentUser/LocalMachine" key="Thumbprint"
value="{THUMPRINT}" validonly="false" />
</signature>
<mapper type="service"
name="remote service"
roles="service security-group-sync-source users-adder" />
</auth.app>
8. Switch to editing KanBo.ConsoleJobHostRunner.exe.config.
9. Create a job for synchronizing AD groups into KanBo.
<job-host name="external-groups-pipeline" options="log_time(debug) catch">
    <job name="external-groups-job" />

<job.security-group-sync-source name="external-groups-job" />
<!-- this adds the actual source of users, another plugins can add custom types -->
<security-group-sync-source.active-directory />
10. Create a job for adding users from AD to KanBo from the previously specified OU. Fill in the path field with your LDAP Query and adjust it to suit your needs.
<job-host name="external-groups-pipeline" options="log_time(debug) catch">
    <job name="external-groups-job">
</job-host>

        <source type="ad"
path="LDAP://OU=KanBo,DC=DEVELOPER,DC=LOCAL"
filter="(&(objectClass=user)(whenChanged>={yearsago,1}))" />
</job.users-adder>

In case you are using a special (different) domain for your AD, adjust also the domain field after <source type="ad".
domain="{YOUR DOMAIN}"
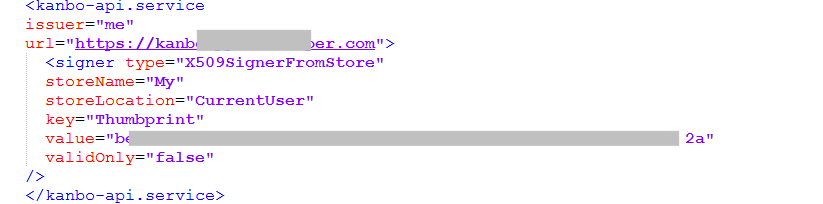
11.Fill in the following values with your certificate information (the certificate's thumbprint).
     <kanbo-api.service
issuer="me"
url="https://kanboapp.example.org:8443">

        <signer type="X509SignerFromStore"
storename="My"
storelocation="CurrentUser/LocalMachine"
key="Thumbprint" value="{THUMBPRINT}"
validonly="false" />
     </kanbo-api.service>
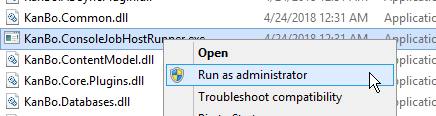
12. Now you can run KanBo.ConsoleJobHostRunner.exe (run it as administrator in CMD) to check if the job is running correctly and no errors occur.
Create a task in Task Scheduler for Ad sync component
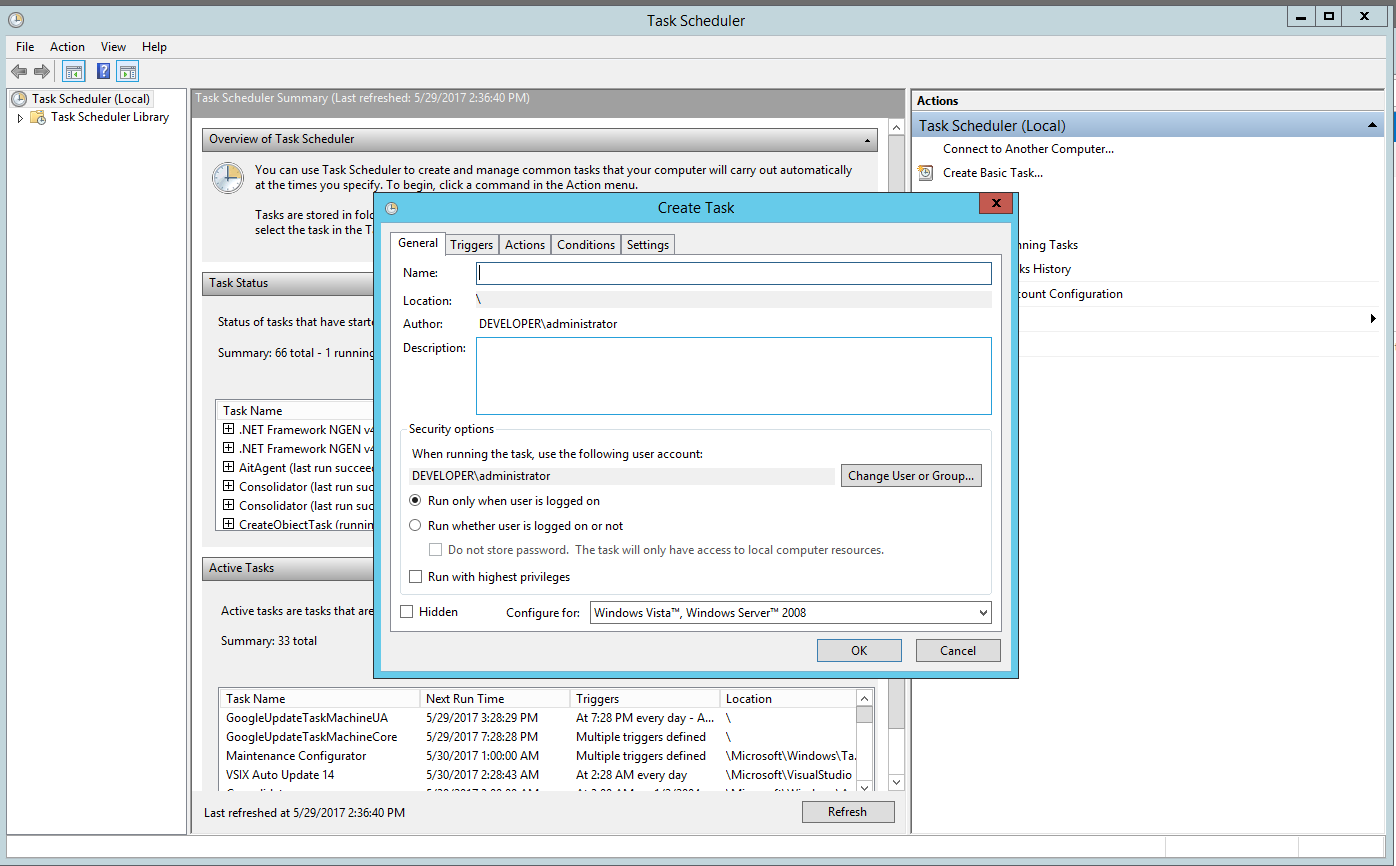
13. Go to the Task Scheduler. Click on Create Task.
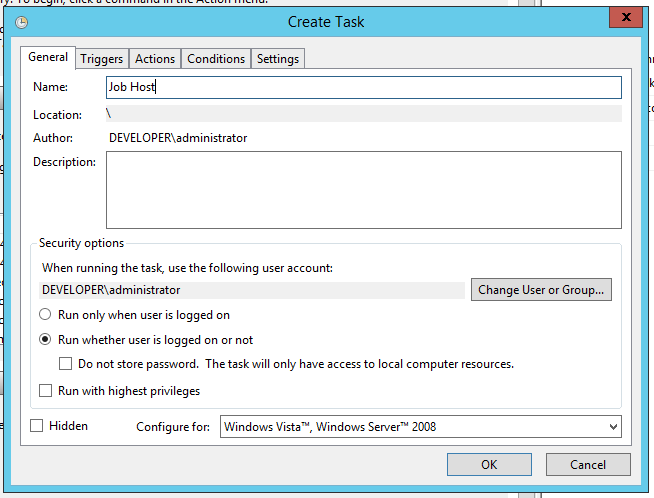
14.Set a name, for example "Job Host".
- Select "Run only when user is logged or not".
- Save these changes.
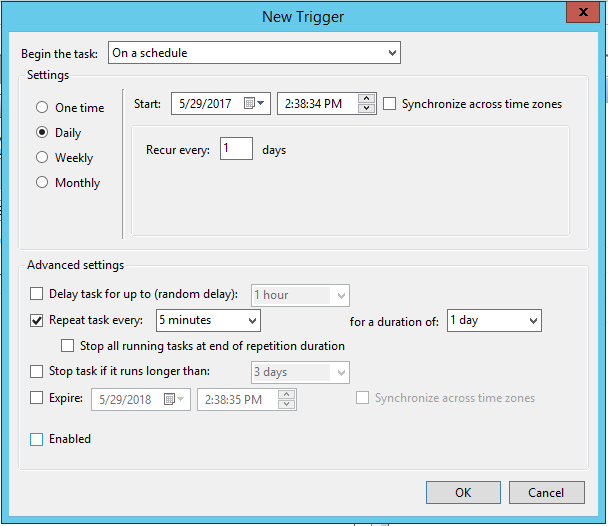
15. Go to Triggers section.
- Click on "New" button.
- Select "Daily" and set Repeat Task every 5 minutes (or a higher number of minutes - depending how efficient you would like your Job to perform its tasks of importing AD users).
- Save these changes.
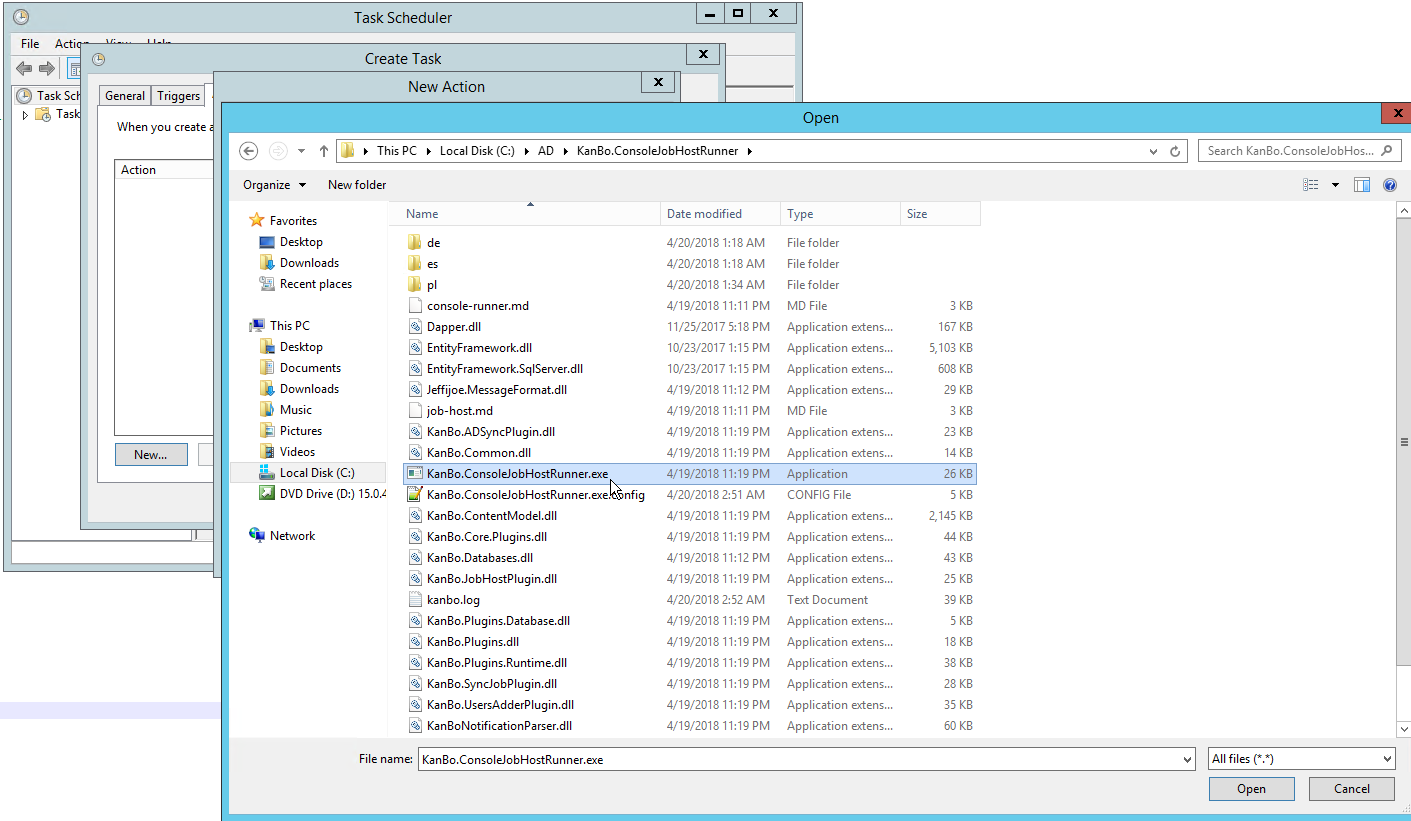
16. Go to the Actions section.
- Select Action "Start a Program".
- Click on Browser and select the KanBo.ConsoleJobHostRunner.exe.
- Save these changes.
17. See if task is running correctly in Task Scheduler.

Adding an External User Group to KanBo
When the connection and plugins are fully configured, you can start adding your Active Directory Group as a KanBo External Group.
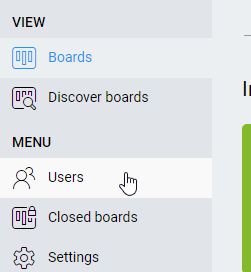
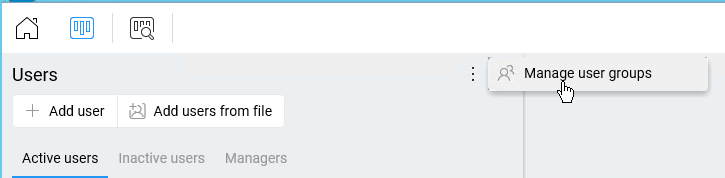
1. Enter your KanBo. Go to the Users section.
2. Now select the more button (three dots) and select Manage User Groups.
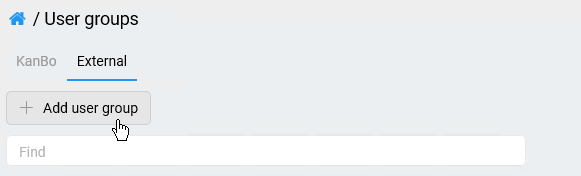
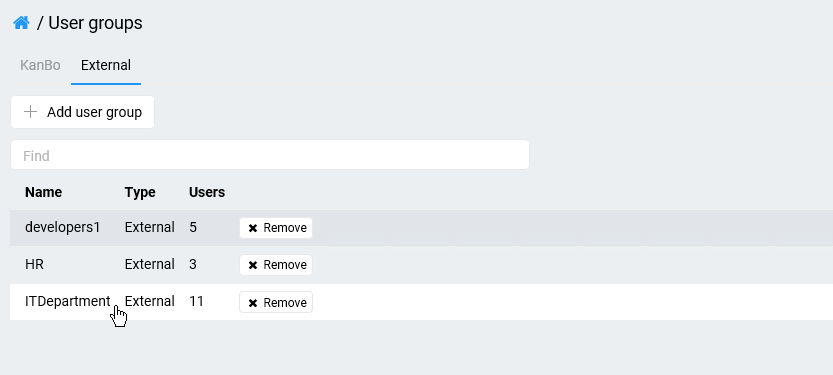
3. Click on External in User Groups section. While you enter it, you can now also click on + Add User Groups
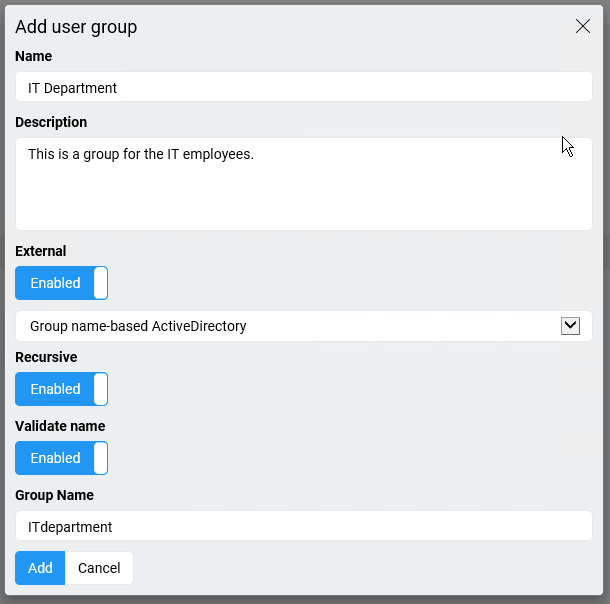
4. A pop-up will appear. Enter the following data.
- Name - name of your User Group
- Description - a short description of this Group
- External - click on Enable.
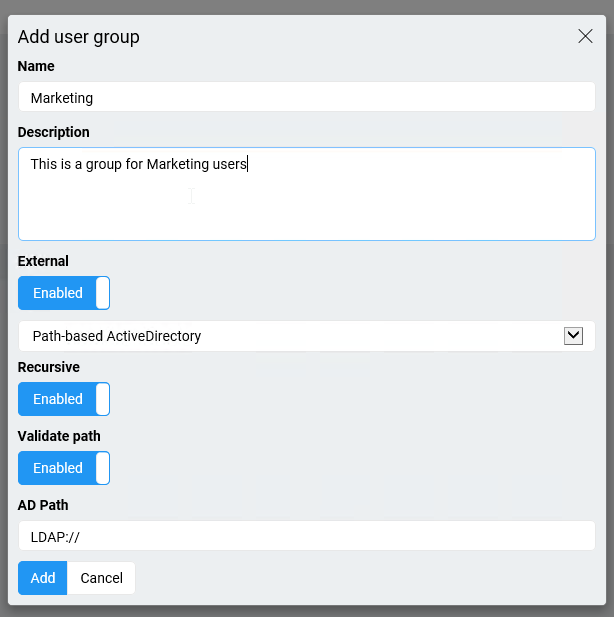
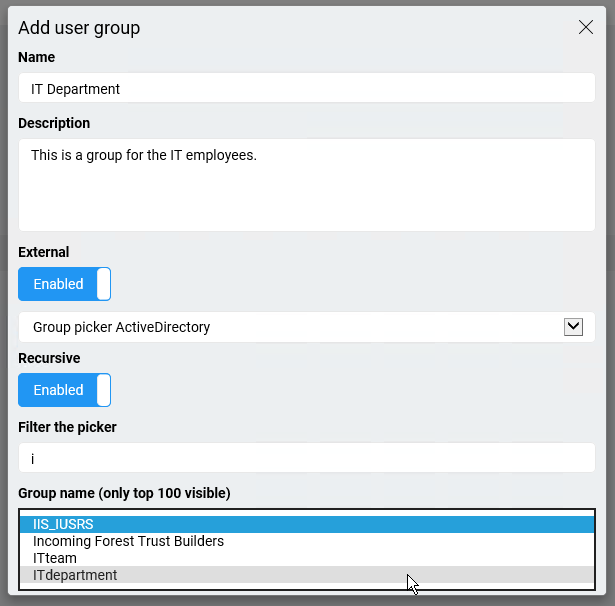
You can use three types from a Picker to find and connect your AD Group:
1. Path-based Active Directory - enter a path to your AD Group by modifying the following line with your data : LDAP://CN=sub,OU=two,OU=KanBo,DC=DEVELOPER,DC=local.
Select Validate: Enabled to make sure the path or AD Group's name is proper.
2. Group name-based - enter here a name of your AD Group.
3. Group picker - choose your Group by name from the picker - please keep in mind that the picker will show you only 100 results. You can search for your group by name using i.e. " k* " to get a list of Groups with a name starting from "k" letter.
Managing the User Group
After adding an External User Group, you will be redirected to this User Group's page. You can also enter your Group by entering Users section on the Landing Page -> Users ->Manage User Groups -> External and choosing your Group.
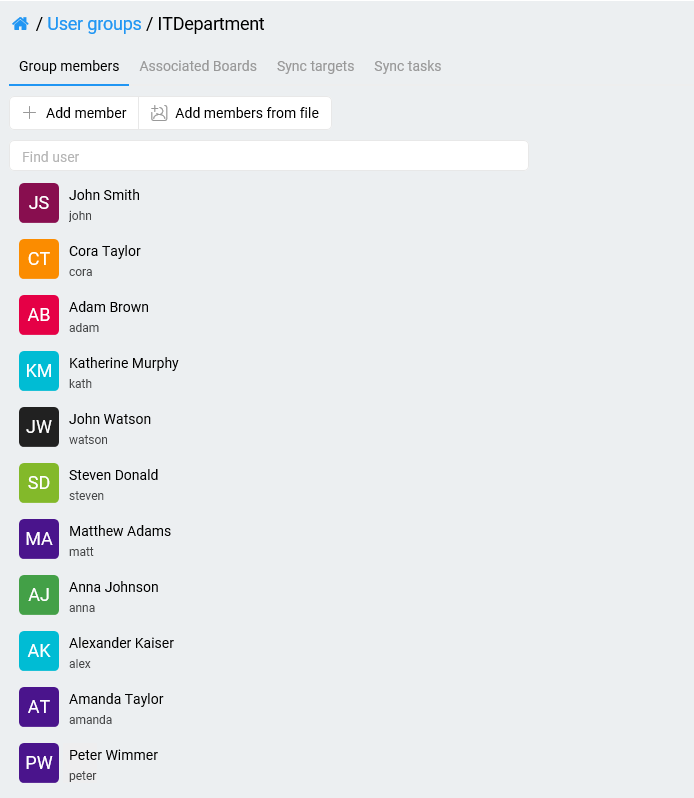
In this section you can enter 4 sub-sections:
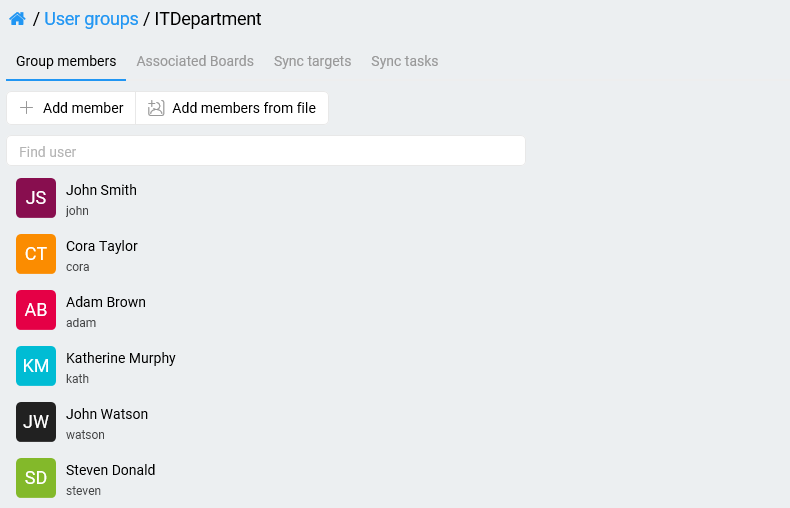
- Group Members - here you can see all users added to a User Groups and manage the group.
Simply click on
 button to see User's Profile, MyBoard or to Remove User from Group.
 button to see User's Profile, MyBoard or to Remove User from Group.
When your plugins for the External Groups are fully configured, you can also manage (add or remove) group members from the Active Directory Service. After a synchronization, the whole group will be transferred in it's share to KanBo.
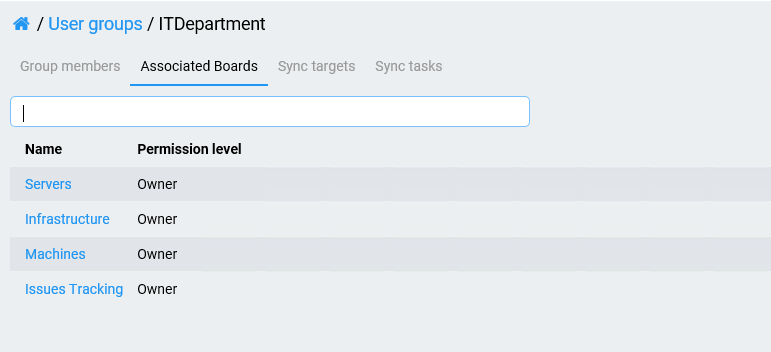
- Associated Boards - here you can see all Boards where this User Group is Added.
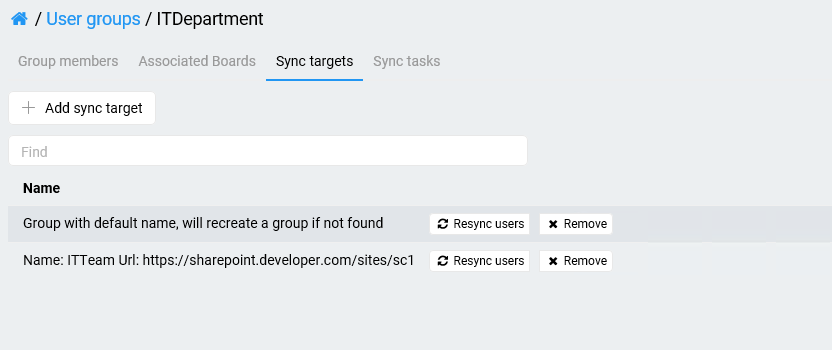
- Sync Targets - here you can Add Sync targets to a Group and also resync them. This will result in a synchronization of users in SharePoint. You can also remove your Sync Targets from this section. Read more here.
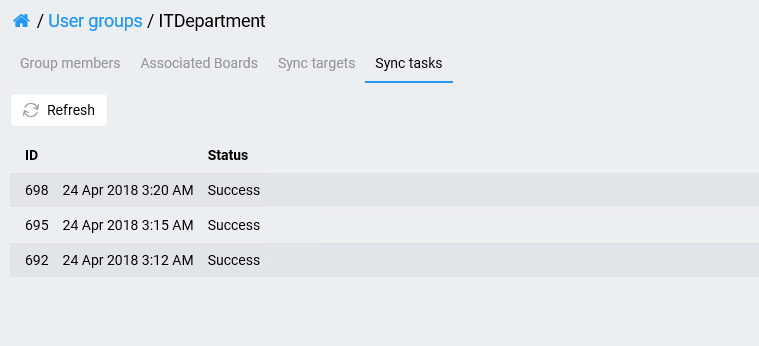
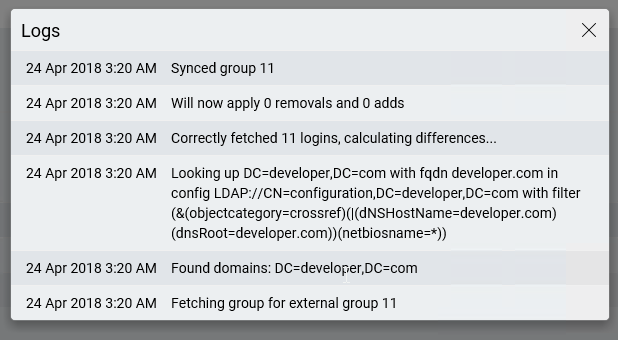
- Sync Tasks - here you can see all Sync Tasks connected to a Group and their dates. When you click on a Task, you will be shown with all logs considering adding Users from AD Group to KanBo External User Group or removing them.
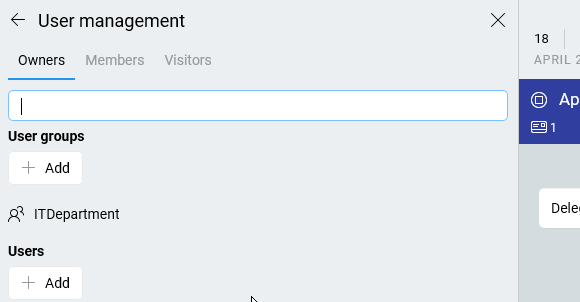
Add a User Group to a Board
Once your Group has been added, you can add a whole group to KanBo Boards at once. Depending in which section you will add your Group, they will be given Board permissions of Board Owners, Members or Visitors.
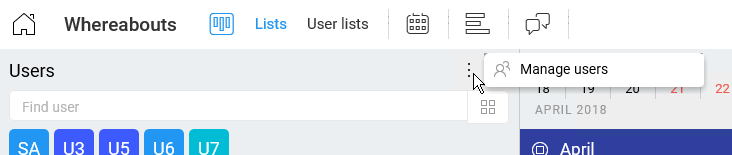
1. Enter a Board where you would like to add an External User Group to. Go to the Users section.
2. Select the more button (three dots) and click on Manage Users.
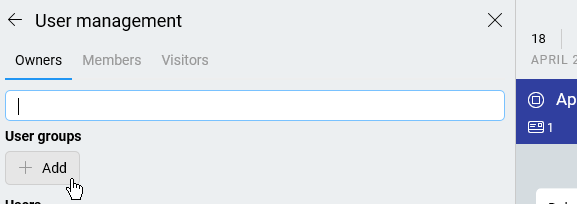
3. Click on User Groups +Add button.
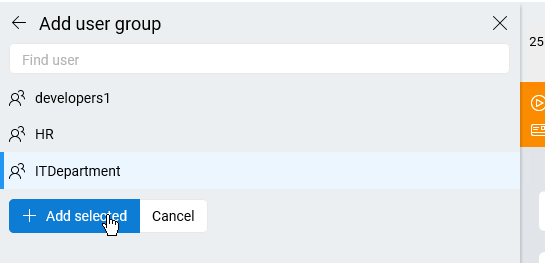
4. Select a Group you would like to add and click on "Add selected" button.
5. Your Group and all it's members have been added to a Board.
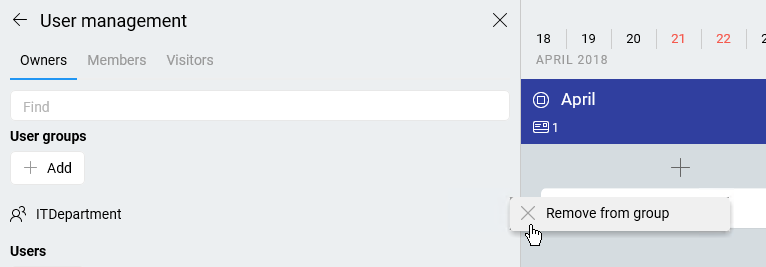
Remove an External Group from a Board
1. Simply enter your Board and click on Users Section.
2. There choose the "Manage users" button. Find your Group in the list. 3. Click on more button (three dots) and select "Remove from Group". Your Group will be removed from this Board.