
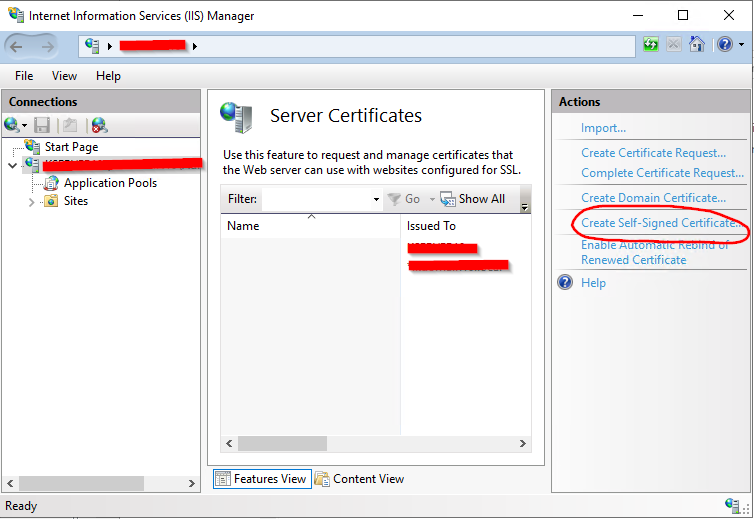
How to Create a X.509 High-Trust Certificate
Table of Contents
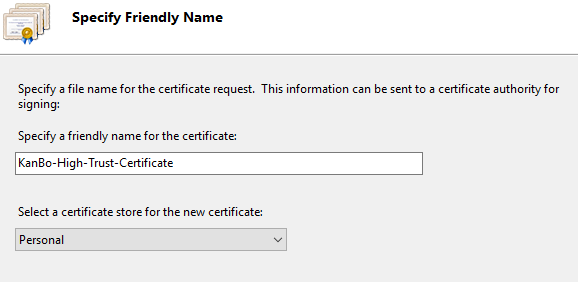
- Specify here a friendly Name, like "KanBo-High-Trust-Certificate" as example and choose "Personal" Certificate Store.
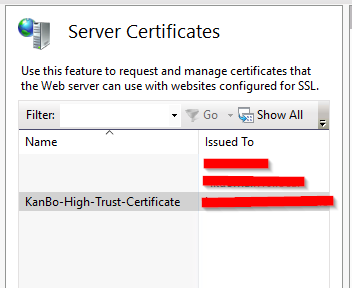
The certificate should be available now in IIS Certificates.
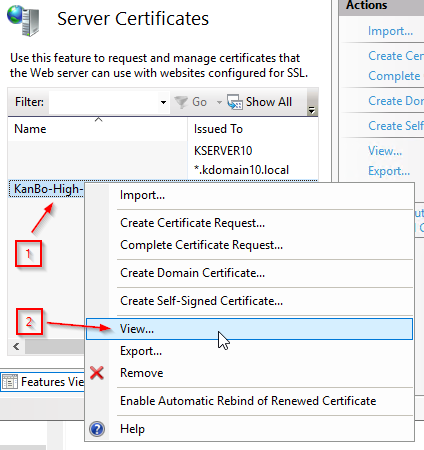
- Right click on the Certificate and then click on View.

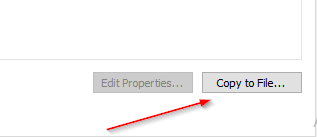
- Click on Details Tab and then on "Copy to File".

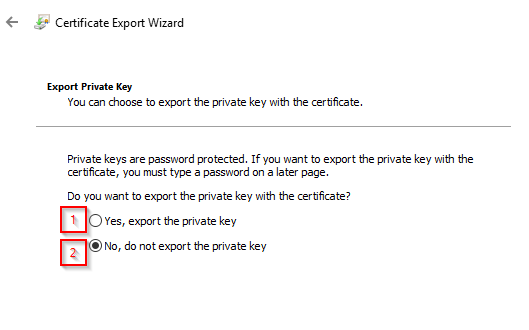
In the next window we have the possibility to choose to export the Certificate or the private Key.
Start with Exporting the Private Key.- Therefore, please click on "Yes, export the private key".
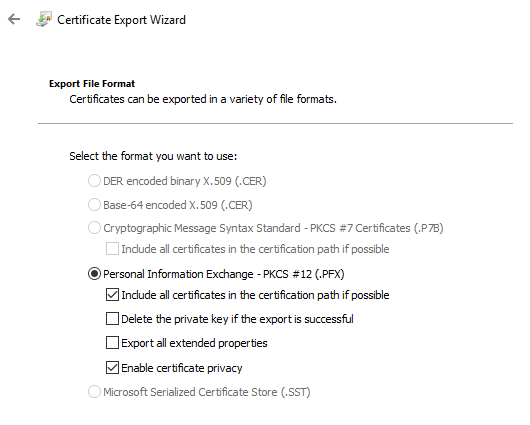
- In the next window, please check the settings like below and click next.
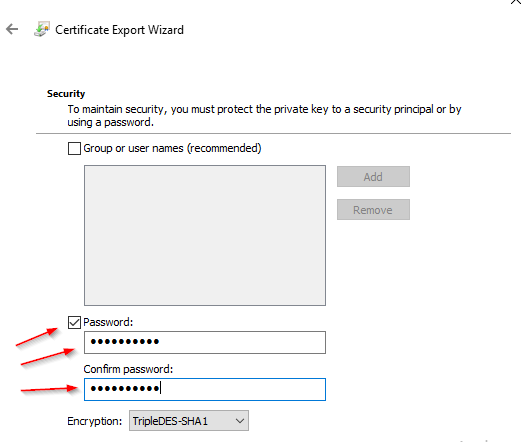
- Click on Password and choose a Password, type it two times in the correct fields and click next.
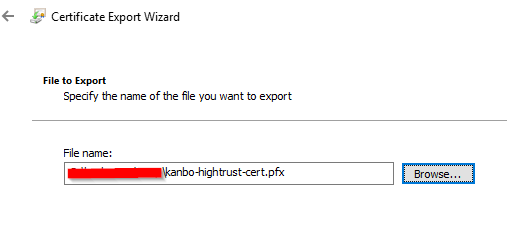
- Choose a name and directory where you want to save it and click next and then finish - you should get then a confirmation that it was successfull.
Now we are going to Export the Certificate.
- Again right click the Certificate in IIS and click on View.
- Click on Copy to File.
- In the next window choose now "No, do not export the private key".

- Click Next and choose the format "DER encoded binary X.509"
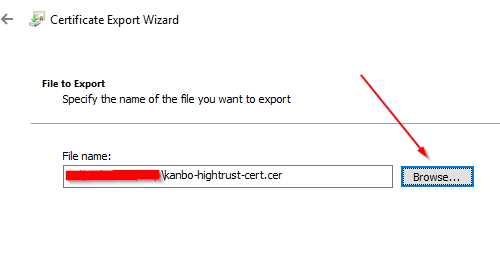
- Click Next and choose a filename and directory where you want to save now the Certificate.
- Click Next and Finish.
You should now have both, the Certificate and also the private key exported.