Send Email to KanBo – Installation (On-Premise)
Table of Contents

1. Creating a Catch-All email address.
You will need to create a Catch-All email account on Exchange server.
- Read how create a Catch-All email address here.
- Read more about Catch-All address and how to create it on Exchange here.
- Create a new account for the Catch-All purpose. Make sure this account has the Exchange license and mailbox.
- Add the custom domain to accepted domains.
2. Creating a SSL certificate.
This is a recommended method for the IIS scenario. Please perform these steps on your Virtual Machine.
- Go to the IIS and double click on Server Certificates.
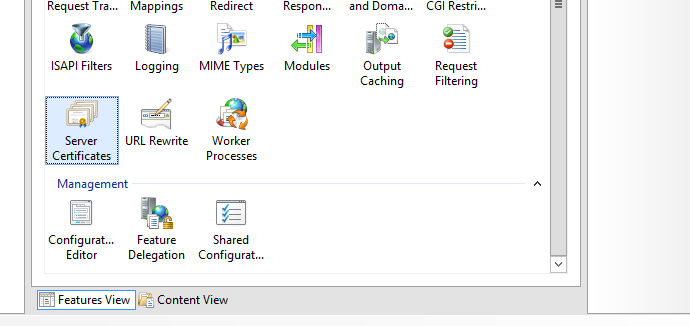
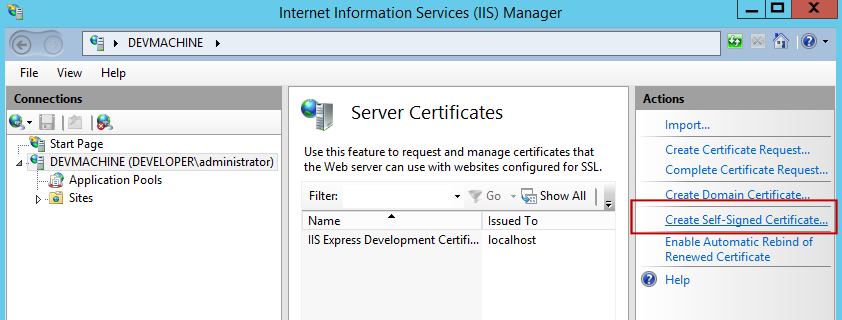
- Now click on Create Self-Signed Certificate.
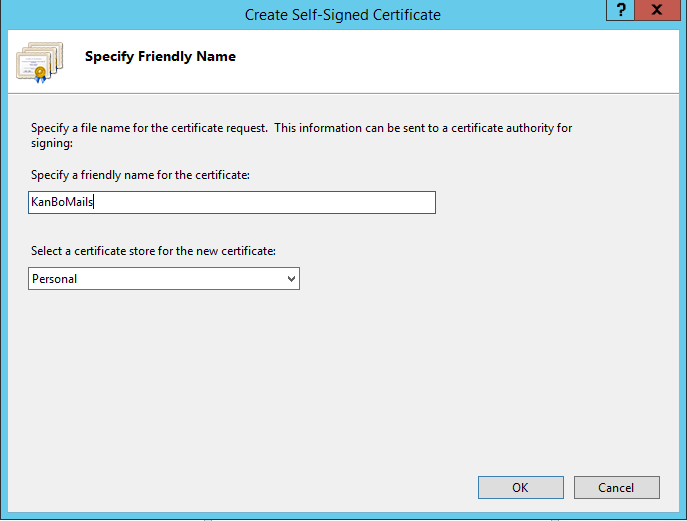
- Specify a friendly name for a certificate and select Personal. Click on OK.
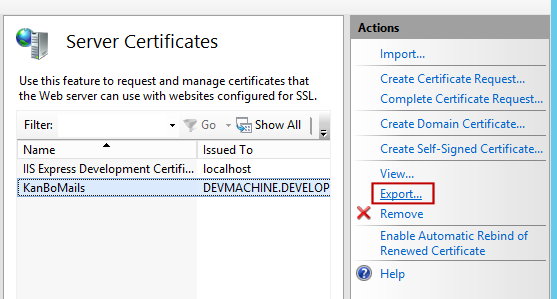
- Select the certificate and select Export.
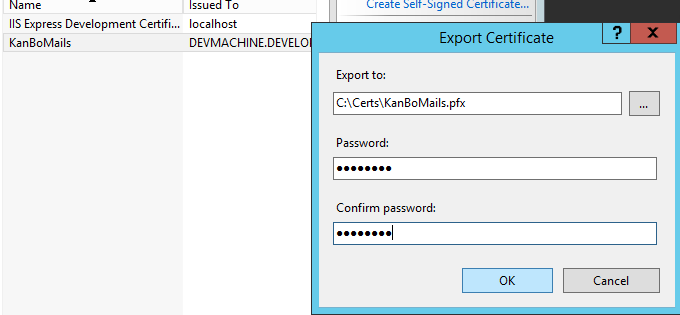
- Select the path and name for the certificate and add new password to it.
3. Changing KanBo appsettings.json
- Move to the location where your KanBo backend is hosted (the KanBo package). Open the appsettings.json in any text editor.
- Add the following code to the "plugins" section and change the path to the certificate.
{
    "type": "auth.app",
    "issuer": "incoming-mails",
    "children": [
     {
      "type": "signature",
      "algo": "rs256",
      "children": [
       [
        "cert",
        {
         "type": "x509-file",
         "file": "C:\\Certs\\mails\\somecert.cer"
        }
       ]
      ]
     },
     [
      "mapper",
      {
       "type": "service",
       "name": "incoming emails",
       "roles": "service"
      }
     ],
     [
      "mapper",
      {
       "type": "user"
      }
     ],
     [
      "mapper",
      {
       "type": "email",
       "roles": "service"
      }
     ],
     [
      "mapper",
      {
       "type": "login"
      }
     ]
    ]
   },
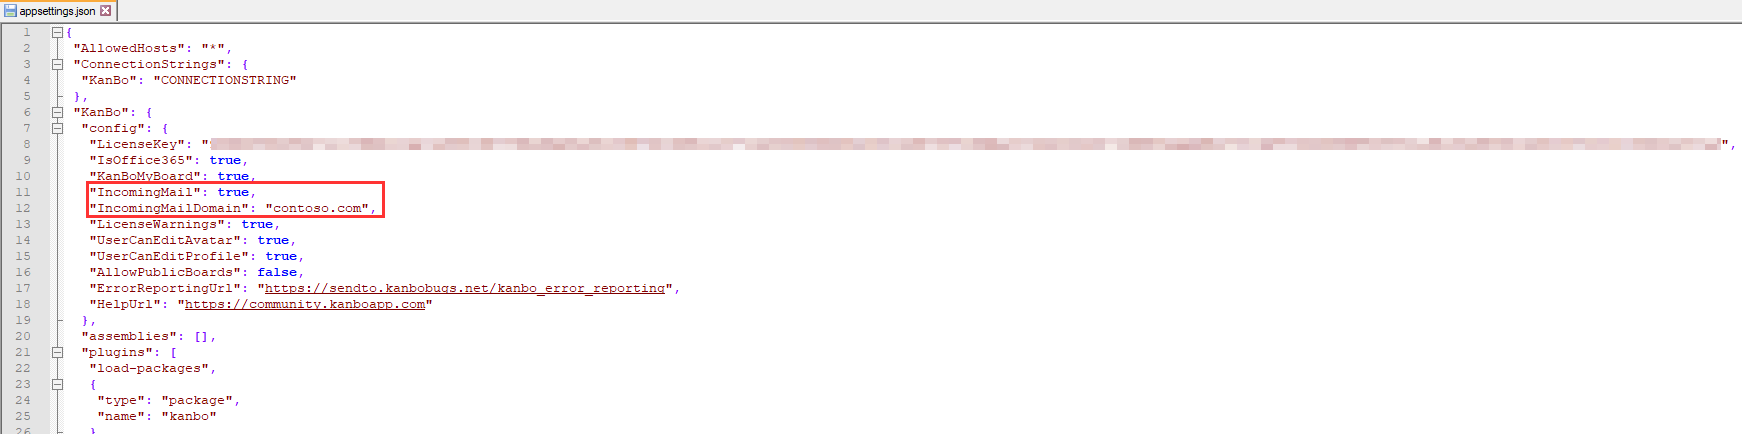
- Set KanBoIncomingMail value to true.
- Set KanBoIncomingMailDomain to your sending domain name - the one on which you have the Catch-All mailbox.
- Save the appsettings.json
"IncomingMail": true,
"IncomingMailDomain": "YourDomain",
<add key="kanbo.max-receivers" value="1" />
4. Configure the Email Tool
- Contact us at support@kanboapp.com to receive a KanBo.JobHost.zip package if you do not have it.
- Once you download the package, unzip it and move it a chosen location. In our case it would be: C:\Email Tool\EmailToKanBo\EmailToKanBo.
- Open your directory and start editing appsettings.json
- In the following section please change the following values:
-
YourCatchAllEmail@domain.com - add here your Catch All email
- Password - add here the Catch-All account's email
- mail.url - server address of your Exchange instance
<add key="mail.type" value="ews-unread" />
<add key="mail.receiver-email" value="YourCatchAllEmail@domain.com"/>
<add key="mail.receiver-password" value="Password"/>
<!-- will autodiscover if empty -->
<add key="mail.url" value="https://some-host-address"/>

- In the next section, adjust the following values:
- CertPath - local path to your certificate,
- Password - your certificate password,
- https://YourKanboAddress - add here your KanBo address
- YourDomain - add here your email domain to which Catch-All address is connected to
<add key="kanbo.api.cert.file" value="CerthPath\CertName.pfx"/>
<add key="kanbo.api.cert.pass" value="Password"/>
<add key="kanbo.api.url" value="https://YourKanBoAddress"/>
<add key="kanbo.incoming-mail-domain" value="YourDomain"/>
- Save the changes.

5. Add a task to the Task Scheduler.
Here is the simple example how to add Email to KanBo Task to the Windows Task Scheduler.
Full manual for Windows Scheduled Tasks you can find in the Microsoft web site: link
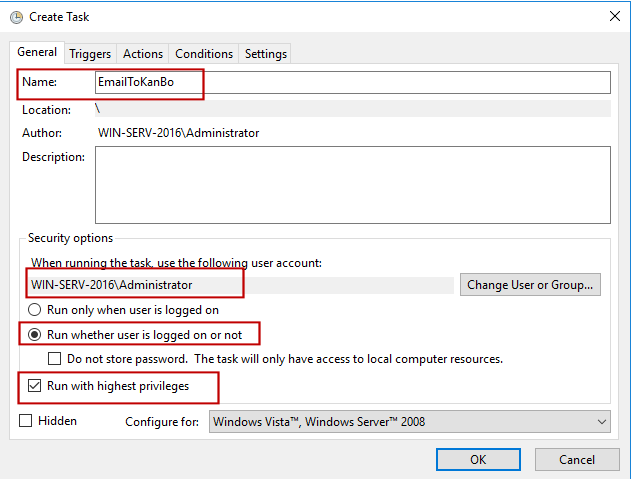
- Execute Task Scheduler. Insert data in the following values:
- Name
- Select user with proper privileges to execute task.
- Select Run whether user is logged on or not
- We also recommend to select Run with highest priviledges.
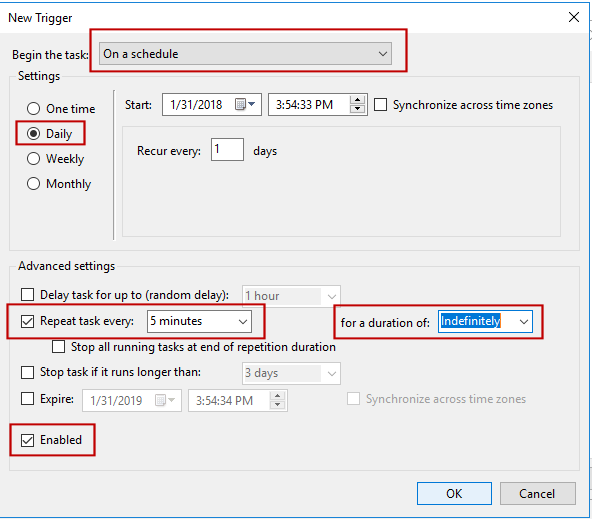
- Select Triggers tab and create a new trigger. Complete the steps as it follows:
- Begin the task - On a Schedule
- Settings: Daily
- Advanced settings: Repeat task every 5 minutes for a duration of Indefinitely (you can of course chose another period of time to suit your needs)
- Select Enabled
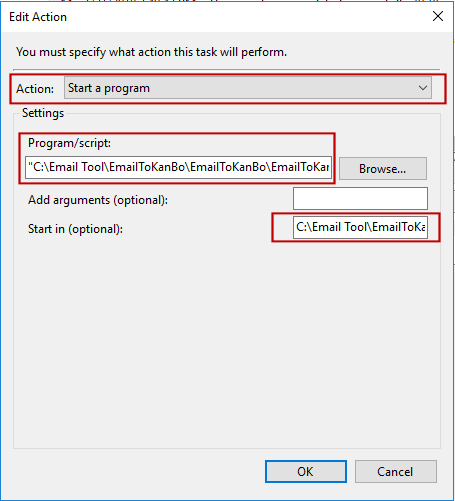
- Select Actions tab and add new action pointing to the EmailToKanBo.Webjob.exe file within the folder where you unpacked the Email To KanBo tool.
- Action: Start a program,
- Program/script - local path to EmailToKanBo.Webjob.exe file (example: C:\Email Tool\EmailToKanBo\EmailToKanBo\EmailToKanBo.Webjob.exe)
- Start in (optional) - add a local path to the folder where EmailToKanBo.Webjob.exe is located (example: C:\Email Tool\EmailToKanBo\EmailToKanBo\)
- After this action is completed, select OK and confirm your administrator credentials.