
Installation of the KanBo Teams App
Grant permissions in Microsoft Entra
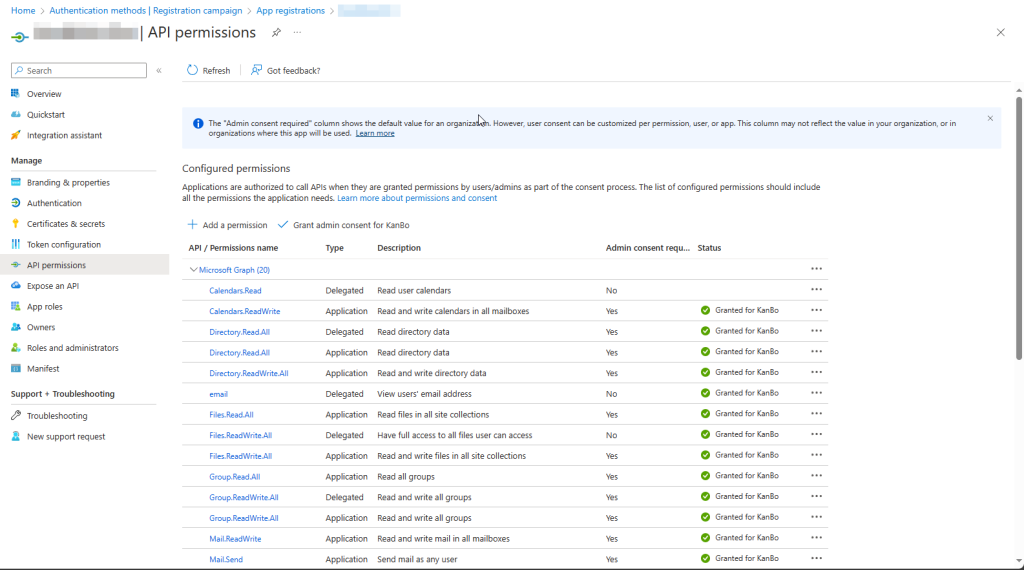
Go to App registrations – Microsoft Entra admin center and find the app registration of Your KanBo and open it, after which, go to “API permissions”.
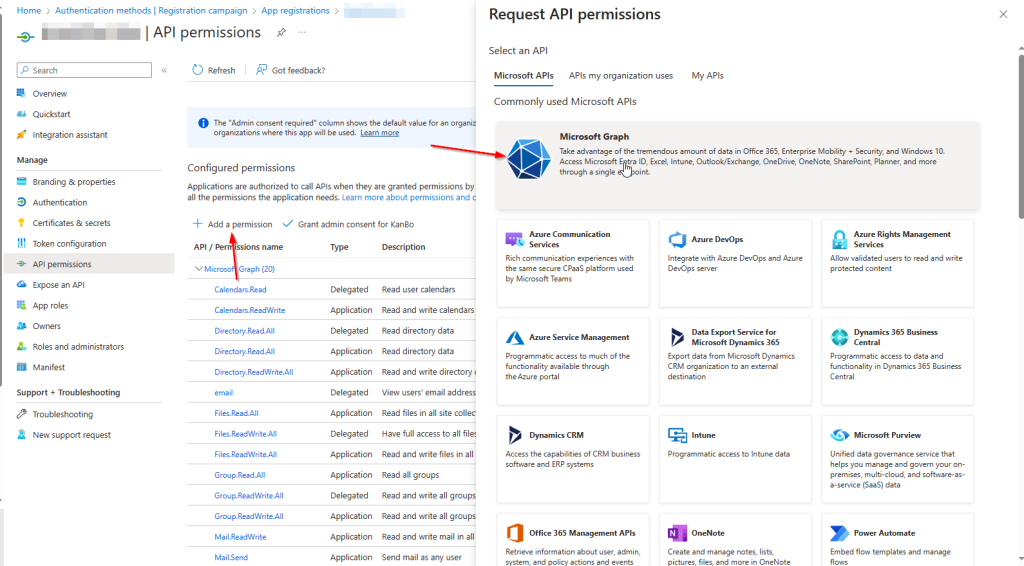
You can add permissions by clicking the “Add a permission” button, the clicking on “Microsoft Graph”
You have an option to choose between delegated permissions and applications permissions
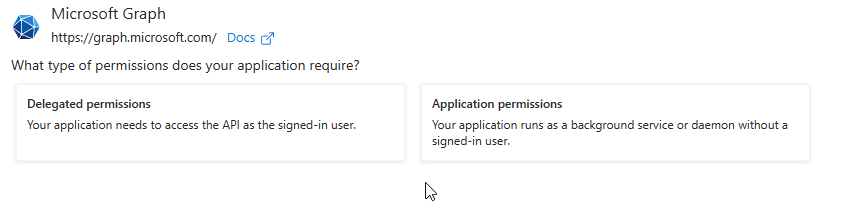
We will need permissions from both of those options.
List of Delegated permissions to be added:
- TeamsActivity.Send
List of Application permissions to be added:
- AppCatalog.Read.All
- TeamsAppInstallation.ReadWriteForUser.All
After adding all required permissions, click on “Grant admin consent for KanBo”

Configuring KanBo App Settings
Go to Your KanBo appsettings.json and paste these lines into the “plugins” section:
{
  "type": "teams-app.selfhosted",
  "children": [
    {
      "type": "env",
      "children": [
        {
          "type": "source",
          "content-path": "PATH-HERE"
        },
        {
          "type": "teams-app",
          "app-name": "KanBo.TeamsApp"
        }
      ]
    }
  ]
},
Your KanBo folder should contain a folder called “KanBo.TeamsAppPlugin”. Copy the path to it and change the PATH-HERE in the code to the path to this folder.
Remember, that the path should either have forward slashes, or double backwards slashes
After that is done, restart Your KanBo App
Teams App setup
After Your KanBo has restarted, go to https://yourkanbourl/plugins/teams-app/setup
You should be presented by a page like this:
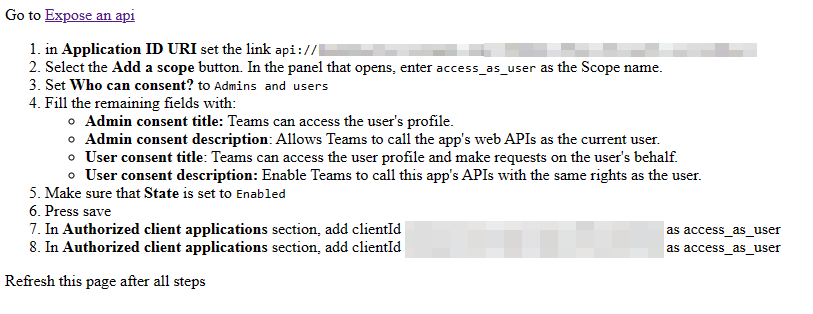
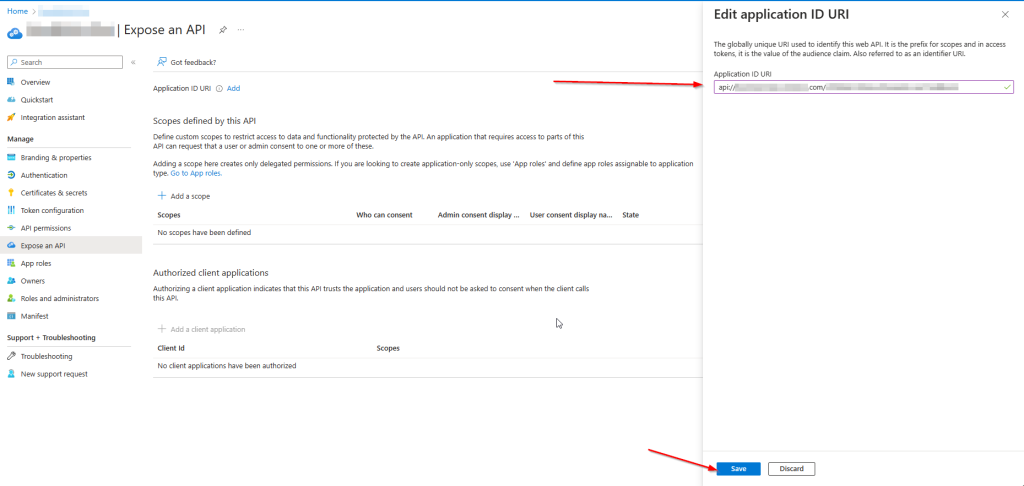
After You click on the “Expose an API” link, add a new Application ID Uri

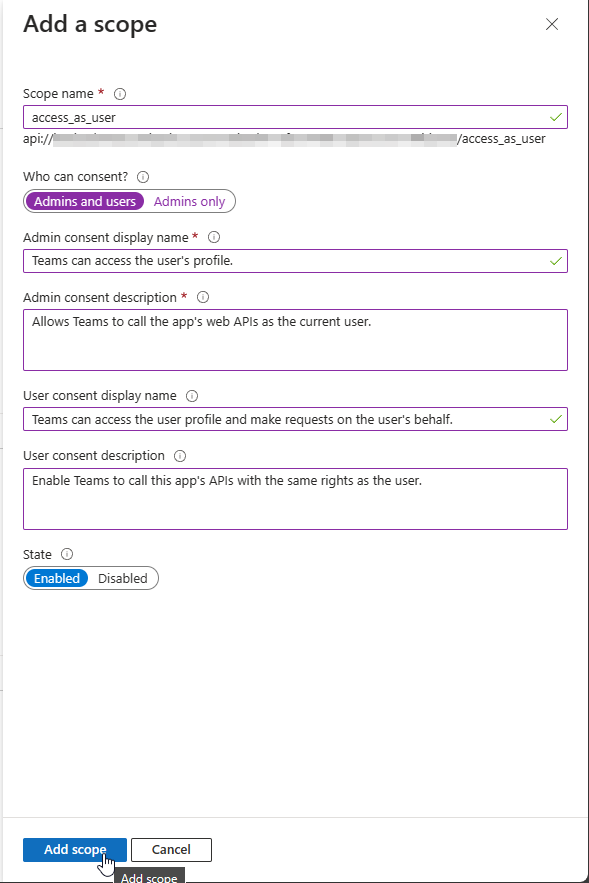
After that, add a New Scope and fill it with the information from the setup page like this:

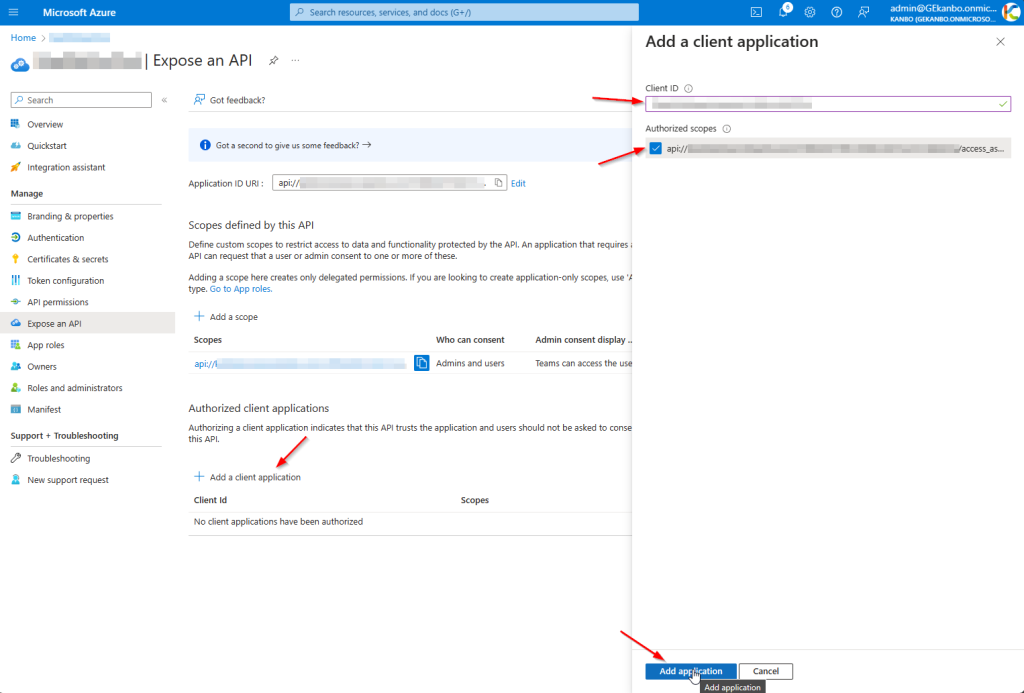
Now, we add the authorized client applications from the setup page
Now go back to the setup page and refresh the page.
If all the previous steps were done correctly, You should be presented with this after refreshing the setup page:

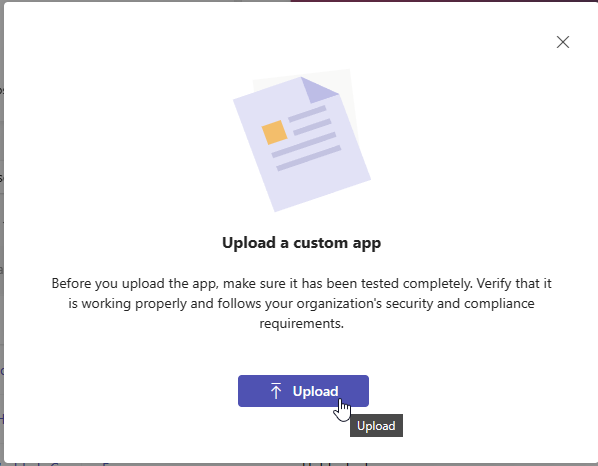
Clicking on “this” will start a direct download of a “KanBo.zip” file. Download it and head to Microsoft Teams admin center
There, click on Teams apps > Manage apps > Actions > Upload new app
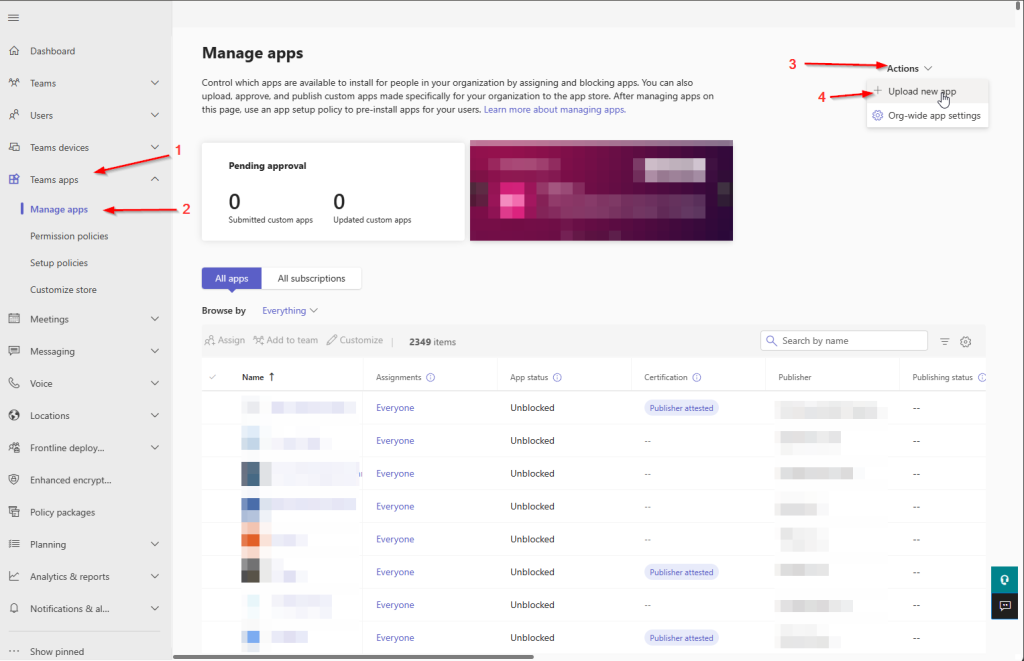
And then, upload Your app:
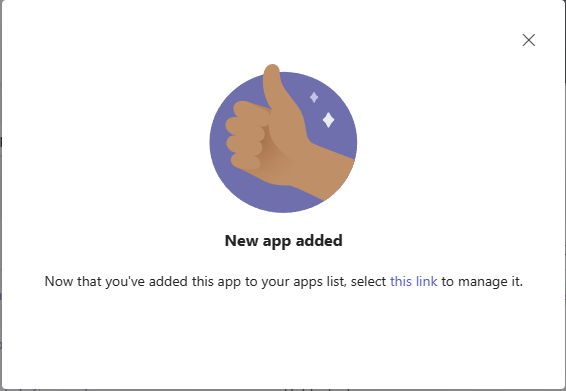
Now You can start using Your KanBo App in Teams!