
-
Learn the Basics
-
- Spaces
- Space Types
- Creating Spaces
- Adding Users to Spaces
- Space Activity Stream
- Following Spaces
- Space Details
- General Space Settings
- Duplicating Spaces
- Renaming Spaces
- Changing the Space Color and Icon
- Removing Users from Spaces
- Closing and Restoring Spaces
- Moving Spaces between Different KanBo Environments
- Deleting Spaces
-
- Creating Cards
- Following Cards
- Scheduling Cards
- Renaming Cards
- Duplicating Cards
- Quick Actions
- Mass Actions
- Copy & Paste
- Archiving Cards
- Adding Cards to MySpace
- Adding Mirror Cards
- Removing Mirror Cards
- Moving Cards between Spaces
- Deleting Cards
- Removing Cards from MySpace
- Hinzufügen von Karten zu "MySpace"
- Entfernen von Karten aus "MySpace"
- Hinzufügen von Status
-
Visualize Work
-
- Space Views
- Creating Space Views
- Personal and Shared Space Views
- Card Grouping
- Filtering Cards
- Display Settings
- Work Progress Calculation
- Grouping Description
- Card Grouping Settings
- Changing the Order of Groupings
- Changing the Order of Space Views
- Deleting Space Views
- Following Card Statuses and Custom Fields
-
-
Collaborate
-
Level Up Your Work
-
Work Securely
-
Integrations
-
- Advanced KanBo Actions in Power Automate
- Creating KanBo Space Attached to Subfolder Created by Power Automate
- Creating Document Folders in Document Libraries Created by KanBo with Power Automate
- Exporting Space Views to Excel
- KanBo and Azure Logic Apps Integration
- Power Automate Integration: Triggers and Actions
- Seamless Import from Microsoft Planner to KanBo
- Synchronizing KanBo with Outlook Calendar
- Using KanBo Outlook App
-
Working with Card Templates
This post is also available in: Deutsch
Learn to use KanBo to its full potential. One of its strengths is the card template.
Together with document folder definition and document templates, you can build the structure of the company’s document library. KanBo allows you to create complex repositories. You can create documents directly from the card level and be sure that they are in the right place.
The following diagram shows a simplified model of using these features. The space can represent a company department with appropriate documents and tasks such as cards.

Some documents have the same structure, so you can create them using templates. The same goes for similar tasks. Why not create an entire workflow template?
Grab a drink and let’s get started!
What do you need to know before the start?
Before you start, find out if you have a document template source added. If you don’t, you need to have the Document Sources role assigned as a user to be able to add it.
There are 5 main steps in this guide:
First: setting
- Create a card template.
- Add document folder definition in the card template.
- Declare allowed document templates.
Second: working
- Create a card using a template.
- Create a new document from the allowed document templates in the document folder.
How to work with card templates?
Card templates are for creating the pattern of the workflow. Use them to your regular work.
Go through the steps needed to build the structure from the example below.

The example shows a card template named Job Posting with a Job Posting Materials document folder inside it. This folder has a Job Offer Template document template added as allowed.
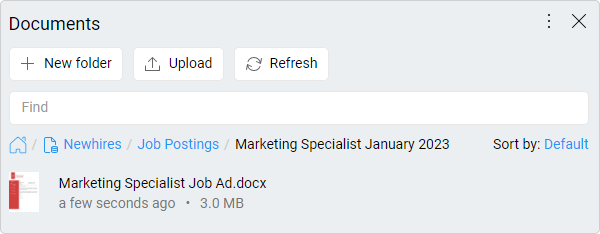
This card template was the base for the card named Marketing Specialist with the Marketing Specialist January 2023 folder automatically created inside. The folder contains the Marketing Specialist Job Ad file, that was created based on the Job Offer Template file.
2. Enter a card template and set the document folder definition
Look at the guide about automatic document folder definition in a card template.

3. Add allowed document templates
Now, when you are at a card template with a document folder definition set, you can choose allowed document templates for your future cards.
- Go to the document folder’s
 Settings
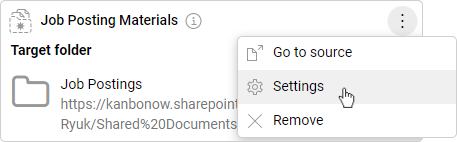
- Click
 Allowed document templates.
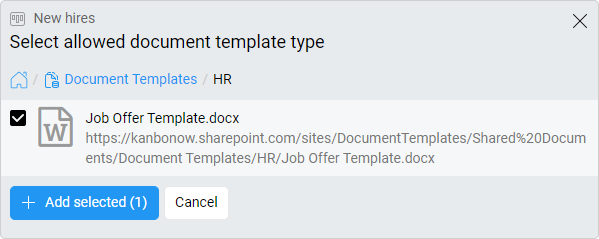
 - Click + Add and select the document templates you want to allow for this folder. It will be available on every card created with that template.
- Mark every document template you may need and click + Add selected to confirm your selection.
Now that everything is set up, you can start regular work.
4. Create a card using the template
There are two ways to get it:
Create a new card with this template or apply this card template to an existing card.
You can see the field related to your previous action on the right.
")
5. Create a new document using allowed template
The last step is the creation of the document that will be based on the prepared and chosen document template.
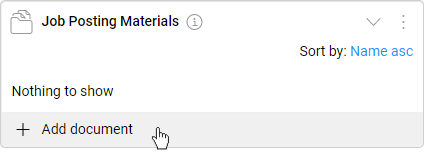
- Enter a card based on that template.
- Click on + Add document in the document folder.
- Select
 Add new document from template.
 - Select one of the allowed document templates.
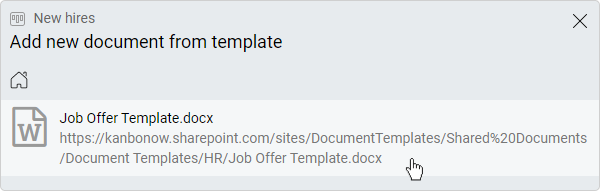
- Type a name and click on Add to confirm. This would be a real name for the file.
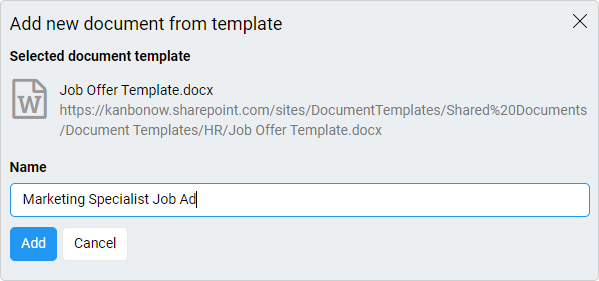
Done. A new document based on the document template appeared in the card folder.
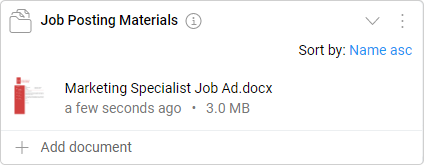
When the document is created, you can also find it in the space documents section. Note the difference between a folder name in a card and its real name, which includes a card name.
FAQ
What is document folder definition in a card template?
Document folder definition is the process of assigning document folders to cards based on card templates. In other words, it’s the process of creating a specific format for storing documents in the cards.
Can I allow specific document templates for my card template folders?
Yes, you can choose which document templates are allowed for your card template folders by going into the folder’s settings and selecting the Allowed document templates option.
How do I create a new card using a template?
You can create a new card using a template by selecting the desired card template during the card creation. You can also apply a card template to an existing card by selecting the card and then clicking Apply template from the card menu.
Was this article helpful?
Please, contact us if you have any additional questions.