
-
Learn the Basics
-
- Creating Cards
- Changing Card Statuses
- Following Cards
- Scheduling Cards
- Renaming Cards
- Duplicating Cards
- Quick Actions
- Mass Actions
- Copy & Paste
- Creating Card Statuses
- Changing the Default Card Status
- Changing the Order of Card Statuses
- Deleting Card Statuses
- Moving Cards between Spaces
- Archiving Cards
- Unarchiving Cards
- Deleting Cards
- Creating Card Blockers
- Managing Card Blockers
- Adding Cards to MySpace
- Hinzufügen von Karten zu "MySpace"
- Removing Cards from MySpace
- Entfernen von Karten aus "MySpace"
- Adding Mirror Cards
- Removing Mirror Cards
-
- Documents in KanBo
- Card Documents
- Uploading or Creating Documents in Cards
- Attaching and Detaching Documents in Cards
- Space Documents
- Document References
- Document Sources
- Downloading Documents
- Editing Documents
- Editing Documents in Browser
- Editing Documents in Office Applications
- Renaming Documents
- Deleting Documents
-
Visualize Work
-
- Space Views
- Creating Space Views
- Personal and Shared Space Views
- Card Grouping
- Filtering Cards
- Display Settings
- Work Progress Calculation
- Grouping Description
- Card Grouping Settings
- Changing the Order of Groupings
- Changing the Order of Space Views
- Deleting Space Views
- Following Card Statuses and Custom Fields
-
-
Collaborate
-
Level Up Your Work
-
Work Securely
-
Integrations
-
- Advanced KanBo Actions in Power Automate
- Creating KanBo Space Attached to Subfolder Created by Power Automate
- Creating Document Folders in Document Libraries Created by KanBo with Power Automate
- Exporting Space Views to Excel
- KanBo and Azure Logic Apps Integration
- Power Automate Integration: Triggers and Actions
- Seamless Import from Microsoft Planner to KanBo
- Synchronizing KanBo with Outlook Calendar
- Using KanBo Outlook App
-
Creating Workspaces
You need the Adding Workspaces role to create a workspace.
The creation of a workspace varies depending on the environment in which your KanBo is installed.
In this article:
Create a workspace
To create a workspace:
- Open Kanbo.
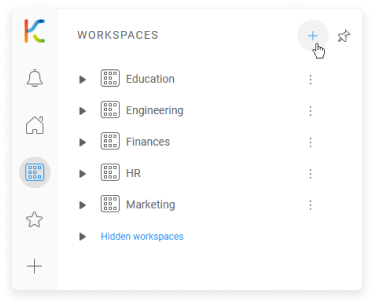
- On the Sidebar, go to Workspaces & Spaces, and then select the plus icon in the upper right corner.
- Enter the name of the workspace, and go Next.
- Select the space color, and then select Next.
- Choose if you want to connect your workspace with Microsoft Teams*, and then select Next.

If you want to merge the workspace with an existing team, select the third option and find the existing team by its name. The new workspace will have the same type, users, and document source as the team.
This decision affects the types of workspaces you can create in the next step.
- Choose the workspace type, select Next.
- Check the workspace review, and then select Create workspace.
Creating workspaces in on-premises environments
To create a workspace:
- Open Kanbo.
- On the Sidebar, go to Workspaces & Spaces, and then select the plus icon in the upper right corner.
- Enter the name of the workspace, and go Next.
- Select the space color, and then select Next.
- Check the workspace review, and then select Create workspace.
Was this article helpful?
Please, contact us if you have any additional questions.